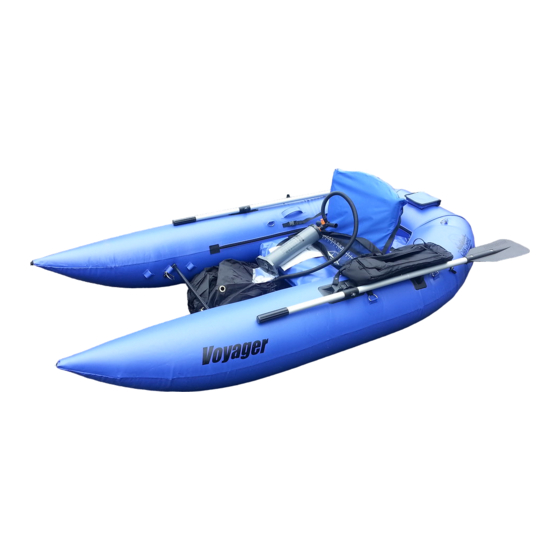
Creek Company VOYAGER FRAMELESS PONTOON Montage-instructies - Pagina 2
Blader online of download pdf Montage-instructies voor {categorie_naam} Creek Company VOYAGER FRAMELESS PONTOON. Creek Company VOYAGER FRAMELESS PONTOON 4 pagina's.

The assembly of your new Voyager Frameless is very simple. You inflate the 3 bladders, attach
the oars and footbar and go! Below are detailed instructions for initial setup:
1.
Remove Voyager and all parts from Carry/Storage Bag.
2.
Unfold and lay the Voyager out flat on the ground.
3.
Using small cone on adaptor, inflate seat back and seat bottom. Inflate until firm. Do not overinflate.
4.
Pull excess seat back material over seat bottom bladder and tighten straps to pull seat back upright. Attach seat
back incline/decline straps to buckles. Adjust seat back to your preference after inflating the main bladder.
5.
Inflate the main bladder using the large cone adaptor. Before inflation, be sure to fully seat the Valve Assembly
into the air bladder, screwing tightly by hand. When fully seating the valve assembly be sure that the valve plate
is in place around the valve assembly and not restricting the valve assembly from full seal. After inflating, be sure
to fully seat the top cap on to the valve assembly, screwing tightly by hand. Both are required for an airtight seal.
Inflate until firm. Do not overinflate. ( see illustration 2)
6.
Attach footbar at desired length. There are 3 adjustment points.
Slide ends of footbar through sleeves sewn onto Voyager cover and pin
in place using snap pins.
7.
Assemble Oars by sliding ends together and snap into place with
spring button.
8.
Attach oars to Voyager by sliding oarlock pin though hole in oar. Lock in
place using round locknut knob attached to oarlock. Oars can be locked
up out of the way using the attached oarkeepers on the Voyager.
9.
Attach stripping apron by wrapping each forward strap around the oarlock,
under the oar and each rear strap to a D-ring near the seat back.
10.
Attach side gear bag by sliding the straps through the 4 D-rings on either side of the seat and snapping buckles in
place. Tighten straps. The gear bag can be mounted on either side of the Voyager. The gear bag has a
padded side, slot pocket with hook and loop straps that will hold any rod, fly,spin or bait. Also the gear bag is
insulated to keep your drinks cold.
11.
Deflation/Storage. Deflate main bladder by unscrewing entire valve assembly from bladder. Deflate seat back/
bottom by pinching valve to release stop flap or insert adaptor cone to allow deflation. With all air released, oars
removed and Voyager laying flat on the ground, fold to fit into the carry/storage bag. Add pump and oars (broken
down) into bag. Zip closed and use compression
ASSEMBLE VOYAGER
ILLUSTRATION 2
Top Valve Cap
Valve
Assembly
Valve
Plate
Bladder
