Crestron 4 Series Snelstarthandleiding - Pagina 3

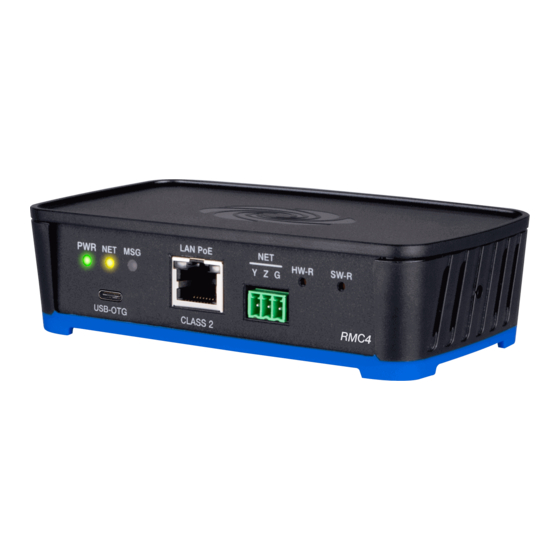
Blader online of download pdf Snelstarthandleiding voor {categorie_naam} Crestron 4 Series. Crestron 4 Series 12 pagina's. Control processor for zūm lighting control system
Ook voor Crestron 4 Series: Snelstarthandleiding (8 pagina's), Snelstarthandleiding (8 pagina's), Snelstarthandleiding (6 pagina's), Snelstarthandleiding (6 pagina's), Snel aan de slag (5 pagina's), Snelstarthandleiding (6 pagina's), Snelstarthandleiding (2 pagina's), Snelstarthandleiding (2 pagina's), Aan de slag (2 pagina's), Snelstarthandleiding (2 pagina's)

Crestron 4 Series Snelstarthandleiding
ZUM-HUB4
4-Series™ Control Processor for Zūm® Lighting Control System

Installation

The ZUM-HUB4 can be mounted into a rack or placed onto a flat
surface.
Mounting Into a Rack
The hub occupies 1U of rack space.
To install the included rack ears:
1. Use a #1 or #2 Phillips screwdriver to remove the three screws from
each side of the front of the device as shown in the following
illustration.
2. Use the screwdriver and the screws removed in the previous step to
attach the included rack ears to the device.
3. Mount the device into the rack using four mounting screws
(not included).
Placing onto a Flat Surface
When placing the device onto a flat surface or stacking it with other
equipment, attach the included rubber feet near the corners on the
underside of the device.

Make Connections

The hub has a dedicated Control Subnet that is used for communication
between the control system and Crestron Ethernet devices. This subnet
allows for dedicated communication between the control system and
Crestron Ethernet devices without interferences from other network
traffic on the LAN.
Make the connections, and note the following:
Use Crestron power supplies for Crestron equipment.
l
The included cable(s) cannot be extended.
l
Apply power after all connections have been made.
l
NOTES:
Ensure the unit is properly grounded by connecting the chassis
l
ground lug to an earth ground (building steel).
The hub can be powered with the (included) 24VDC power pack.
l
Do not connect the CONTROL SUBNET port to the LAN. The
l
CONTROL SUBNET port must be connected only to Crestron
Ethernet devices.
For details on using the Control Subnet, refer to the
Systems Reference Guide
(Doc. 8559).
Quick Start
4-Series™ Control
3