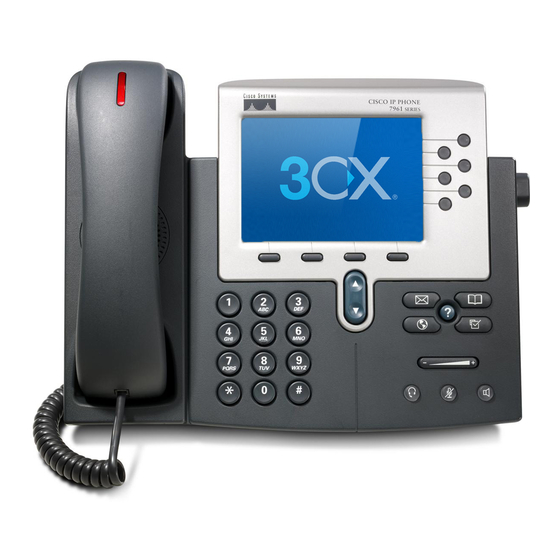
HANDSET, SPEAKERPHONE AND HEADSET VOLUME
1.
To increase or decrease the volume of your handset, speaker or headset during a call or after invoking dial tone, press the up
or down
(handset, speaker or headset).
2.
To save the setting, press Save softkey.
ADJUSTING THE RINGER VOLUME
1.
Press the up or down Volume button
buttons are off. Press the Volume (- or +) button repeatedly until you reach the desired volume level. The new ringer
volume is saved automatically.
CHANGING THE RINGER SOUND
1.
Press the Settings
2.
Navigate to a phone line or default setting, and press [Select].
3.
Use the Navigation button to scroll through the ring types; you can press the [Play] softkey to play a sample of a
"highlighted" ring type.
4.
When you find a ring type (sound) that you like, press [Select].
5.
Press [Cancel] to revert to the previously saved setting, or press [Save].
6.
Press [Default] to apply the default ring setting to a selected phone line.
7.
Press [Exit] softkey to return to the main phone screen
(Exit softkey may have to be pressed several times to return to the regular phone screen).
CHANGING THE LCD CONTRAST
1.
Press the Settings
2.
If unable to read phone screen, press [Settings] button and then 1,4 on the keypad.
3.
Press the Up or Down softkey or the volume button
4.
Press the [Save] softkey, or press [Cancel] to revert to the previously saved setting.
5.
Press the [Exit] softkey to return to the main phone screen.
(Exit softkey may have to be pressed several times to return to the regular phone screen).
PLACING A PHONE CALL
1.
Pre-dial (dial on-hook, without first getting dial tone). Do one of the following:
a. Enter a phone number. (The Auto-Dial feature might pop up to suggest matching phone numbers from your Placed Calls
Log.)
b. Press the Navigation
Next, press Dial softkey to dial the selected telephone number. Or,
1. Lift the handset to dial the selected telephone number. Or,
2. Press Speaker button or headset button (non-wireless headsets), to dial the selected telephone number. Or,
3. Press a line button (automatically selects speaker) and dials the selected telephone number.
2.
To place a call using the speaker, press Speaker button or [NewCall] softkey and dial the number.
3.
To place a call using a headset, plug the approved headset (non-wireless headsets) into the back of the phone base and press
headset button before or after dialing number. If headset button is lit, press [NewCall] to place a call. Press [EndCall] when
finished with call to remain in headset mode.
4.
Originating a second call after you have an existing call on the same line. To do so, simply place the current call on [Hold]
(using the soft key) and press [NewCall].
5.
Receiving a second call after you have an existing call on the same line:
a. The second call will cause your line to ring once and the softkeys will change giving you an option to [Answer] or
[Divert] the call. If you press [Answer], the first call will be placed on hold automatically.
b. To switch between calls, press [Hold], then select the line you want, and press [Resume] for the line you want to talk with.
6.
To change from the handset to the speaker, press Speaker button and then hang up the handset.
7.
To change from speaker to handset, lift Handset.
8.
The volume and mute controls also adjust volume to the ear piece and mute the speech path of the headset.
(
Volume) button. The Volume button adjusts the volume for the currently active condition
button and select, User Preferences, then select [Rings].
button and select [User Preferences], then select [Contrast].
button to scroll and/or select a phone number from your Placed Calls log.
while the handset is in the cradle and the headset and speakerphone
to set the desired level.
Pg. 3

