Cisco Cisco 7960 Referentiehandleiding - Pagina 11

Blader online of download pdf Referentiehandleiding voor {categorie_naam} Cisco Cisco 7960. Cisco Cisco 7960 17 pagina's. Ip phone & unity voicemail
Ook voor Cisco Cisco 7960: Gebruikershandleiding (19 pagina's), Gebruikershandleiding (12 pagina's), Aangepaste gebruikershandleiding (2 pagina's), Handmatig (35 pagina's), Gebruikershandleiding (15 pagina's), Installatie- en configuratiehandleiding (10 pagina's), Gebruikershandleiding (23 pagina's), Gebruikershandleiding (14 pagina's), Referentiehandleiding (2 pagina's), Snelle referentiehandleiding (2 pagina's), Gebruikershandleiding (28 pagina's), Gebruikershandleiding (16 pagina's), Snelle gebruikershandleiding (2 pagina's), Gebruikershandleiding (9 pagina's), Referentiehandleiding (4 pagina's), Snelstarthandleiding (12 pagina's), Handmatig (8 pagina's), Snelle referentiehandleiding (12 pagina's), Gebruikershandleiding (20 pagina's), Gebruikershandleiding (14 pagina's), Snelle referentiehandleiding (12 pagina's), Handleiding voor beheerders (10 pagina's), Gebruikershandleiding (6 pagina's), Snelle gebruikershandleiding (2 pagina's), Beknopte handleiding (2 pagina's), Gebruikershandleiding (3 pagina's), Snelle gebruikershandleiding (2 pagina's), Snelle installatiehandleiding (1 pagina's), Handmatig (21 pagina's), Gebruikershandleiding (3 pagina's), Aan de slag (50 pagina's), Snelstarthandleiding (6 pagina's), Snelstarthandleiding (2 pagina's), Snelle referentiehandleiding (2 pagina's), Snelstarthandleiding (2 pagina's), Aan de slag handleiding (27 pagina's), Referentiehandleiding (3 pagina's), Gebruikershandleiding (12 pagina's), Gebruikershandleiding (12 pagina's)
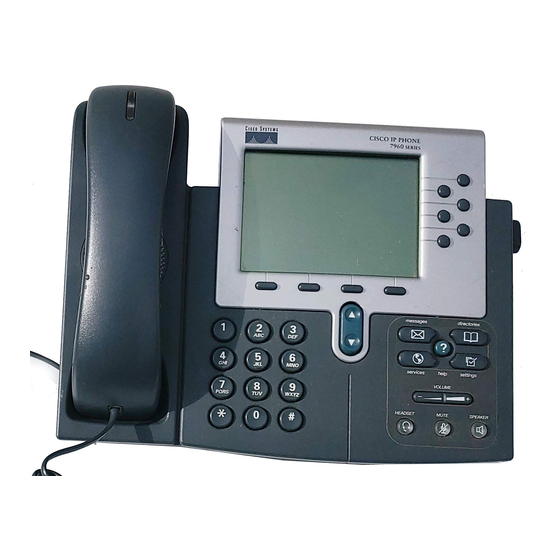
Cisco Cisco 7960 Referentiehandleiding

USING MUTE

Mute disables the audio input for your handset, headset, speakerphone, and external microphone. With Mute enabled, you can hear
other parties on a call but they cannot hear you.
IF YOU...
Toggle Mute on
Toggle Mute off

TRANSFERRING A CONNECTED CALL

Mute disables the audio input for your handset, headset, speakerphone, and external microphone. With Mute enabled, you can hear
other parties on a call but they cannot hear you.
IF YOU WANT TO...
Transfer a call without talking to the
transfer recipient
Talk to the transfer recipient before
transferring a call ("consult transfer")
Transfer two current calls to each other
("direct transfer")
TIPS
• You cannot use the
Transfer
softkey to redirect a call on hold. Remove the call from hold before transferring it.
• If you want to connect two calls to each other using direct transfer, the calls must be on the same line. If the calls are not on the same line, transfer one call to the other line, then use DirTrfr.

FORWARDING YOUR CALLS TO ANOTHER NUMBER

You can use Call Forward All to redirect your incoming calls from your Cisco IP Phone to another number.
Note:
Enter the Call Forward All target number exactly as you would dial it from your desk phone. For example, enter an access code
such as 9 or the area code, if necessary.
IF YOU WANT TO...
Set up call forwarding on your primary line
Cancel call forwarding on your primary line
Verify that call forwarding is enabled on
your primary line
Set up or cancel call forwarding for any line
TIPS
• You can forward your calls to a traditional analog phone or to another IP phone (although your system administrator might restrict the call forwarding feature to numbers within your company).
• You must configure this feature per line; if a call reaches you on a line where call forwarding is not enabled, the call will ring as usual.
SNET: CISCO 7940/7960 REFERENCE GUIDE
THEN...
Press
.
Press
.
THEN...
Press
Transfer
and enter the target number. When you hear the call ringing, press
Press
Transfer
and enter the target number. Wait for the transfer recipient to answer. If the recipient accepts the transferred call, press
again. If the recipient refuses the call, press
Scroll to highlight any call on the line and press Select. Repeat this process for the second call. With one of the selected calls highlighted,
press
DirTrfr.
(You may need to press the more softkey to see DirTrfr.) The two calls connect to each other and drop you from the call.
THEN...
Press
CFwdALL
and enter a target phone number.
Press CFwdALL.
Look for this icon above the primary line
target number.
Log in to your User Options web pages, choose your device, then choose
forwarding for each line on your phone.
When call forwarding is enabled for any line other than the primary line, your phone does not provide you with any confirmation that calls are
being forwarded. Instead, you must confirm your settings in the User Options pages.
Transfer
Resume
to return to the original call.
. Also, check the status line near the bottom of the phone screen; it displays the call forwarding
Forward all calls...
REFERENCE
again.
from the main menu. You can set up or cancel call
Back to Table of Contents
i
Transfer
11