Crutchfield 120 90-3037P Snelstarthandleiding - Pagina 3
Blader online of download pdf Snelstarthandleiding voor {categorie_naam} Crutchfield 120 90-3037P. Crutchfield 120 90-3037P 3 pagina's. Installation kit
Installation Kit
Shaft Receiver Assembly
1.
Press posts on trimplate into holes on kit frame to snap parts
together (Figure 1).
2.
Push clips on support tray into slots on rear of kit frame
to secure (Figure 1).
3.
Cut off tabs on both mounting brackets labeled "B" and "C"
shown as shaded (Figure 2). The "A" tabs must remain.
4.
Secure mounting brackets to sides of kit assembly with
studs and nuts supplied (Figure 1).
5.
Choose the proper spacers (supplied with your order) to
allow receiver nosepiece to extend 1/8" to 1/4" beyond face of
trimplate (Figure 3).
6.
Insert receiver shafts (with spacers in place) through openings
in trimplate. Secure receiver and faceplate with shaftnuts
supplied with receiver.
7.
Attach control knobs.
Tools Required
1/4" & 3/8"
Sockets
Deep Socket
(size depends upon receiver)
Hacksaw
Control Knobs
FIGURE 2
Cut off
"B" & "C" tabs
(shaded)
"C"
"A" tabs must remain
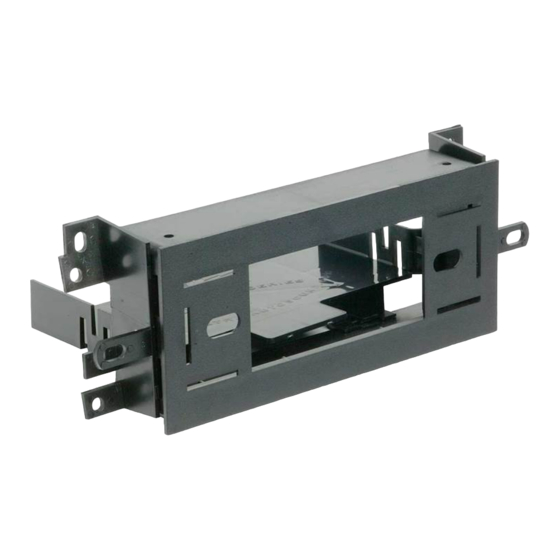
FIGURE 1
Left Mounting Bracket
Nut
Trimplate
"B"
Faceplate
"A"
Shaftnuts
"B"
"A"
Chevrolet/GMC
Support Tray
Right Mounting Bracket
Stud
Kit Frame
1/8" -1/4"
Spacer
Copyright 2004 Crutchfield Corporation
120 90-3037P
Spacers
(supplied with
your order)
FIGURE 3
®
3