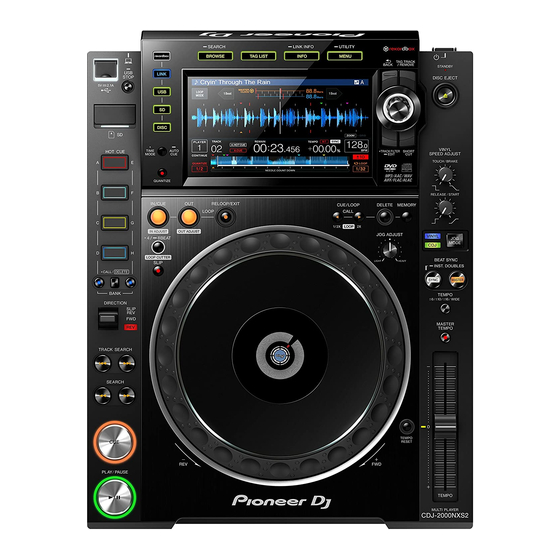
Pioneer CDJ-2000NXS2 Gebruiksaanwijzing - Pagina 21
Blader online of download pdf Gebruiksaanwijzing voor {categorie_naam} Pioneer CDJ-2000NXS2. Pioneer CDJ-2000NXS2 43 pagina's. Multiplayer
Ook voor Pioneer CDJ-2000NXS2: Gebruiksaanwijzing (17 pagina's), Snelstarthandleiding (4 pagina's), Aansluithandleiding (7 pagina's)

3 Turn the rotary selector.
Move the cursor and select the item.
4 Select the track and press the rotary selector.
When the track is loaded, the screen switches to the normal playback
screen.
The track is loaded, playback starts, and the corresponding medium
button flashes.
= For details on the normal playback screen, see Main unit display
on page 17 .
If the medium contains the rekordbox library
If the SD memory card or USB device inserted into/connected to this
unit or another player connected by PRO DJ LINK contains rekordbox
library information, the rekordbox library is displayed.
! Music files are displayed in the categories (album, artist, etc.) set
with rekordbox.
! The types of items on the category menu can be changed in rekord-
box's preferences.
Playing the rekordbox library on a
computer or mobile device
Music files are displayed in the categories (album, artist, etc.) set with
rekordbox.
1 Press the [rekordbox] button.
The rekordbox library is displayed on this unit's main unit display.
! With wireless LAN (Wi-Fi) connections, if [Please push the rotary
selector to permit mobile connection.] appears on this unit's main
unit display when connecting, connection is possible by pressing the
rotary selector.
! To select a mobile device connected by USB, press the [USB] button.
Also, to select a mobile device connected to another player that is
connected by PRO DJ LINK, press the [LINK] button.
2 Turn the rotary selector.
Move the cursor and select the item.
3 Select the track and press the rotary selector.
When the track is loaded, the screen switches to the normal playback
screen.
The track is loaded, playback starts, and the corresponding medium
button flashes.
= For details on the normal playback screen, see Main unit display
on page 17 .
Load previous tracks
The names of the last eight tracks that were played can be displayed and
these tracks can be selected.
1 Display the normal playback screen.
2 Press the [MENU/UTILITY] button.
3 Turn the rotary selector to select the track, then press
the rotary selector to set playback.
! The display of the track names is canceled by pressing the
[MENU/UTILITY] or [BACK] button.
Pausing
During playback, press the [PLAY/PAUSE f] button.
The [PLAY/PAUSEf] and [CUE] buttons flash. When the
[PLAY/PAUSEf] button is pressed again, playback resumes.
! When tracks have been loaded from a disc, the disc automatically
stops spinning if no operation is performed for 100 minutes while in
the pause mode.
Forward and reverse scanning
Press one of the [SEARCH m, n] buttons.
The track is scanned in the forward or reverse direction while one of the
[SEARCH m, n] buttons is pressed.
! It is not possible to move to a different category or folder during
forward or reverse scanning.
Finding the beginnings of tracks (Track
Search)
Press one of the [TRACK SEARCH o, p] buttons.
Press the [p] to move to the beginning of the next track.
When [o] is pressed, playback returns to the beginning of the cur-
rently playing track. When pressed twice in a row, playback returns to
the beginning of the previous track.
! It is not possible to move to a different category or folder with the
track search function.
Adjusting the playing speed (Tempo
control)
Press the [TEMPO ±6/±10/±16/WIDE] button.
The [TEMPO] slider's adjustment range switches each time the button
is pressed. The adjustment range setting is indicated on the main unit
display.
Setting value
±6
±10
±16
WIDE
The [WIDE] adjustment range is ±100 %. When set to –100 %, playback
stops.
! The adjustment range is set to ±10 % when the power is turned on.
Move the [TEMPO] slider forward or backward.
The tempo increases when moved to the [+] side (down), decreases
when moved to the [–] side (up). The rate at which the playing speed is
changed is indicated on the playing speed display.
Adjusting the playing speed without
changing the pitch (Master Tempo)
Press the [MASTER TEMPO] button.
The [MASTER TEMPO] button and [MT] indicator on the main unit
display light.
Move the [TEMPO] slider forward or backward.
The pitch does not change even when the playing speed is changed with
the [TEMPO] slider.
! The sound is digitally processed, so the sound quality decreases.
! The master tempo setting remains in the memory, even when the
power is turned off.
Units of adjustment
0.02 %
0.05 %
0.05 %
0.5 %
En
21
