Clarke Super 7 Instructieboek - Pagina 2
Blader online of download pdf Instructieboek voor {categorie_naam} Clarke Super 7. Clarke Super 7 3 pagina's. Sander & edger

INSTRUCTIONS FOR CONNECTION TO
2
THE POWER SUPPLY AND
THE ELECTRICAL GROUND
This machine must be connected to the electrical ground to protect the
operator from electric shock. The machine has an approved power cord with
three conductors and a plug with three terminals. Connect the plug to a
receptacle that has three holes and is connected to the electrical ground. The
green (or green and yellow) conductor in the cord is the ground wire. Never
connect this wire to any terminal other than the ground pin terminal.
This machine uses a 11 0 to 1 20 volt AC or DC electrical circuit. Make
sure you have the correct frequency and voltage before connecting the
power cord to an outlet. The machine has a plug as shown in Figure A. If a
receptacle connected to the electrical ground as shown inFigure A is not
available, use an adapter as shown in Figure C. This adapter must be con
nected as shown in Figure B to an electrical ground in the electrical outlet.
Make sure you use the plate screw and the tab to fasten the adapter.
.. . . . . . j
�I�
�
(A)
COtlNECTED TO THE
ELECTRICAL GROUND
GROUtlO PIN
NOTE: DO NOT USE ADAPTERS SHOWN IN
FIGURES B ANO C IN CANADA.
A
FIG. A, B and C
WARNING: Always use this machine with a three-conductor elec
trical system connected to the electrical ground. Replace any worn,
cut, or damaged cords. Replace any damaged plugs, receptacles, or
A
connector bodies.
WARNING: Do not cut, remove, or break the ground terminal. Do not
try to fit a three-terminal plug into a receptacle or connector body
that does not fit the plug. If the receptacle or connector body does
not fit the plug, see your Authorized Clarke Dealer to get an authoriz
A
ed person to make the connection.
WARNING: Do not move the machine over an electrical cord. Always
lift the cord over the machine.
EXTENSION CORDS
Use only an approved extension cord with three conductors, a plug with
three terminals, and a connector body with three holes. This machine has a
power cord with wire size 14 AWG (AWG means American Wire Gauge).
A
WARNING: If you use an extension cord, use an extension cord with
minimum wire size 12 AWG. Do not use an extension cord longer
A
than 50 feet. Do not join two extension cords.
WARNING: Make sure the electrical plug is disconnected before in
stalling or changing the dust bag and sandpaper.
OUTl,ET MUST OE
(8)
(Cl
MODEL DUS FLOOR SANDER
3
HOW TO PREPARE THE MACHINE
FOR OPERATION
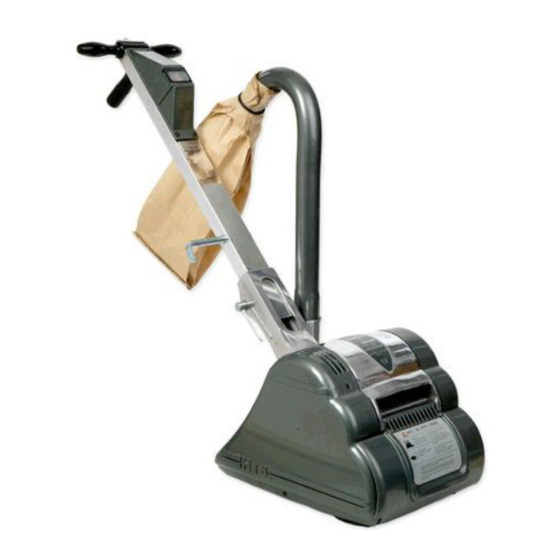
HOW TO INST ALL THE DUST BAG
Put the exhaust tube in position on the exhaust bracket. Put the opening in
the bag around the neck of the exhaust tube and tighten the string.
VACUUM SYSTEM
Remove the dust from the dust bag when the efficiency of the vacuum
system decreases. Remove the dust from the dust bag each time you finish
using the machine.
If the vacuum system gets an obstruction, remove the three screws to
remove the exhaust bracket. Remove the obstruction and install the exhaust
bracket, exhaust tube, and dust bag. Remove the three screws to remove
the intake shoe from the bottom of the machine. Remove the obstruction
and install the intake shoe with 3/8 inch ( 1 cm) clearance.
HOW TO INSTALL THE SANDPAPER
1. Tilt the machine back so that the handle is
on the floor. Remove the electrical plug
from the electrical outlet.
2. Move the ends of the sandpaper over the
edge of a table. See figure 1. The ends
must turn away from the abrasive side of
the sandpaper.
3. Use the special key given with the
machine to loosen the three screws in the
clamp. The clamp must have approx
imately 3/8 inch ( 1 cm) clearance.
4. Put one end of the sandpaper under the
clamp and turn the drum one complete
revolution. Put the other end of the
sandpaper under the clamp. Make sure
the sandpaper is smooth and tight. See
figure 2.
5. Use the special key to tighten the three
screws in the clamp. See figure 2. Make
Figure 2
sure the sandpaper is smooth and tight.
NOTE: If the sandpaper breaks while in use,
stop the machine and remove the electrical
plug from the electrical outlet. Remove any
broken pieces
vacuum system before installing a new piece
of sandpaper.
of sandpaper from the
•
