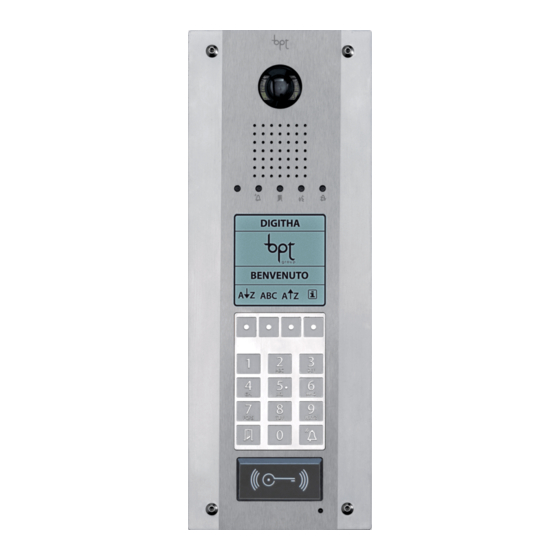
CAME BPT 62080010 Handmatig - Pagina 2
Blader online of download pdf Handmatig voor {categorie_naam} CAME BPT 62080010. CAME BPT 62080010 2 pagina's.
ITALIANO
Avvertenze generali
Leggere attentamente le istruzioni, prima di iniziare l'installa-
•
zione ed eseguire gli interventi come specificato dal costruttore;
L'installazione, la programmazione, la messa in servizio e la
•
manutenzione del prodotto deve essere effettuata soltanto da
personale tecnico qualificato ed opportunamente addestrato nel
rispetto delle normative vigenti ivi comprese le osservanze sulla
prevenzione infortuni;
Prima di effettuare qualunque operazione di pulizia o di manu-
•
tenzione, togliere l'alimentazione al dispositivo;
L'apparecchio dovrà essere destinato unicamente all'uso per il
•
quale è stato espressamente concepito.
Il costruttore non può comunque essere considerato respon-
•
sabile per eventuali danni derivanti da usi impropri, erronei ed
irragionevoli.
Installazione da incasso
Eliminare uno o più punti di rottura della scatola d'incasso A①.
Far passare la tubazione con i conduttori d'impianto attraverso uno
dei punti a rottura utilizzando il passacavo in dotazione B①.
Deformare le alette tirandole verso l'esterno B②. Murare la sca-
tola all'altezza desiderata tenendo conto dell'indicazione
posizionamento dell'obiettivo della telecamera C.
Per installare il tettuccio antipioggia (non in dotazione) procedere
come indicato in figura D.
Togliere la squadretta di blocco allentando le due viti E ed inserire
il posto esterno alla base della scatola d'incasso F.
Riposizionare la squadretta di blocco nella propria sede e avvitare
le due viti F.
Togliere il coprimorsetto, effettuare i collegamenti e rimontare il co-
primorsetto G. Fissare il posto esterno alla scatola d'incasso H.
Installazione da parete
Eliminare uno o più punti di rottura della scatola d'incasso I①.
Far passare la tubazione con i conduttori d'impianto attraverso uno
dei punti a rottura utilizzando il passacavo in dotazione J①.
Fissare la scatola utilizzando i tasselli in dotazione all'altezza J
desiderata tenendo conto dell'indicazione
e del posizionamento
dell'obiettivo della telecamera C.
Togliere la squadretta di blocco allentando le due viti E ed inserire
il posto esterno alla base della scatola da parete K.
Riposizionare la squadretta di blocco nella propria sede e avvitare
le due viti K.
Togliere il coprimorsetto, effettuare i collegamenti e rimontare il co-
primorsetto G. Fissare il posto esterno alla scatola d'incasso L.
Il prodotto è conforme alle direttive di riferimento vigenti.
Dismissione e smaltimento. Non disperdere nell'ambiente
l'imballaggio e il dispositivo alla fine del ciclo di vita, ma smaltirli
seguendo le norme vigenti nel paese di utilizzo del prodotto. I com-
ponenti riciclabili riportano simbolo e sigla del materiale.
I DATI E LE INFORMAZIONI INDICATE IN QUESTO MANUALE SONO
DA RITENERSI SUSCETTIBILI DI MODIFICA IN QUALSIASI MOMEN-
TO E SENZA OBBLIGO DI PREAVVISO. LE MISURE, SE NON DIVER-
SAMENTE INDICATO, SONO IN MILLIMETRI.
FB00868M4A - ver. 1 - 09/2017
ENGLISH
General Precautions
Read the instructions carefully before beginning the installation
•
and carry out the actions as specified by the manufacturer;
The installation, programming, commissioning and maintenan-
•
ce of the product must be carried out only by qualified technical
personnel, correctly trained with regard to respecting the regula-
tions in force, including the implementation of accident prevention
measures;
Before carrying out any cleaning or maintenance operation, dis-
•
connect the device from the power supply;
The equipment must be destined solely for the use for which it
•
was expressly designed.
The manufacturer declines all liability for any damage as a result
•
of improper, incorrect or unreasonable use.
Recessed installation
Remove one or more break-off tabs on the recessed box A①.
Push the pipe with the system conductors through one of the break-
ing points using the cable gland provided B①.
Bend the tabs by pulling them outwards B②. Wall in the box at the
desired height, paying attention to the
sign and the positioning of
the lens of the surveillance camera C.
e del
To install the rain-proof cover (not provided) proceed as shown in
figure D.
Remove the locking square by undoing the two screws E and insert
the entry panel at the bottom of the recessed box F.
Reposition the locking square in its housing and tighten the two
screws F.
Remove the terminal block cover, make the connections and replace
the terminal block cover G. Fasten the entry panel to the recessed
box H.
Wall mounting
Remove one or more break-off tabs on the recessed box I①.
Push the pipe with the system conductors through one of the break-
ing points using the cable gland provided J①.
Attach the box using the expansion plugs provided at the desired
height J paying attention to the
sign and the positioning of the
lens of the video surveillance camera C.
Remove the locking square by undoing the two screws E and insert
the entry panel at the bottom of the mounting box K.
Reposition the locking square in its housing and tighten the two
screws K.
Remove the terminal block cover, make the connections and replace
the terminal block cover G. Fasten the entry panel to the recessed
box L.
The product complies with the applicable reference directives.
Dismantling and disposal. Dispose of the packaging and the device properly at the end
of its life cycle, according to the regulations in force in the country where the product is
used. The recyclable components bear the symbol and code for the material.
THE DATA AND INFORMATION PROVIDED IN THIS MANUAL ARE SUBJECT TO CHANGE AT
ANY TIME WITHOUT PRIOR NOTICE. MEASUREMENTS, UNLESS OTHERWISE INDICATED,
ARE IN MILLIMETRES.
FRANÇAIS
Instructions générales
Lire attentivement les instructions, avant de commencer l'ins-
•
tallation et effectuer les interventions comme indiqué par le fa-
bricant ;
L'installation, la programmation, la mise en service et l'entre-
•
tien du produit ne doivent être effectués que par un personnel
technique qualifié et convenablement formé, conformément aux
normes légales en vigueur, y compris les dispositions concernant
la prévention des accidents ;
Avant d'effectuer toute opération de nettoyage ou d'entretien,
•
débrancher l'alimentation électrique de l'appareil ;
L'appareil doit être uniquement utilisé dans le but pour lequel
•
il a été conçu.
Le fabricant ne peut toutefois être tenu pour responsable des
•
éventuels dommages qui naîtraient d'une utilisation erronée ou
déraisonnable.
Installation a encastrer
Supprimer un ou plusieurs points de rupture du boîtier à encastrer
A①.
Faire passer le tuyau avec les conducteurs de l'installation par l'un
des points de rupture en utilisant le passe-câble B①.
Plier les ailettes en les tirant vers l'extérieur B②. Placer le boîtier à
encastrer dans le mur à une hauteur adéquate, en tenant compte de
et du positionnement de l'objectif de la caméra C.
l'indication
Pour installer le capot de protection contre la pluie (non fourni), pro-
céder comme indiqué dans la figure D.
Enlever l'équerre de blocage en desserrant les deux vis E puis
installer le poste externe à la base du boîtier à encastrer F.
Remettre l'équerre de blocage en position puis serrer les deux vis
F.
Enlever le cache-borne, effectuer les branchements puis remettre
le cache-borne G. Fixer le poste externe au boîtier à encastrer H.
Installation au mur
Éliminer un ou plusieurs points de rupture du boîtier à encastrer
I①.
Faire passer le tuyau avec les conducteurs de l'installation par l'un
des points de rupture en utilisant le passe-câble fourni J①.
Fixer le boîtier en utilisant les chevilles fournies à la hauteur J
souhaitée, en tenant compte de l'indication
et du positionnement
de l'objectif de la caméra C.
Enlever l'équerre de blocage en desserrant les deux vis E puis
installer le poste externe à la base du boîtier mural K.
Remettre l'équerre de blocage en position puis serrer les deux vis
K.
Enlever le cache-borne, effectuer les branchements puis remettre
le cache-borne G. Fixer le poste externe au boîtier à encastrer L.
Le produit est conforme aux directives de référence en vigueur.
Mise au rebut et élimination. Ne pas jeter l'emballage et le dispositif dans la nature
au terme du cycle de vie de ce dernier, mais les éliminer selon les normes en vigueur
dans le pays où le produit est utilisé. Le symbole et le sigle du matériau figurent sur les
composants recyclables.
LES DONNÉES ET LES INFORMATIONS CONTENUES DANS CE MANUEL SONT SUSCEP-
TIBLES DE SUBIR DES MODIFICATIONS À TOUT MOMENT ET SANS AUCUN PRÉAVIS.
LES DIMENSIONS SONT EXPRIMÉES EN MILLIMÈTRES, SAUF INDICATION CONTRAIRE.
РУССКИЙ
Общие предупреждения
Перед началом работ по установке внимательно ознакомь-
•
тесь с инструкциями и выполните установку согласно реко-
мендациям производителя;
Установка, программирование, ввод в эксплуатацию
•
и обслуживание продукта должны выполняться только
квалифицированным и специально обученным персоналом
с соблюдением
действующих
стандартов,
требования по охране труда и технике безопасности;
Перед чисткой или техническим обслуживанием следует
•
отсоединять устройство от источника электропитания;
Устройство следует использовать только в целях, для кото-
•
рых оно предназначено.
Производитель не несет никакой ответственности за любые
•
повреждения, возникшие в результате неправильного, некор-
ректного или неоправданного использования.
Установка заподлицо со стеной
Удалите одну или несколько перфорированных заглушек для
ввода кабеля A①. Пропустите кабелепровод с проводами
внутрь монтажной коробки через одно из отверстий, используя
фиксаторы для кабеля B①.
Для удобства отогните фиксаторы B②. Установите встраивае-
мую монтажную коробку на требуемой высоте с учетом положения
C.
объектива видеокамеры и индикатора UP
При необходимости установки защитного козырька (поставля-
ется отдельно) выполните действия как показано на рис D.
Снимите блокирующий кронштейн, ослабив два винта E, Уста-
новите вызывную панель на специальных штырьках в монтаж-
ной коробке F. Верните блокирующий кронштейн на место и
затяните два винта F. Снимите защитную крышку клеммных
колодок, Выполните необходимые подключения и снова за-
кройте защитную крышку клеммных колодок G. Прикрепите
вызывную панель к монтажной коробке H.
Установка на стену
Удалите одну или несколько перфорированных заглушек для
ввода кабеля I①. Пропустите кабелепровод с проводами
внутрь монтажной коробки через одно из отверстий, используя
фиксаторы для кабеля J①.
С помощью поставляемых в комплекте дюбелей и винтов уста-
новите монтажную коробку на требуемой высоте J с учетом
положения объектива видеокамеры и индикатора UP
Снимите блокирующий кронштейн, ослабив два винта E Уста-
новите вызывную панель на специальных штырьках в монтаж-
ной коробке K. Верните блокирующий кронштейн на место и
затяните два винта K. Снимите защитную крышку клеммных
колодок, Выполните необходимые подключения и снова за-
кройте защитную крышку клеммных колодок G. Прикрепите
вызывную панель к монтажной коробке L.
Изделие соответствует требованиям действующих директив.
Прекращение использования и утилизация. Не выбрасывайте
упаковку и устройство в окружающую среду. Утилизируйте их в соот-
ветствии с требованиями законодательства, действующего в стране
установки. Компоненты, пригодные для повторного использования,
отмечены специальным символом с обозначением материала.
КОМПАНИЯ CAME S.P.A. СОХРАНЯЕТ ЗА СОБОЙ ПРАВО НА ИЗМЕНЕНИЕ
СОДЕРЖАЩЕЙСЯ В ЭТОЙ ИНСТРУКЦИИ ИНФОРМАЦИИ В ЛЮБОЕ ВРЕ-
МЯ И БЕЗ ПРЕДВАРИТЕЛЬНОГО УВЕДОМЛЕНИЯ. ВСЕ РАЗМЕРЫ ПРИВЕ-
ДЕНЫ В ММ, ЕСЛИ НЕ УКАЗАНО ИНОЕ.
включая
C.