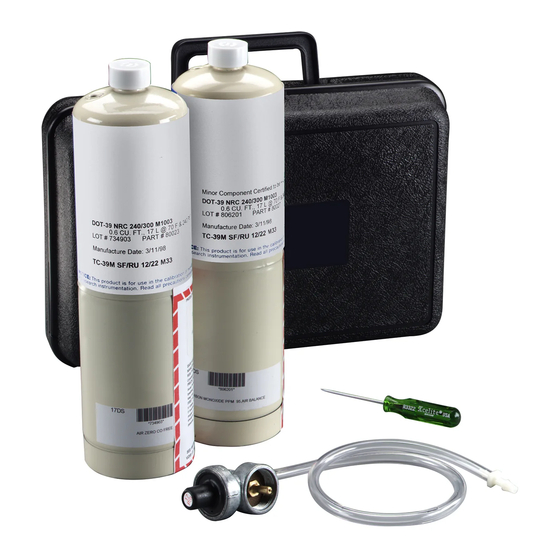
3M Calibration Kit 529-04-49 Instructies
Blader online of download pdf Instructies voor {categorie_naam} 3M Calibration Kit 529-04-49. 3M Calibration Kit 529-04-49 3 pagina's.

3M™ Compressed Air Filter and Regulator Panel W-2806/07006 -
The 3M™ Calibration Kit is available in two sizes. The large kit (part 529-04-48
automotive part 75787) will allow you to complete approximately 36 calibrations.
The small kit (part 529-04-49/ automotive part 72012) will allow you to complete
approximately 10 calibrations.
1. To zero the monitor:
a. Remove the protective cap from the ZERO AIR cylinder outlet.
b. Connect the plastic tubing provided in the kit to the plastic fitting and
connect the opposite end of the tubing securely to the barbed fitting on
the regulator.
c. Connect the monitor's sample tube to the proper end of the
tubing/regulator assembly, described in the previous step.
d. Locate the ZERO adjustment potentiometer and verify monitor has had
adequate warm-up time (see 3M™ CO Monitor User Instructions).
e. Screw the regulator valve onto the ZERO AIR cylinder outlet, making
sure not to "cross thread" the regulator or cylinder outlet port, and
tighten the regulator firmly. Open the knob on the regulator
counterclockwise to start gas flow.
f. Observe the display on the monitor. The reading should move to zero
(00) after approximately one (1) minute. If the display does NOT read
zero (00), adjust the ZERO potentiometer such that the display now
reads zero (00).
g. When these steps have been completed, close the knob on the
regulator clockwise to stop gas flow. Unscrew the regulator valve from
the ZERO AIR cylinder and replace the plastic protective cap.
h. Disconnect the associated calibration test tubing from the monitor and
reconnect the monitor's sample tube to the sampling supply on the
filtration system.
i. NOTE: When using the small kit, be aware that the regulator valve
allows gas to flow from the cylinder as soon as it is tightened down. To
conserve the gas in the cylinder do not attach the regulator valve until
you are ready to begin zeroing, and remove the valve as soon as
zeroing is complete.
Calibration
