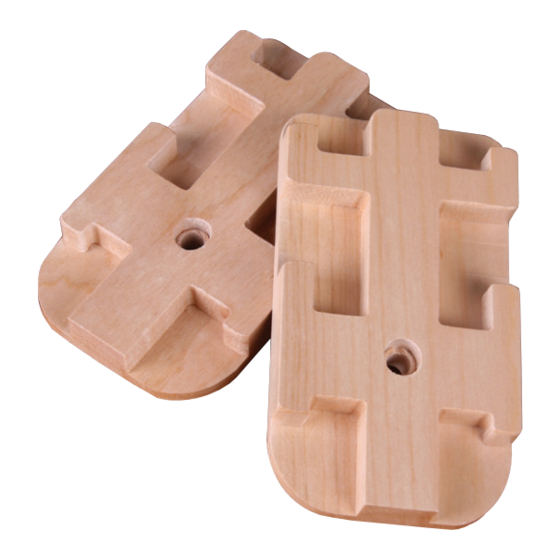
Ashford KNITTERS LOOM SECOND HEDDLE KIT Montage-instructies
Blader online of download pdf Montage-instructies voor {categorie_naam} Ashford KNITTERS LOOM SECOND HEDDLE KIT. Ashford KNITTERS LOOM SECOND HEDDLE KIT 3 pagina's.

KNITTERS LOOM SECOND HEDDLE KIT
Assembly and Double Weave Instructions
Ashford Handicrafts Limited
415 West Street, Ashburton 7700, New Zealand
Telephone 64 3 308 9087
[email protected] www.ashford.co.nz
Tools Required
Assembly
1. Unfold and sit your loom on a flat surface.
2. Remove the knob and washer from one side of the loom.
3. Carefully remove the bolt from the 2 loom sides.
4. Tap the bolt from the heddle support block.
5. Identify the correct new double heddle support block by
6. Locate the new support block over the edge of a table and
7. Locate the bolt and support block back through the 2 loom
8. Secure with the washer and knob.
9. Repeat for the other side.
Note: You will also need an extra heddle (reed) with the same
DPI as the one you already have.
KL2HK19052015V6
Ashford Guarantee
Thank you for purchasing this Ashford product. In the unlikely event there is any
fault in manufacture, please contact the dealer you purchased it from. To validate
the guarantee, please go to www.ashford.co.nz/product-registration
Create this beautiful double weave shuttle holder
on a Knitters Loom second heddle kit.
Double Weave and Brooks Bouquet on the Knitters Loom
This project has been woven on a 30cm (12ins) Knitters Loom but can be
adapted to any Rigid Heddle or Knitters Loom.
Materials used
Loom: Knitters Loom 30cm (12ins)
Reed: 2 x 40/10cm (10dpi)
Warp & Weft Yarns:
Ashford McKenzie 4 ply
(100% Merino; 385m/421yds;100gms net)
White 1 ball, Black 1 ball
Other: Two pick-up sticks
checking that the locator pin fits into the groove in the side.
insert the bolt into the hole. Check that the bolt and locator
pin are clear of the table. Then tap the head of the bolt into
the counter bored hole until level with the surface.
sides. Check the locator pin is in the groove.
Warping
1. Place one reed in the back heddle
rest position.
2. Excluding the first three and last
three slots, warp across reed in the
normal way but place two loops in
each slot
3. Roll the warp onto the back roller
(or shuttles)
and cut the loops.
(one loop of black and one of white)
.
