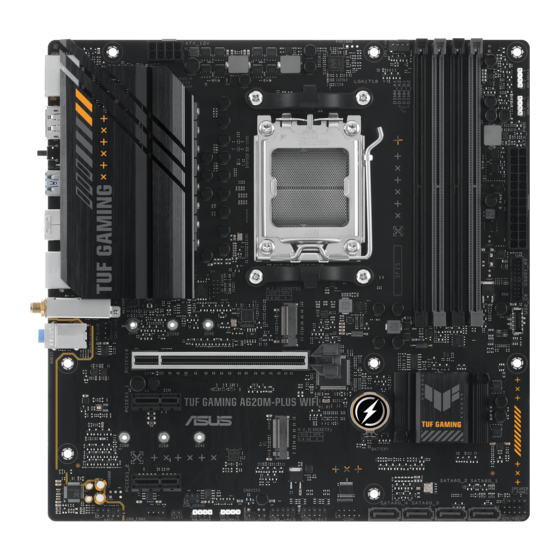
Asus TUF GAMING A620M-PLUS WIFI Podręcznik - Strona 18
Przeglądaj online lub pobierz pdf Podręcznik dla Płyta główna Asus TUF GAMING A620M-PLUS WIFI. Asus TUF GAMING A620M-PLUS WIFI 38 stron.
Również dla Asus TUF GAMING A620M-PLUS WIFI: Skrócona instrukcja obsługi (2 strony), Skrócona instrukcja obsługi (2 strony)

8.
BIOS FlashBack™ button. Press the BIOS FlashBack™ button for three seconds
until the FlashBack™ LED blinks three times, indicating that the BIOS FlashBack™
function is enabled.
To use BIOS FlashBack™:
9.
USB 2.0 port with BIOS FlashBack™ function. Insert a USB storage device with the
latest BIOS version to this Universal Serial Bus (USB) port to run BIOS FlashBack™.
10.
USB 2.0 ports. These Universal Serial Bus (USB) ports are for USB 2.0 devices.
11.
Wi-Fi 6 ports. These ports connect to the bundled ASUS Wi-Fi moving antenna.
•
•
12.
Microphone port (pink). This port connects a microphone.
Refer to the audio configuration table below for the function of the audio ports in 2, 4, 5.1,
or 7.1-channel configuration.
Audio 2, 4, 5.1 or 7.1-channel configuration
Port
Light Blue
(Rear panel)
Lime
(Rear panel)
Pink
(Rear panel)
Lime
(Front panel)
Pink
(Front panel)
To configure a 7.1-channel audio output:
1-8
1) Visit https://www.asus.com/support/ and download the latest BIOS version for this
motherboard.
2) Manually rename the file as TA620MPW.CAP, or launch the BIOSRenamer.exe
application to automatically rename the file, then copy it to your USB storage device.
The BIOSRenamer.exe application is zipped together with your BIOS file when you
download a BIOS file for a BIOS FlashBack™ compatible motherboard.
3) Plug the 24-pin power connector to the motherboard and turn on the power supply
(No need to power on the system). Insert the USB storage device to the USB port with
BIOS FlashBack™ function.
4) Press the BIOS FlashBack™ button for three (3) seconds until the BIOS FlashBack™
LED blinks three times, indicating that the BIOS FlashBack™ function is enabled.
5) Wait until the light goes out, indicating that the BIOS updating process is completed.
Ensure that the ASUS Wi-Fi moving antenna is securely installed to the Wi-Fi ports.
Ensure that the antenna is at least 20 cm away from all persons.
2-channel
-
Front Speaker
Out
-
-
-
Use a chassis with HD audio module in the front panel to support a 7.1-channel audio
output.
4-channel
5.1-channel
Rear Speaker
Rear Speaker
Out
Front Speaker
Front Speaker
Out
Center /
-
Subwoofer
-
-
7.1-channel
Rear Speaker
Out
Out
Front Speaker
Out
Out
Center /
Subwoofer
-
Side Speaker Out
-
Chapter 1: Product Introduction
-
