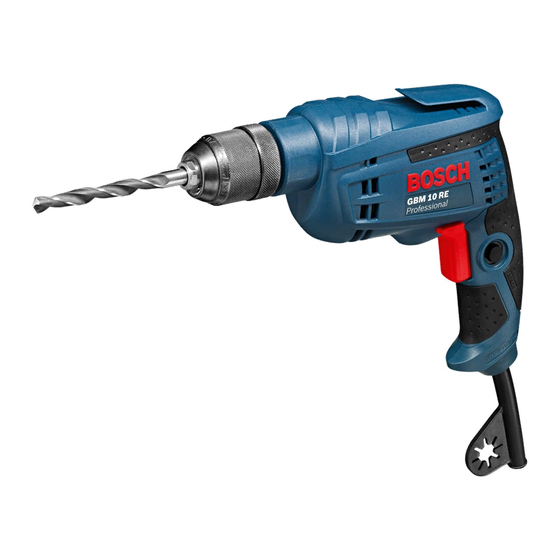
Bosch GBM 10 Oryginalna instrukcja obsługi - Strona 7
Przeglądaj online lub pobierz pdf Oryginalna instrukcja obsługi dla Wiertarka Bosch GBM 10. Bosch GBM 10 33 stron.
Również dla Bosch GBM 10: Instrukcja obsługi (12 strony)

OBJ_BUCH-718-004.book Page 7 Wednesday, April 27, 2011 10:11 AM
Rotary drill
Chuck clamping range
Weight according to EPTA-Procedure 01/2003
Protection class
The values given are valid for a nominal voltage [U] of 230 V. For different voltages and models for specific countries, these values can vary.
Please observe the article number on the type plate of your machine. The trade names of the individual machines may vary.
Assembly
Changing the Tool
Before any work on the machine itself, pull the mains
plug.
Wear protective gloves when changing the tool. The
drill chuck can become very hot during longer work peri-
ods.
Keyless Chuck (see figure A)
Hold the rear sleeve 3 of the keyless chuck 1 tight and turn the
front sleeve 2 in rotation direction
serted. Insert the tool.
Hold the rear sleeve 3 of the keyless chuck 1 tight and firmly
tighten the front sleeve 2 by hand in rotation direction
til the locking action (click) is heard. The drill chuck is locked
automatically.
The locking is released again to remove the tool when the
front sleeve 2 is turned in the opposite direction.
Key Type Drill Chuck (see figure B)
Open the key type drill chuck 10 by turning until the tool can
be inserted. Insert the tool.
Insert the chuck key 9 into the corresponding holes of the key
type drill chuck 10 and clamp the tool uniformly.
Screwdriver Tools (see figure C)
When working with screwdriver bits 11, a universal bit holder
12 should always be used. Use only screwdriver bits that fit
the screw head.
Replacing the Drill Chuck
For machines without spindle lock, the drill chuck must be re-
placed through an authorized after-sales service agent for
Bosch power tools.
The drill chuck must be tightened with a tighten-
ing torque of approx. 31–35 Nm.
Dust/Chip Extraction
Dusts from materials such as lead-containing coatings,
some wood types, minerals and metal can be harmful to
one's health. Touching or breathing-in the dusts can cause
allergic reactions and/or lead to respiratory infections of
the user or bystanders.
Certain dusts, such as oak or beech dust, are considered
as carcinogenic, especially in connection with wood-treat-
ment additives (chromate, wood preservative). Materials
containing asbestos may only be worked by specialists.
Bosch Power Tools
mm
kg
– Provide for good ventilation of the working place.
– It is recommended to wear a P2 filter-class respirator.
Observe the relevant regulations in your country for the
materials to be worked.
Prevent dust accumulation at the workplace. Dusts can
easily ignite.
Operation
Starting Operation
Observe correct mains voltage! The voltage of the pow-
, until the tool can be in-
er source must agree with the voltage specified on the
nameplate of the machine. Power tools marked with
230 V can also be operated with 220 V.
, un-
Reversing the Rotational Direction (GBM 10 RE)
(see figure D)
The rotational direction switch 8 is used to reverse the rota-
tional direction of the machine. However, this is not possible
with the On/Off switch 7 actuated.
Right Rotation: For drilling and driving in screws, push the
rotational direction switch 8 left to the stop.
Left Rotation: For loosening and unscrewing screws and
nuts, press the rotational direction switch 8 through to the
right stop.
Switching On and Off
To start the machine, press the On/Off switch 7 and keep it
pressed.
To lock the pressed On/Off switch 7, press the lock-on button
6.
To switch off the machine, release the On/Off switch 7 or
when it is locked with the lock-on button 6, briefly press the
On/Off switch 7 and then release it.
Adjusting the Speed (GBM 10 RE)
The speed of the switched on power tool can be variably ad-
justed, depending on how far the On/Off switch 7 is pressed.
Light pressure on the On/Off switch 7 results in a low rotation-
al speed. Further pressure on the switch results in an increase
in speed.
Working Advice
Apply the power tool to the screw/nut only when it is
switched off. Rotating tool inserts can slip off.
For drilling in metal, use only perfectly sharpened HSS drill
bits (HSS=high-speed steel). The appropriate quality is guar-
anteed by the Bosch accessories program.
GBM 10
GBM 10 RE
Professional
Professional
1 – 10
1 – 10
1.3
1.3
/II
/II
2 609 140 657 | (27.4.11)
English | 7
GBM 10 RE
Professional
1 – 10
1.3
/II
