DS18 XOHV Instrukcja obsługi - Strona 8
Przeglądaj online lub pobierz pdf Instrukcja obsługi dla Wzmacniacz DS18 XOHV. DS18 XOHV 15 stron. High volt external pre-amplifier

XOHV
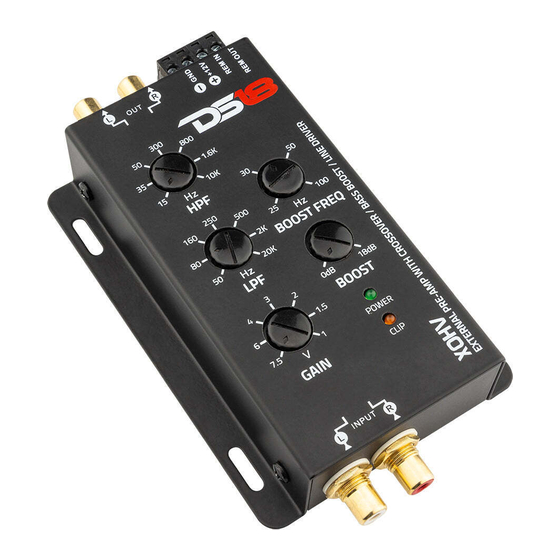
4. LPF: Low Pass Filter, Adjust the frequency
setting
of
the
Frequencies higher than the setting will be
filtered out of the audio signal.
5. Gain: Level sensitivity adjust the pre-amp
sensitivity
input
sensitivity level is 1V, while the maximum
level is 7.5V.
6. Boost Freq: Adjust the Bass Boost
Frequency point, the frequency range is from
25Hz to 100Hz.
7. Boost: Adjust the Bass Boost level up to
18dB.
8. Power: LED Indicator that shows when the
Pre-amplifier is on and in proper working
condition the red LED will illuminate. Refer to
the troubleshooting guide for possible
solutions if this will not power on.
9. Clip: Clipping usually happens because the
gain is set too high in an attempt to maximize
the amp's output potential. When the gain is
set too high for the application the Pre-amp
will produce a squared or clipped sound wave,
and the amp and the speakers connected to it
will generate a large amount of heat trying to
reproduce the clipped signal. This can result
in catastrophic damage to your equipment.
Follow these simply steps to avoid problems
with your system: Once your Pre-amp is set
up, watch the CLIP indicator light. If you see
the light blinking turn the gain down, when
the CLIP indicator goes off, you're no longer
clipping. Our clipping indicator is as accurate
as an oscilloscope, but also it gives you the
ability to monitor the dynamic source
material we call music in real-time.
7
low
pass
crossover.
level.
The
minimum
4. LPF: filtro de paso bajo, ajuste el ajuste de
frecuencia del cruce paso bajo. Las frecuencias más
altas que el ajuste serán filtradas de la señal de
audio.
5. Ganancia: sensibilidad de nivel ajuste el nivel de
sensibilidad de entrada de pre-amp. El nivel mínimo
de sensibilidad es de 1V, mientras que el nivel
máximo es de 7,5v.
6. Freq Boost: ajusta el punto de frecuencia del
bajo, el rango de frecuencia es de 25Hz a 100Hz.
7. Boost: ajusta el nivel de impulsión del bajo hasta
18dB.
8. Encendido: indicador LED que indica cuando el
preamplificador está encendido y en condiciones de
funcionamiento adecuadas, el LED rojo se iluminará.
Consulte la guía de resolución de problemas para
encontrar posibles soluciones si no se enciende.
9. Clip: el recorte suele ocurrir porque la ganancia se
ajusta demasiado alto en un intento de maximizar el
potencial de salida del amplificador. Cuando la
ganancia es demasiado alta para la aplicación, el
preamplificador
producirá
cuadrada o recortada, y el amplificador y los
altavoces conectados a él generarán una gran
cantidad de calor tratando de reproducir la señal
recortada.
Esto
puede
catastróficos a su equipo. Siga estos sencillos pasos
para evitar problemas con su sistema: Si usted ve la
luz parpadeando a su vez la ganancia hacia abajo,
cuando el indicador de CLIP se apaga, ya no está
recortando. Nuestro indicador de recorte es tan
preciso como un osciloscopio, pero también le da la
capacidad de monitorear el material de origen
dinámico que llamamos música en tiempo real.
una
onda
sonora
resultar
en
daños
