Absolute Process Instruments 44005/44030 Skrócona instrukcja obsługi - Strona 3
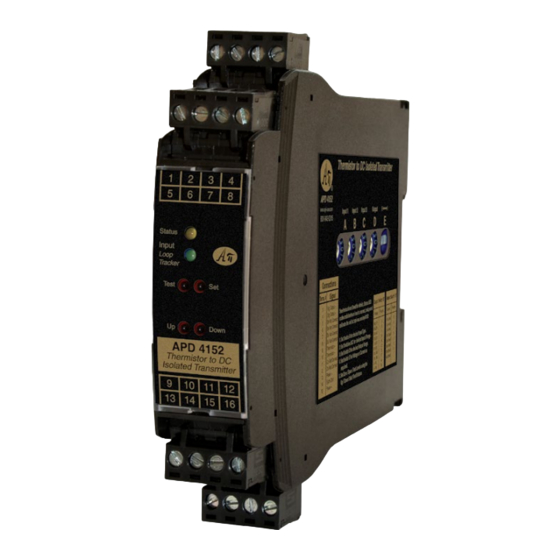
Przeglądaj online lub pobierz pdf Skrócona instrukcja obsługi dla Akcesoria Absolute Process Instruments 44005/44030. Absolute Process Instruments 44005/44030 4 stron. Universal thermistor to dc isolated transmitter, field configurable

Range Table: Thermistor
For models with "R" option, output ranges are reversed
Output
±10 V
0-10 V
Thermistor
Switches
ABCDE ABCDE ABCDE ABCDE ABCDE ABCDE ABCDE ABCDE ABCDE ABCDE ABCDE ABCDE ABCDE ABCDE ABCDE ABCDE ABCDE ABCDE
Type
Ohms
44004/44033
2.252 k
6185V 6183V 6184V 6187V 6182V 6189V 6186V 6181V 6188V 6180V 6183I 6187I 6182I 6189I 6186I 6181I 6188I 6180I
44005/44030
3 k
6285V 6283V 6284V 6287V 6282V 6289V 6286V 6281V 6288V 6280V 6283I 6287I 6282I 6289I 6286I 6281I 6288I 6280I
44007/44034
5 k
6385V 6383V 6384V 6387V 6382V 6389V 6386V 6381V 6388V 6380V 6383I 6387I 6382I 6389I 6386I 6381I 6388I 6380I
44006/44031
10 k
6485V 6483V 6484V 6487V 6482V 6489V 6486V 6481V 6488V 6480V 6483I 6487I 6482I 6489I 6486I 6481I 6488I 6480I
6585V 6583V 6584V 6587V 6582V 6589V 6586V 6581V 6588V 6580V 6583I 6587I 6582I 6589I 6586I 6581I 6588I 6580I
44008/44032
30 k
YSI 400
2.252 k
6685V 6683V 6684V 6687V 6682V 6689V 6686V 6681V 6688V 6680V 6683I 6687I 6682I 6689I 6686I 6681I 6688I 6680I
Spectrum 1003
1 k
6785V 6783V 6784V 6787V 6782V 6789V 6786V 6781V 6788V 6780V 6783I 6787I 6782I 6789I 6786I 6781I 6788I 6780I
Range Table: Custom Input Range
For models with "R" option, output ranges are reversed
Output
±10 V
0-10 V
Custom Input
Switches
ABCDE ABCDE ABCDE ABCDE ABCDE ABCDE ABCDE ABCDE ABCDE ABCDE ABCDE ABCDE ABCDE ABCDE ABCDE ABCDE ABCDE ABCDE
Type
See module side label
FF85V FF83V FF84V FF87V FF82V FF89V FF86V FF81V FF88V FF80V FF83I FF87I FF82I FF89I FF86I FF81I FF88I FF80I
1
2 3 4
Output
5 6 7 8
Not used
* Do not make
connections to unused
terminals!
Wire terminal torque
0.5 to 0.6 Nm or
4.4 to 5.3 in-lbs
Input
9 1 0
1 1 1 2
Power
1 3 1 4
1 5
Mounting to a DIN Rail
Install module vertically on a 35 mm DIN rail in a protective
enclosure away from heat sources. Do not block air flow. Allow
1" (25 mm) above and below housing vents for air circulation.
1. Tilt front of module downward and clip
the lower mount with spring clips to the
bottom edge of DIN rail.
2. Push front of module upward until upper
mount snaps into place.
Removal
Avoid shock hazards! Turn signal input,
output, and power off before removing
module.
1. Push up on bottom back of module.
2. Tilt the front of module downward to
release upper mount from top edge of
DIN rail.
3. The module can now be removed from
the DIN rail.
A
A
P
P
BSOLUTE
BSOLUTE
ROCESS
ROCESS
±5 V
2-10 V
0-8 V
0-5 V
±5 V
2-10 V
0-8 V
0-5 V
Current Sourcing Output
Module powers mA output loop
Current Sinking Output
switch E set to "I"
External loop supply
1 6
Module mA output is unpowered
Do Not Connect to Unused
Terminals 1, 5, 6, 7, 8
Upper
Mount
Lower
Mount
Spring
Clip
Cu 60/75°C
conductors
13 Power AC or DC +
14 AWG
14
max.
16 Power AC or DC –
I
I
NSTRUMENTS
NSTRUMENTS
1-5 V
0-4 V
0-2 V
0-1 V 0-20 mA 4-20 mA 0-16 mA 0-10 mA 2-10 mA 0-8 mA 0-4 mA 0-2 mA
1-5 V
0-4 V
0-2 V
0-1 V 0-20 mA 4-20 mA 0-16 mA 0-10 mA 2-10 mA 0-8 mA 0-4 mA 0-2 mA
Voltage
Voltage Output
Device
Switch E set to "V"
–
1
2
3
mA
Device
Switch E set to "I"
–
1
2
3
4-20 mA
Device
R
i
+
+
–
Loop
Power
–
Source
–
+
1
2
3
5
6
7
Thermistor Input
9
10
11 12
13
14
15
Earth Ground
* Do not make connections
to unused terminals!
1220 American Way Libertyville, IL 60048
Phone:
800-942-0315
+
4
R
i
+ 20V
4
4
8
Yellow status LED
Setup: blinks once per second
Off: normal operation
2 digit code: error code
Green LoopTracker LED brightness
varies with input level
To maintain full isolation and avoid
malfunctions, do not connect power
supplies in common with input, out-
put or unit power.
16
api-usa.com
Fax: 800-949-7502
APD 4152
APD 4152
3
