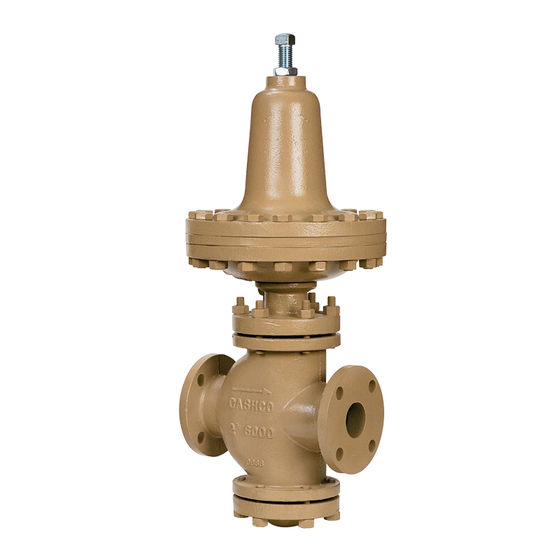
cashco 8310HP Instrukcja instalacji, obsługi i konserwacji - Strona 3
Przeglądaj online lub pobierz pdf Instrukcja instalacji, obsługi i konserwacji dla Kontroler cashco 8310HP. cashco 8310HP 8 stron. Pressure reducing regulators
Również dla cashco 8310HP: Instrukcja instalacji, obsługi i konserwacji (10 strony)

VI. MAINTENANCE
SYSTEM UNDER PRESSURE. Prior to performing any
maintenance, isolate the regulator from the system and
relieve all pressure. Failure to do so could result in
personal injury.
A. General:
1.
Maintenance procedures hereinafter are based
upon removal of the regulator unit from the pipeline
where installed.
2.
Owner should refer to owner's procedures for
removal, handling, cleaning and disposal of non-
reuseable parts, i.e. gaskets, etc.
3.
Refer to Figure 1 for standard regulator (NOTE:
"LP" variation has larger diaphragm area than "HP"
variation). Refer to Figures 2 through 4 for option
blow-ups.
B. Diaphragm Replacement:
1. Using an overhead hoist, lift regulator on to a flat
surface work bench.
SPRING UNDER COMPRESSION. Prior to removing
flange bolts, relieve spring compression by removing
the adjusting screw. Failure to do so may result in flying
parts that could cause personal injury.
2.
Relax range spring (28) by turning adjusting screw
(or T-bar) (32) CCW (viewed from above) until
removed from spring chamber (13).
3.
Draw or embed a match mark between diaphragm
case (14) and spring chamber casting (13) along
flanged area.
4. Remove all flange nuts (30) and bolts (29).
5.
Remove spring chamber (13), spring button (27),
and range spring (28).
6.
Draw second match mark on diaphragm case
(14) flange in alignment with a match mark on the
threaded end of the valve plug assembly (12) to
indicate "free vertical movement" position of the
valve plug assembly (12).
7. Securing the "flats" on the threaded end of the
valve plug assembly (12) with adjustable wrench,
remove pressure plate nut (24) by rotating CCW
(viewed from above).
NOTE: Do not rotate the valve plug assembly (12).
The plug (12.1) and seat rings (10 & 11) have been
mechanically lapped at the factory per ANSI Class
II seat leakage and assembled to provide optimum
"free vertical movement".
IOM-8310HP/LP-BASIC
WARNING 1
WARNING 2
SECTION VI
8.
Pry loose pressure plate (22) from diaphragm(s)
(20) and remove both. Inspect to ensure no defor-
mation due to over-pressurization. If deformed,
replace.
NOTES: 1. Not removing the pusher plate (17) or
rotating the valve plug assembly (12) will provide
performance equal to original factory performance
when diaphragm(s) (20) is replaced with a like
diaphragm(s) (20). Refer to Section VI.C, steps
12 and 13 for correct diaphragm setting if pusher
plate (17) or stem lock nut (19) is removed, or valve
plug assembly (12) is rotated.
2. Refer to quantity of diaphragm(s) (20) incorpo-
rated in the bill of materials listing. Depending on
outlet pressure level, multiple metal diaphragms
may be "stacked".
9.
Remove diaphragm gasket (21) and pusher plate gas-
ket (18). Clean gasket sealing surfaces thoroughly.
10. Install new diaphragm gasket (21) on diaphragm
case (14) flange and new pusher plate gasket (18)
on pusher plate, if required. NOTE: No gaskets
utilized with a composition (soft) diaphragm).
11. Position new diaphragm(s) (20) over threaded end
of valve plug assembly (12).
12. Ensuring that the curved outer rim side of the pres-
sure plate (22) rests against the diaphragm(s) (20)
directly, place the pressure plate (22) over threaded
end of the valve plug assembly (12).
13. Install pressure plate nut (24) on threaded end of
valve plug assembly (12) and tighten to a torque
value of 75-80 Ft-lbs (101-108 Nm) for metal dia-
phragm, or 30-35 Ft-lbs (40-47 Nm) for composition
diaphragm. Maintain alignment of match marks on
the valve plug assembly (12) with second match
mark on diaphragm case (14) flange. NOTE: Use
two flange bolts (29) to keep multiple diaphragms'
(20) bolt holes properly aligned while tightening
pressure plate nut (24). DO NOT USE FINGERS
TO HOLD DIAPHRAGMS (20) DURING TIGHTEN-
ING OF PRESSURE PLATE NUT (24).
14. Set range spring (28) on retainer hub of pressure
plate (22).
15. Place multi-purpose, high temperature grease into
depression of spring button (27) where adjusting
screw (or T-bar) (32) bears. Set spring button (27)
on to range spring (28); ensure spring button (27)
is laying flat.
16. Aligning the match marks, place spring chamber
(13) over the above stacked parts. Install all flange
bolts (29) and flange nuts (30). Mechanically
tighten bolting (29) (30) in a cross pattern that al-
lows spring chamber (13) to be pulled down evenly.
Recommended torque values are as follows:
Model
8310HP
8310LP
Diaphragm
Torque
Material
ALL
45 ft-lbs (61 Nm)
ALL
45 ft-lbs (61 Nm)
Bolt
Size
5/8" Ø
1/2" Ø
3
