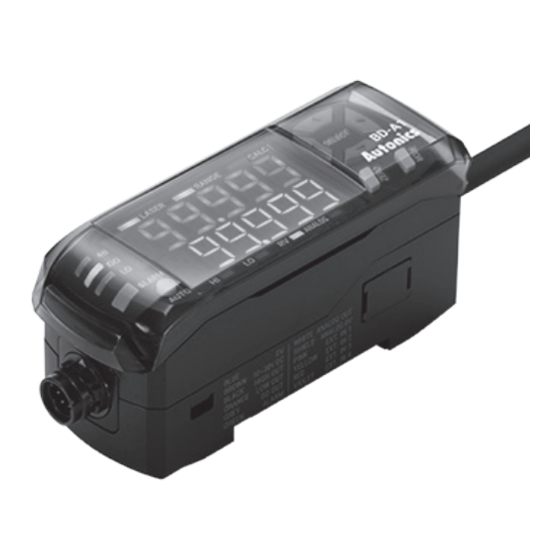
Autonics BD-030 Instrukcja obsługi produktu - Strona 5
Przeglądaj online lub pobierz pdf Instrukcja obsługi produktu dla Akcesoria Autonics BD-030. Autonics BD-030 6 stron. Laser displacement sensors
Również dla Autonics BD-030: Podręcznik (14 strony), Instrukcja obsługi produktu (5 strony)

[Amplifier unit] Parameter Setting
• Some parameter are activated / deactivated depending on other parameters. Refer to
the description.
• [MODE] key: Enters parameter group, save and return to the upper step (over 3 sec)
[◀], [▶] key: Changes parameter group, parameter
[▲], [▼] key: Changes setting value of parameter
• Refer to the user manual for the details.
■ Parameter group 1
Parameter
Display
Default
Response time
RSPD
Teaching mode
SENS
1PNT
Output type
NoNC
PV display
DISP
STND
Display digit
DOT
)000
Display scale low
limit
Different
H-SC
by model
Display scale high
limit
L-SC
Hysteresis
HYS
)001
Analog output scale
low limit
Different
H-AN
by model
Analog output scale
high limit
L-AN
Error output
ERrOUT
KEEP
Fixed output
FIxOUT Max. value
■ Parameter group 3
Parameter
Display
Default
External input 1
D-IN1
T-IN
External input 2
D-IN2 OUtCLR
External input 3
D-IN3
L-OFF
External input 4
D-IN4
ZERO
Mode: Auto Sensitivity (Teaching)
Set the judgment output (HIGH/GO/LOW) range automatically. Enter the auto sensitivity
adjustment setting mode after set the type of teaching mode in parameter group 1.
■ 1-point teaching
Sets the judgment output range by using present value (PV) of reference object height.
HIGH setting value=height present value×1.5
LOW setting value=height present value÷2
Setting
1. '1P' is displayed on SV display, push the [AUTO] key within 2 sec.
2. After teaching the object for 2 sec, set the judgment output range automatically by
applying the result.
■ 2-point teaching
Sets the judgment output range by using present value (PV) of reference object step.
HIGH setting value=(step×1.5)+bottom height
LOW setting value=(step÷2)+bottom height
Setting
1. '1P' is displayed on SV display, push the [AUTO] key within 2 sec.
2. After teaching the object for 2 sec, '2P' is displayed on SV display, push the [AUTO] key
within 2 sec.
3. After teaching the object for 2 sec, set the judgment output range automatically by
applying the result.
Mode: Control Output Type
Sets the type of control/analog output.
■ Setting range
Output type
Setting range
Control output NPN, PNP
Analog output
OFF, 4-20MA, 0-5V, 1-5V, -5-5: -5 to 5 V
■ Parameter group 2
Parameter
Display
Calculation
1MS
CALC
Gain
GAIN
Filter
NO
FILTER
Samples for
averaging
AVF
Samples for median MEDIAN
Hold
HOLD
Hold timing input
HOLdT
Auto trigger level
AtLV
Auto trigger
Hysteresis
AtHYS
Timer
T-MOD
Timer value
TIME
■ Parameter group 4
Parameter
Display
Display direction
DIR
Bank
BANK BANK-0
Saving mode
SAVE
Lock mode
LOCK
Initialize
INIT
[Amplifier unit] Error
In error status, 'ERROR' is displayed on PV display.
Deal with an error by referring to the below solution of each setting value SV display.
SV
Output Reason
Display
Disconnection of
sensor head/amplifier
O
unit/cable Sensor
HEAD
head malfunction
Default
Malfunction of
O
emission
LASER
OFF
Not existing the
1
DARK
object or background
AVF
-
in maximum
RANGE
measurement range
16
-
Over receive the light
OFF
BRIGHT
In status of display
-
OFF
unavailable
------
T-IN
Amplifier unit memory
0
malfunction
(EEPROM cannot
)001
O
be refreshed due to
OFF
A-MEM
exceeding the number
of recording over 1
0
million times)
Sensor head memory
O
malfunction
H-MEM
Default
Poor connection
Normal
O
between amplifier
display
AMP-C
units
Mismatch the version
of firmware between
O
OFF
sensor head and
VER
OFF
amplifier unit
OFF
Disconnection of the
O
judgment output
OUT
O
Amplifier unit error
AMP
Over current of output
O
terminal
oCUR
Poor connection
between
O
amplifier units or
AIF
communication
module
Sold Separately: Extension Cable
• Unit: mm, For the detailed drawings, follow the Autonics website.
• The connectors of general and robot type have a same dimension.
Troubleshooting
Check the connection between sensor head
and amplifier unit.
Check the disconnection of sensor head cable.
Perform the above items and supply the power
again.
If the problem is not resolved after the above
items are performed, it is judged that the sensor
head is defective and needs to be replaced.
Adjust the distance between sensor head and
object in the maximum measurement range.
Return to status of present value display
available.
Turn off the power, check the connection of
sensor head, and supply the power again.
Executes the initialize function in parameter
group 4.
If the problem is not resolved after the above
items are performed, it is judged that the
amplifier unit is defective and needs to be
replaced.
Turn off the power, check the connection of
sensor head, and supply the power again.
If the problem is not resolved after the above
item is performed, it is judged that the amplifier
unit is defective and needs to be replaced.
After turn off the power, check the connection
between amplifier units, and supply the power
again.
Please contact the Autonics technical advisory
center.
After turn off the power, check connection of
HIGH (black) / GO (gray) / LOW (orange) wire,
and supply the power again.
After turn off the power, check the connection
of sensor head, and supply the power again.
If the problem is not resolved after the above
items are performed, it is judged that the
amplifier unit is defective and needs to be
replaced.
Check the load of output is specification range.
Check the output is contacted other wire or
frame.
After turn off the power, check the connection
between amplifier units or communication
module, and supply the power again.
31.7
32.4
Model
General type
Robot type
CID6P-1-SI-BD
CIDR6P-1-SI-BD
CID6P-2-SI-BD
CIDR6P-2-SI-BD
CID6P-5-SI-BD
CIDR6P-5-SI-BD
CID6P-10-SI-BD
CIDR6P-10-SI-BD
Cable
length
1 m
2 m
5 m
10 m
