High Altitude Science Eagle Flight Computer Podręcznik - Strona 3
Przeglądaj online lub pobierz pdf Podręcznik dla Płyta główna High Altitude Science Eagle Flight Computer. High Altitude Science Eagle Flight Computer 6 stron.

Getting Started
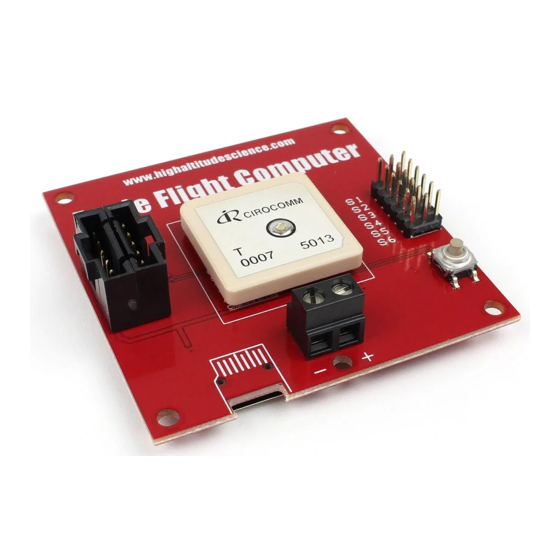
Attaching the Power – Thread your power cable up through the stress relief hole.
Insert the wire ends into their appropriate slots and clamp in place by tightening
the power terminal screws with a flat-blade screwdriver.
IMPORTANT:
The black
wire goes into the slot marked "-" and the red wire goes into the slot marked "+".
Failure to do so will damage your flight computer.
Attaching a Sensor Module - Insert the sensor wire harness plug into any Sensor
Port such that the clip on the wire harness plug engages with the lock on the data
port. The plug is keyed preventing you from plugging the sensor in backwards. The
computer will automatically detect the sensor when it is first powered on
regardless of which Sensor Port you connect it to. If you only wish to save GPS data
to your micro SD card, there is no need to attach a sensor. However, if you do
decide to attach a sensor module to either one of the Sensor Ports, it must be
attached before you power on the flight computer. On newer versions, the Sensor Ports are mounted to the
bottom side to protect them during rough landings.
Mounting the Micro SD – The flight computer will only save data to the micro SD card if it is properly
mounted. Once the computer has booted, data is saved to the micro SD card every six seconds. To mount your
micro SD card, slide it into the micro SD card slot on the bottom of the flight computer with the gold contacts
on the micro SD card facing up. The correct alignment of the micro SD card is printed on the top of the
computer. Once properly aligned, push your micro SD card into its slot until you hear a click. To remove your
SD card, push it until you hear a second click. You can now pull it out.
IMPORTANT:
the micro SD card must be
8 GB or smaller.
Powering On – Because the computer does not have a power switch, it will power on when the last battery is
inserted. The System LED will flash, indicating that the computer is powered. The first time your flight
computer is powered on, the GPS receiver will have to initialize before it achieves satellite lock. This may take
up to 10 minutes. Make sure your flight computer has an unobstructed view of the sky while initializing
(outside away from trees and buildings). The GPS receiver has a small LED. It will burn continuously while
initializing and searching for satellites. Once satellite lock is confirmed, the GPS receiver LED will start flashing.
www.highaltitudescience.com
Eagle Flight Computer Manual V1.0 – Page 3
