Gama Sonic GS-106S-G Instrukcja obsługi - Strona 3
Przeglądaj online lub pobierz pdf Instrukcja obsługi dla Oświetlenie zewnętrzne Gama Sonic GS-106S-G. Gama Sonic GS-106S-G 4 stron. Baytown solar lamp
Solar Lamp Post Location
For optimum light duration throughout the night, it is very important to place your
solar lamp in a spot where it will receive the maximum amount of direct sunlight
throughout the day.
NOTE: For best results, the solar lamp post must be charged for two
sunny days in the "OFF" position.
Operation Instructions
1. Remove part (A) from part (B) by unscrewing the 2 screw caps. Turn the
operation switch (Fig. 2) to ON (|) position, the Solar Lamp will
automatically operate dusk to dawn.
2. Reattach part (A) to part (B) and secure with the 2 screw caps.
Installation Instructions
Anchor installation
1. Insert the Turning bar (H) in the hole through the Auger stake (G).
2. Place Auger in desired location and apply downward pressure while turning the
Turning bar clock wise.
3. Occasionally check the Auger level to ensure your digging is straight.
4. Stop turning once the ground stop ring has reached ground level, see Fig 1.
5. Remove the Turning Bar.
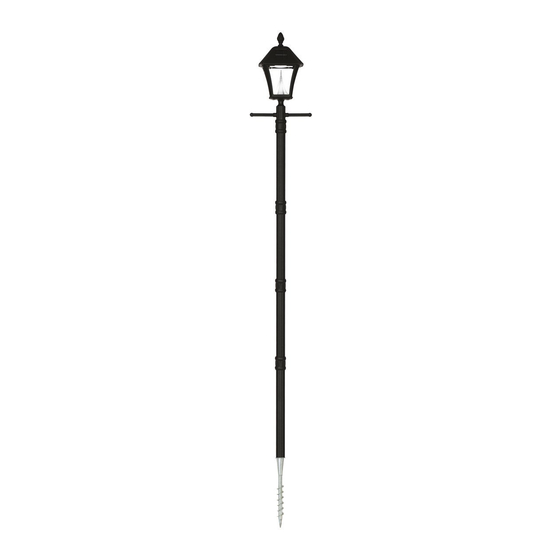
Lamp assembly:(fig. 1)
1. Screw part (D
) onto part (F) then screw part (E
1
2. Screw part (D
) onto part (E
2
3. Screw part (D
) onto part (E
3
4. Screw part (D
) onto part (E
4
5. Screw parts (C x 2) into base of part (B).
Placing the Lamp on top of the Anchor:
1. Unscrew the two screws from part (F).
2. Place the assembled lamp on top of the Auger stake
3. Secure part (F) to part (G) using the two screws.
Replacing the Batteries
(After several years of use, the battery may need replacing).
1. Unscrew the two screw caps and detach part (A) from part (B). Make sure
the ON/OFF switch is in the OFF(O) position.
2. Unscrew the battery compartment (Fig. 2) screw located on the silver
reflector and remove the compartment door.
3. Unclip the connector and remove the old battery. Make sure the new
battery is high quality 3.2V/1,500mAh () Li
connector.
4. Clip on new battery and install into the battery compartment. Screw back
battery compartment screw.
5. Reattach part (A) to part (B) and secure with the 2 screw caps.
:
) then screw part (E
1
) then screw part (E
2
) then screw parts (A+B) into part (D
3
) into part (D
).
1
1
) into part (D
2
2
) into part (D
3
3
-ion
Rechargeable battery with
).
).
).
4