BERNSTEIN G30013A Instrukcja montażu - Strona 14
Przeglądaj online lub pobierz pdf Instrukcja montażu dla Produkt hydrauliczny BERNSTEIN G30013A. BERNSTEIN G30013A 16 stron. Support frame
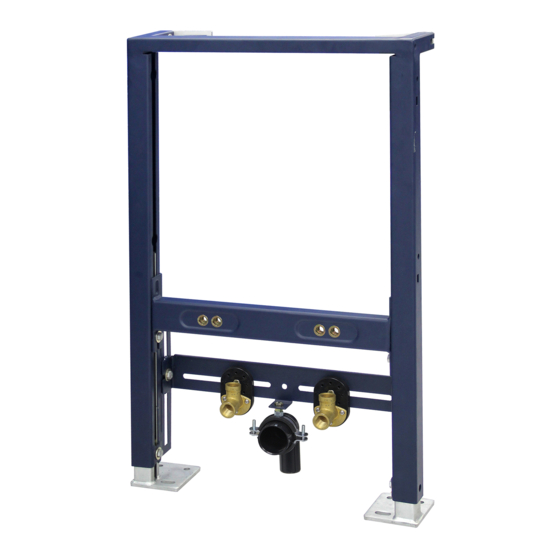
Push fit a 'spare' section of waste pipe fully into the waste
outlet elbow.
Place a straight edge flush against the partition wall (as
shown) and mark a line on the waste pipe. Remove the
waste pipe from outlet elbow.
Remove the blanking plugs from the outlets. Push fit the
waste pipe seal into the waste outlet elbow and lubricate the
inside.
Offer up the bidet and connect the hot and cold flexible pipes
to the inlet elbows, adaptors may be required. Fully tighten
all connections. Carefully position the bidet onto the bidet
fixing bolts, lining up the waste connections at the same time
and push back.
6
SUPPORT FRAME G30013A
Measure the marked length of the 'spare' waste pipe (Xmm).
This measurement MINUS 3mm is the length of waste pipe
that is needed to extend from the back of the bidet into the
waste elbow. Cut the waste pipe to length and remove any
burrs.
On each side of the bidet, place the plastic and metal
washers onto the bolts, secure with the nuts and push fit the
covers. Note: The bidet fixing bolts can be lengthened or
shortened using a large flatblade screwdriver.