Gardena 34 E basicMove Instrukcja obsługi - Strona 5
Przeglądaj online lub pobierz pdf Instrukcja obsługi dla Kosiarka Gardena 34 E basicMove. Gardena 34 E basicMove 13 stron. Electric flexible steerable lawnmower
Również dla Gardena 34 E basicMove: Instrukcja obsługi (12 strony)
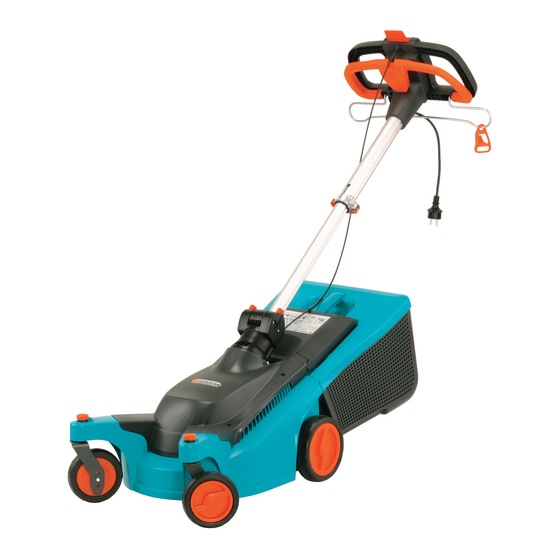
Adjusting the swivelling
upright :
9
A
0
B
Connecting the extension
cable :
5
C
Starting the mower :
H
F
Adjusting the cutting
height :
z
S
1. Press in both slides
steering upright
2. Open the clamping lever
3. Pull out swivelling upright
4. Close clamping lever
For safety reasons, on first use, the upper part of the
handle must be drawn out fully. It can then no longer
be collapsed to the as-delivered position.
The clamping force can be adjusted via the nut
clamping effect decreases, open the clamping lever and
turn the knurled nut clockwise (e.g. with pliers).
1. Push extension cable connector
on to the mower plug
2. Form a loop with the extension
E
cable
cable strain relief
3. Hook in extension cable
a way that the cable sags slightly
and the cable strain relief can slide
along the entire length of the
cable clip.
Note: To avoid driving over the extension cable, the exten-
D
sion cable should always be arranged in such a way that
when the mower is operating, the cable is routed in from
the side which has already been mowed.
DANGER ! Risk of injury if the mower does not switch
A
off automatically !
V Do not remove or bypass the safety devices
G
(start button, switch handle).
1. Place mower on a flat area of the lawn.
2. Press the start button
steering wheel
3. After starting the motor, release the start button
4. Only push the mower forwards and at walking pace.
For 34 E easyMove :
The cutting height can be adjusted from 2.0 to 6.5 cm in 1.5 cm-
stages (4 positions).
v Unscrew wheels
ting height required.
4
All 4 wheels
height (see scale
9
simultaneously and open up the
0
.
A
.
0
to the required length.
A
again.
D
.
and guide it thorough the
5
.
E
in such
F
and pull the switch handle
H
.
4
by hand and screw back in firmly at the cut-
4
must always be screwed in at the same cutting
z
on the back of the wheel mounting).
S
B
. If the
C
5
E
G
F
again.
on the
15