Gardena AquaContour automatic 8133 Instrukcja obsługi - Strona 3
Przeglądaj online lub pobierz pdf Instrukcja obsługi dla Sprzęt do trawników i ogrodów Gardena AquaContour automatic 8133. Gardena AquaContour automatic 8133 12 stron. Aquacontour automatic.
large-area irrigation
Również dla Gardena AquaContour automatic 8133: Instrukcja obsługi (13 strony)
Information about usage :
The Large-Area Irrigation AquaContour
automatic should not be combined with
other sprinklers in one irrigation line.
If there is a change in the range of the Large-
Area Irrigation AquaContour automatic, the
pressure conditions will change in the irriga-
tion line, so altering the range of the other
sprinkler.
➔ Only use separate individual water
channels for watering. Do not install
in a series with other sprinklers.
The ranges selected may vary with major
fluctuations in water pressure.
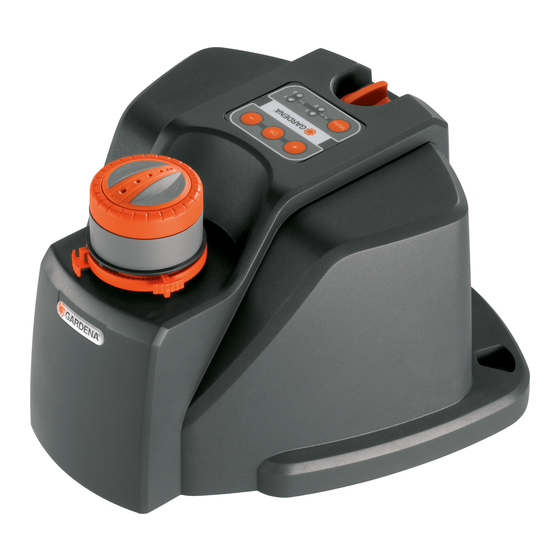
3. Function
Control panel :
2
4
3
1
6
5
4. Initial Operation
Insert batteries :
12
Pressure Tank Units (with pressure chamber)
to supply water to the Large-Area Irrigation
AquaContour automatic are not recommended
as they cause fluctuations in pressure with the
switch-on / off pressure.
Sand and other abrasive substances in the
water will result in faster wear and reduced
output.
v With water containing sand a Central Filter
(e.g. GARDENA Central Filter Art. 1510)
should be used.
The GARDENA Large-Area Irrigation AquaContour automatic
can be used to water individual garden areas.
Two programmed areas can be stored. A jet of water slowly
turns in a circle to the end of the programmed area, stops, and
turns back again, altering the irrigation range depending on the
ranges programmed. The control panel is used to programme
the irrigation contour points.
1
Menu button:
Choose between programming mode
(Set 1 or 2) and operating mode (Auto
1 or 2).
2
"+" button :
Increases irrigation range.
3
"-" button :
Decreases irrigation range.
4
OK button :
Stores the irrigation range selected.
5
Set LEDs :
Indicate programming mode 1 or 2.
6
Auto LEDs :
Indicate automatic operating mode 1 or 2.
LED 1 or 2 flashes every 10 seconds.
The batteries are not included with initial purchase.
v To insert batteries see 7. Maintenance "Replace batteries" .