Gardena Select 1891 Instrukcja obsługi - Strona 6
Przeglądaj online lub pobierz pdf Instrukcja obsługi dla Sprzęt do trawników i ogrodów Gardena Select 1891. Gardena Select 1891 15 stron. Water control
Również dla Gardena Select 1891: Instrukcja obsługi (15 strony), Instrukcja obsługi (17 strony)

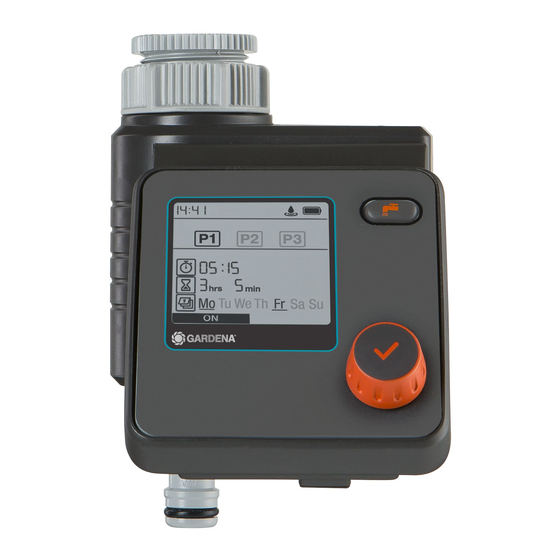
3. FUNCTION
v (Fig. F)
You can change the settings or move to the next
setting by turning the knob. You can confirm the
respective input by pressing the rotary knob.
Pressing the knob for a minimum of 3 seconds
locks or unlocks the display.
Time
Active Watering
Connected
sensor
Sensor
Programs
P1
Start Time
(0 – 23) hrs (0 – 59) min.
Run Time
hrs
(0 – 7) hrs (1 – 59) min.
Mo Tu We Th Fr Sa Su
ON
Frequency
(weekdays)
*
max. 1 year
min. 4 weeks
max. 4 weeks
14
Battery
Condition *
Soil Moisture
0 drops = Sensor
P2
P3
detects "dry"
3 drops = Sensor
detects "wet",
no time-controlled
watering
min
Today
OFF
Schedule
active /
deactive
too weak for opening again
If you will be away for long periods of
time, please replace the battery when
the battery symbol blinks – otherwise
the watering system may fail.
4. PROGRAMMING
Fig. G:
1 Set time (hours) | 2 Set time (mins) |
3 day setting (Mon ‒ Sun) | 4 Ready for schedule
Fig. H:
1 Select schedule | 2 Set schedule |
3 Confirm schedule | 4 Device programmed
P1, P2, P3 denote watering schedules. You can
save up to 3 independent schedules. Irrigation
days must be selected and confirmed individ ually.
The current weekday will be underlined.
By pressing On / Off, schedules can be activated
or deactivated individ ually.
Fig. I: Soil Moisture Sensor, Art. 1188,
(optionally available)
v (Fig. D):
1 Menu: Soil Moisture Sensor
After a soil moisture sensor is connected,
the word "Sensor" will be displayed.
This can last for up to 1 minute. The soil moisture
level at which a watering will not be carried out
as per the schedule can be set using the switching
point controller on the soil moisture sensor
(see GARDENA Soil Moisture Sensor Operator's
manual). This does not affect active (manual)
watering.
Fig. J:
1 Active watering | 2 Change watering duration |
3 Stop active watering at any time
By pressing the
button, manual watering can
be started or stopped at a desired time.
v (Fig. G – J)
