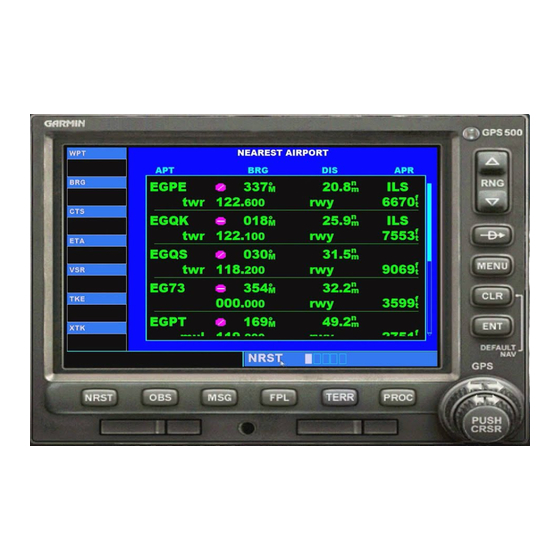
Bottom Row Keys
N
The NRST key displays the Nearest Airports page. Then, rotating the small
right knob steps through the NRST pages.
The OBS key is used to select manual or automatic sequencing of waypoints.
O
Pressing this key selects OBS mode, which will retain the current "active to"
waypoint as your navigation reference even after passing the waypoint (i.e.,
prevents sequencing to the next waypoint). Pressing the OBS key again will
return to normal operation, with automatic sequencing of waypoints. Whenever
OBS mode is selected, you may set the desired course to/from a waypoint using
the OBS Page, or an external OBS selector on your HSI or CDI.
M
The message key is used to view system messages and to alert you to
important warnings and requirements.
F
The flight plan key allows you to create, edit, activate and invert flight plans,
as well as access approaches, departures and arrivals. A closest point to flight
plan feature is also available from the flight plan key.
The vertical navigation key allows you to create a three-dimensional
VNAV
profile which guides you to a final (target) altitude at a specified location.
P
The procedures key allows you to select approaches, departures and arrivals
from your flight plan. When using a flight plan, available procedures for your
departure and/or arrival airport are offered automatically. Otherwise, you may
select the desired airport, then the desired procedure.
KeyS / Power On
Powering up the GPS 500
1. Rotate the power knob clockwise to
turn the unit on.
2. A Welcome page appears briefly, followed
by the Land Data page, as the unit conducts
a self-test to ensure proper operation.
3. Once the self-test concludes, the Database
Confirmation page is displayed, showing
the effective and expiration dates of the
Jeppesen database on the NavData® card.
Press ENT to acknowledge the Database
Confirmation page and proceed to the
Instrument Panel Self-Test page.
4. The Instrument Panel Self-Test page allows
you to verify that the GPS 500 is
communicating properly with in-panel
instruments. Compare on-screen
indications with the information depicted
on connected instruments, such as CDI,
HSI, RMI and/or external annunciators.
Once you have verified proper operation,
press ENT to display the Satellite Status
page.
5. Once the GPS 500 has acquired a
sufficient number of satellites to
determine a position, the Map page will
automatically appear showing your present
position.
3

