Garmin Alpha 100 with TT 15 mini Instrukcja obsługi - Strona 6
Przeglądaj online lub pobierz pdf Instrukcja obsługi dla Produkt do pielęgnacji zwierząt domowych Garmin Alpha 100 with TT 15 mini. Garmin Alpha 100 with TT 15 mini 26 stron.
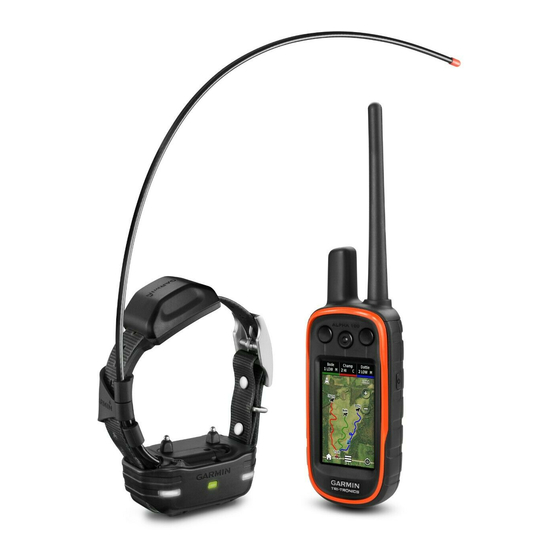
Charging the Handheld Device
To prevent corrosion, thoroughly dry the USB port, the weather
cap, and the surrounding area before charging or connecting to
a computer.
You should fully charge the battery before you use the device for
the first time. Charging a fully depleted battery takes about 2
hours.
NOTE: The device does not charge when it is outside the
temperature range of 0° to 40°C (32° to 104°F).
1
Lift the weather cap
.
2
Plug the small end of the power cable into the mini-USB port
on the device.
3
Plug the other end of the power cable into an appropriate
power source.
The LCD display on the handheld device shows the current
battery charge level. Charging is complete when the battery
charge level icon stops flashing.
Charging the Dog Collar Device
To prevent corrosion, thoroughly dry the contacts on the collar
and the surrounding area before connecting the charging clip.
NOTE: Your dog collar device may look different than the device
pictured.
You should fully charge the battery before you use the device for
the first time. Charging a fully depleted battery takes about five
hours.
1
Snap the charging clip
2
Plug the small end of the power cable into the mini-USB port
on the charging clip cable.
3
Plug the power cable into a power source.
The status LED is solid red when the collar is charging.
4
After the status LED turns solid green, remove the charging
clip from the collar.
2
NOTICE
NOTICE
onto the device
.
Turning On the Devices
• On the handheld device, hold the power key until the
LCD display turns on.
• On the dog collar device, hold the power key until the status
LED flashes and the collar beeps.
Turning Off the Devices
• On the handheld device, hold the power key until the
LCD screen turns off.
• On the dog collar device, hold the power key until the status
LED turns red.
Acquiring Satellite Signals
Both the collar and handheld device must acquire satellite
signals before you put the collar on your dog. Acquiring satellites
can take a few minutes.
1
Go outdoors to an open area.
2
Turn on both devices
(Turning On the Devices, page
3
Select the power key on the handheld device.
shows the GPS signal strength.
When the collar has acquired satellite signals, the status LED
flashes a double-blink or triple-blink in green.
Using the Touchscreen
• Select
to open the application drawer.
• Select
to open a menu.
• Select
to close the page and return to the previous page.
• If you are more than one menu from the home screen, select
and hold
to return to the home screen.
• Select
to return to the previous page.
• Select
to save changes and close the page.
• Select
and
to scroll.
• Select
to search by name.
Locking the Touchscreen
You can lock the screen to prevent inadvertent screen touches.
1
Select the Power key.
2
Select .
Unlocking the Touchscreen
1
Select the Power key.
2
Select .
Dog Collar Device Setup
Methods to Add a Dog Collar Device to a
Handheld Device
If you purchased the dog collar device and the handheld device
separately, you must add the dog collar device to the handheld
device. You can add up to 20 dog collar devices to one
handheld device.
Using MURS/VHF: Allows you to add a dog collar device after
you have placed the dog collar device into pairing mode by
pressing the power key.
This method is helpful when you are adding a new accessory
collar to the system prior to leaving for the hunt
Dog Using Wireless Pairing, page
Entering the track and train codes: Allows you to add a dog
collar device that you do not own and that is not in the area.
The dog's owner must determine if you can only track the dog
or can track and train the dog. This method requires the dog's
owner to find and communicate the codes to the person
adding the dog collar device.
2).
(Adding a
3).
Dog Collar Device Setup