Fujitsu UTP-VX30A Instrukcja instalacji - Strona 6
Przeglądaj online lub pobierz pdf Instrukcja instalacji dla Klimatyzator Fujitsu UTP-VX30A. Fujitsu UTP-VX30A 19 stron. Airstage
Również dla Fujitsu UTP-VX30A: Instrukcja instalacji (7 strony)
4.3.1. Installing the Control unit
• If installing outdoors, make sure to orient A upwards.
• Using a template (accessory) is recommended when positioning the holes for mounting
the control unit.
A
Sealing washers
(×3, Accessories)
Rubber
Steel
anchor
bolt
Rubber inside the washer is contacted
tightly with the Control unit.
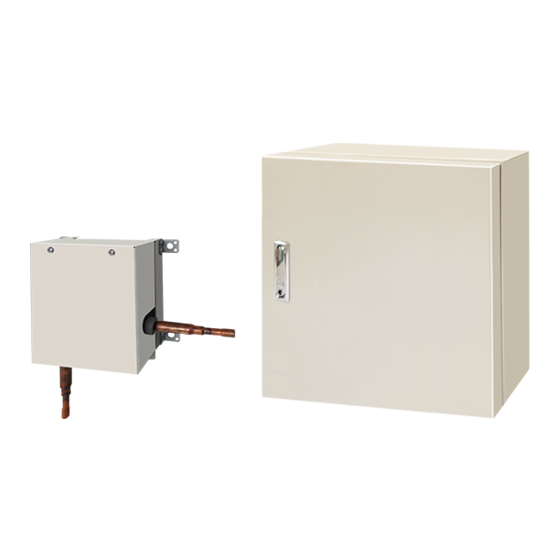
4.3.2. Installing the EEV unit
4.3.2.1. Changing Pipe Orientation
• EEV unit pipe orientation can be changed according to the installation conditions.
(1) Remove the 4 screws and remove the cover.
(2) Cut the cable tie fi xing the cable.
(3) Invert both the pipes and heat insulation.
(4) Pass the cable tie (accessory) through the cable clamp, and fi rmly secure the cable,
and then cut any unnecessary part of cable tie.
(5) Use the 4 screws to mount the cover.
(1), (5)
(2)
Cable tie
Cable
4.3.2.2. Pasting Seals to the piping holes
Use the seals (accessories) to cover any unused piping holes.
Seal
(Accessories)
En-5
Inclination limits
200 mm or more
A
Contorl
unit
M8 Nuts
(×3, Accessories)
Service
space
Cover
Heat insulation
(3)
(4)
Cable tie
(accessory)
Cable clamp
Cable
Seal
(Accessories)
4.3.2.3. Mounting Secure Fittings (If Using 1 EEV unit)
(1) Use the 8 screws (accessories) to secure the secure fi ttings (accessories).
±5° or
less
4.3.2.4. Mounting Secure Fittings (If Using 2 EEV units)
(1) If using 2 EEV units, stacking the 2 kits is recommended.
If stacking 2 EEV units, secure using the secure fi ttings (accessories) and screws
(accessories).
4.3.2.5. Installing EEV units
Mount the EEV unit to the wall.
Select the securing method according to the installation environment.
Method 1: Use the 8 screws (accessories) to secure the unit.
Method 2: Mount the 4 anchor bolts (fi eld supply) to the wall, and then secure the unit.
Method 1
Screws M4×L16
(Accessories)
Installable EEV unit orientations
Installable both indoors and outdoors
A
B
Installable indoors only
(Cannot be installed outdoors)
A
B
Tightening torque
M4 screw
Screws M4×L10 (Accessories)
Secure fi tting (Accessories)
Screws M4×L10
(Accessories)
Secure fi tting (Accessories)
Method 2
Nuts and washers
(Field supply)
Orient the arrow upwards
EEV unit inclination limits
A
B
A
B
0.8 to 2.8 Nm
(8 to 28 kgf·cm)
±10° or
less
±10° or
less