Fujitsu ETERNUS LT260 Skrócona instrukcja obsługi - Strona 2
Przeglądaj online lub pobierz pdf Skrócona instrukcja obsługi dla Przechowywanie Fujitsu ETERNUS LT260. Fujitsu ETERNUS LT260 5 stron. Tape library
Również dla Fujitsu ETERNUS LT260: Podręcznik użytkownika (44 strony)

Speaker script
ETE-LT260-INM-WBT 02/03/2016
As long as the Ready LED is blinking the library is still busy with the initial start and therefore it is necessary to wait, attempt to login earlier
results in a "Library Busy" message.
After the green Ready LED lights continuously the Attention LED continues to blinking as an indication that the initial settings have not been
set up.
Ex-factory the library does not have an administration password set so the password field can be left empty at login.
Consequently a Wizard is automatically launched to guide through the configuration steps.
A message regarding missing default partition appears and can be at this point in time ignored.
As the first configuration step the Administrator password needs to be set up in the usual way of inputting it twice, it is naturally case sensitive.
In the next step it is possible to give the library a local name and a domain name.
Next configurable parameter is the network settings for the Remote Management Interface; only when these parameters are set appropriately
according to the customer network it is possible to access the LT260 using a remote management client.
Please note that for using the IP version 6 you need to first complete the IP version 4 setup and use the Remote Management Interface to
enable IPv6.
Next items to set up are the time zone, date and time - please bear in mind that the date and time settings are used as a basis for all log
entries during the operation of the system and alone therefore it is very important that these settings are correct.
To complete the Initial Wizard select "Finish" and confirm with OK.
All these settings can be later changed using either the OCP or the RMI - but please note that the administrator password must always be set up
during the initial configuration to enable system login and the network parameters are a prerequisite for being able to use the RMI.
As can be seen from the system details at the top of the screen, the system status is still unconfigured and therefore it is necessary to reboot
the system.
This can be done from the Maintenance menu by choosing System Reboot.
After this the library reboots and after the system test has been successfully completed and the green Ready LED is permanently on the
ETERNUS LT260 can be taken into normal operation.
3. Introduction front
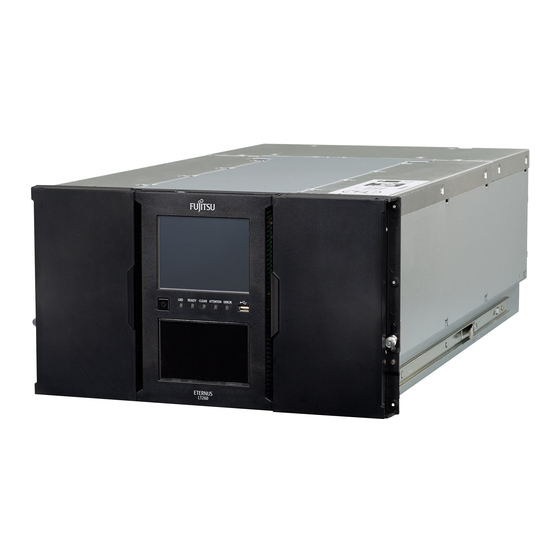
On the front side of the ETERNUS LT260 Base Module there are; access door of the left side magazine, Operator Control Panel, power button,
LEDs, USB port, front window and access door to the right hand side magazine and Mailslots.
The tape library can be switched on by pushing the power button that will consequently lit in green.
The functionalities of the other LEDs are explained in the respective chapter of this Web Based Training.
Powering on the library initiates an inventory of the tape cartridges in the magazines, checking the firmware versions of all modules,
configuring the tape drives and a search of newly added modules.
As the power-on sequence is completed the green Ready LED lights in green thus indicating the library to be fully functional.
The Expansion Module does not have Operator Control Panel; instead the window extends from the top to the bottom of the unit. The cartridge
and drive features are identical with the Base Module.
4. Introduction rear
In the rear side of the Base Module there are always two Power Supplies that provide redundantly power to all the components in the Module.
In the middle there are six bays for the Tape Drives of which a minimum of one is occupied by a Half-Height drive.
In addition to the built-in fans of the Power Supplies each Module has one Chassis Fan.
By removing the Chassis Fan it is possible to access the Drive Power Board bays. The system shown has all six Drive Bays occupied and
consequently both Drive Power Boards must be fitted.
The Control Modules are connected with an Extension Cable.
The Control Module of the Base Module has USB and Ethernet interfaces whereas in the Expansion Module these interfaces are not needed.
The Base Module comes always with two Power Supplies, for the Expansion Module the second Power Supply is a configurable option.
We will have a closer look at all of these modules individually in the respective chapters of this Web Based Training.
5. Introduction to the OCP
Here is the touchscreen of the OCP that provides access to the built-in administration utility of the LT260.
The top of the screen provides some system parameters, from the middle of the screen it is possible to choose the login type from four available
options; User, Administrator, Service and Security.
This is the login screen of the OCP.
First we will log in the library as User, by default none of the accounts have a password set; a password can be though set up using the Security
account.
For User all the other menu options except for Status are not accessible
The OCP returns to a screen saver mode when it has not been used during the defined timeout.
Logging in as an Administrator provides this Home Screen.
Page 2 of 5
Fujitsu Training Academy
