A-Neuvideo ANI-62HDRH Instrukcja obsługi - Strona 5
Przeglądaj online lub pobierz pdf Instrukcja obsługi dla Przełącznik matrycowy A-Neuvideo ANI-62HDRH. A-Neuvideo ANI-62HDRH 20 stron. 4k uhd+ hdr 6x2 hdmi matrix w/audio de-embedding

A
NEUVIDEO
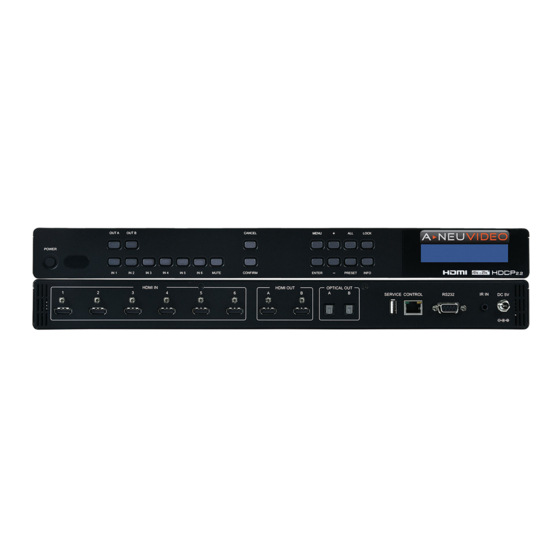
FRONT PANEL
POWER:
Press this button to power the unit on (Green LED) or place it into stand-by mode (Red LED).
q
NOTE: Ethernet, RS-232 and IR remain active while the unit is in stand-by mode.
IR WINDOW:
Accepts IR signals from the included IR remote for control of this unit only.
w
OUT A~B:
Press the "OUT" keys (A or B) of the outputs you wish to route a source to (the letter will flash in the LCD to indicate
e
selection). Pressing an OUT button a second time will de-select that output.
IN 1~6:
After selecting one or more outputs, press the "IN" key of the input (1~6) you wish to route to the selected output(s). In Preset
r
selection mode, these buttons are used to select the saved preset to use.
NOTE: The "CONFIRM" button (Item 7) must be pressed to activate the selected routing configuration.
MUTE:
The "MUTE" button functions as a blank audio/video source. To use it, follow the standard matrix routing instructions, but use
t
the "MUTE" button as the input to blank out the selected outputs. When a "MUTE" input is in use it will show up as "M" within the routing
display.
CANCEL:
Press to Cancel/Undo any un-confirmed routing change selections.
y
CONFIRM:
Press to confirm and activate newly made input/output routing selections.
u
NOTE: It is possible to configure multiple I/O routes prior to pressing the "CONFIRM" button.
MENU:
Press to enter the LCD menu, or to back out from menu items.
i
ENTER:
Press to confirm a selection within the LCD menu or to go deeper into a menu item.
o
+ & −:
Press to move up and down or adjust selections within the LCD menus.
a
ALL:
Press this button to select all outputs simultaneously for routing (the letters will flash in the LCD to indicate selection). Press it
s
a second time to de-select all outputs.
PRESET:
Press to enter the preset recall menu in the LCD window. Press the numbered "IN" button of the Preset you wish to activate
d
followed by the "CONFIRM" button to activate it.
LOCK:
Press to lock all button functions on the front panel. Press and hold for 3 seconds to release the lock function. The LCD will
f
display "LOCK" when the function is active.
INFO:
Press to show the current input/output routing and detected resolution on each output's OSD.
1 $
LCD WINDOW:
Displays the unit's menu, settings and information.
1 %
OPERATION CONTROLS & FUNCTIONS
3
