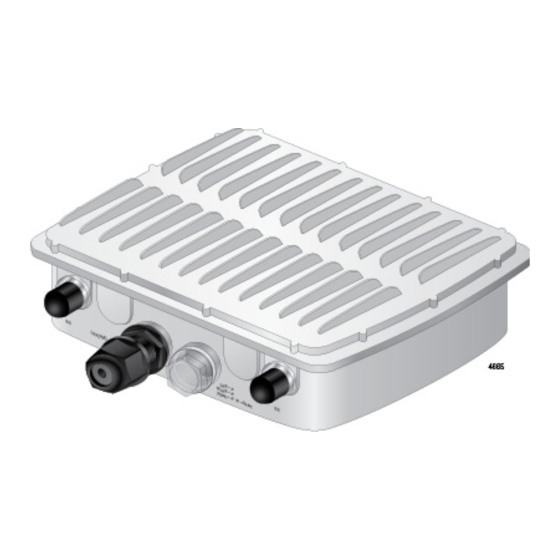
Allied Telesis AT-TQ5403e Instrukcja szybkiej instalacji - Strona 2
Przeglądaj online lub pobierz pdf Instrukcja szybkiej instalacji dla Bezprzewodowy punkt dostępowy Allied Telesis AT-TQ5403e. Allied Telesis AT-TQ5403e 2 stron. Outdoor

Installing the Access Point on a Wall
To install the access point on a wall, perform the following procedure:
Note
Screws for the wall, Phillip-head screwdriver, and pencil are not included in the
shipping box.
1.
Orient the mounting base to the access point.
Note
The access point must be installed the front panel with the LAN port down. The
mounting base can be in a vertical or horizontal position.
2.
Using the mounting base as a template, mark four holes with a pencil.
3.
Pre-drill the marked locations on a concrete wall.
4.
Attach the mounting base to the access point with the screws using a Phillips-head
screwdriver.
5.
Align the mounting base and the holes on the wall.
6.
Tighten the screws to install the access point to the wall.
Installing the Access Point on a Pole
To install the access point to a pole, perform the following procedure:
1.
Attach the pole-mount bracket to the pole with two U-bolds.
2.
Attach the access point to the pole-mount bracket with the screws using a Phillips-
head screwdriver.
Note: Attach the ground cable to the access point before attaching the mounting
base to the access point.
3.
To position the access point upward or downward, loose two bolts located on the
sides of the pole mount bracket using an adjustable wrench or a 10mm socket
ratchet.
4.
Adjust the angle of the access point upward or downward.
5.
Tighten the bolts.
Starting the Initial Management Session
The wireless access point has a DHCP client. The default setting for the client is enabled.
When you connect the access point to a PoE switch for the first time, the access point
queries the subnet on the LAN port for a DHCP server. If a DHCP server responds to its
query, the access point uses the IP address the server assigns to it. If there is no DHCP
server, it uses the default IP address 192.168.1.230.
To start the initial management session, perform the following procedure:
1.
Start the web browser on your management workstation.
4
2.
Enter the IP address of the access point in the URL field of the web browser.
The address is one of the following:
If your network does not have a DHCP server, enter the default address
192.168.1.230.
If your network has a DHCP server, enter the IP address the DHCP server
assigned to the access point.
The access point displays the login prompt.
3.
Enter "manager" for the username and "friend" for the password. The username and
password are case-sensitive.
Setting the Country Setting
For instructions on setting the country setting, see the AT-TQ5403e Installation Guide.
Federal Communication Commission Interface Statement
This device complies with Part 15 of the FCC Rules. It has been tested and found to
comply with the limits for a Class B digital device, pursuant to Part 15 of the FCC Rules.
For more information, refer to the AT-TQ5403e Installation Guide.
European Union Restriction of the Use of Certain Hazardous
Substances (RoHS) in Electrical and Electronic Equipment
This Allied Telesis RoHS-compliant product conforms to the European Union Restriction
of the Use of Certain Hazardous Substances (RoHS) in Electrical and Electronic
Equipment. Allied Telesis ensures RoHS conformance by requiring supplier Declarations
of Conformity, monitoring incoming materials, and maintaining manufacturing process
controls.
Europe - EU Declaration of Conformity
This device complies with Directive 2014/53/EU issued by the Commission of the
European Community. For more information, see the AT-TQ5403e installation Guide.
Note: Contact Allied Telesis for the EU conformity statement. Visit our website at
www.alliedtelesis.com.
Copyright 2019 Allied Telesis, Inc. All rights reserved.
No part of this publication may be reproduced without prior written permission from Allied
Telesis, Inc.
Allied Telesis and the Allied Telesis logo are trademarks of Allied Telesis, Incorporated. All
other product names, company names, logos or other designations mentioned herein are
trademarks or registered trademarks of their respective owners.
Allied Telesis, Inc. reserves the right to make changes in specifications and other
information contained in this document without prior written notice. The information
provided herein is subject to change without notice. In no event shall Allied Telesis, Inc. be
liable for any incidental, special, indirect, or consequential damages whatsoever, including
but not limited to lost profits, arising out of or related to this manual or the information
contained herein, even if Allied Telesis, Inc. has been advised of, known, or should have
known, the possibility of such damages.
5
6
