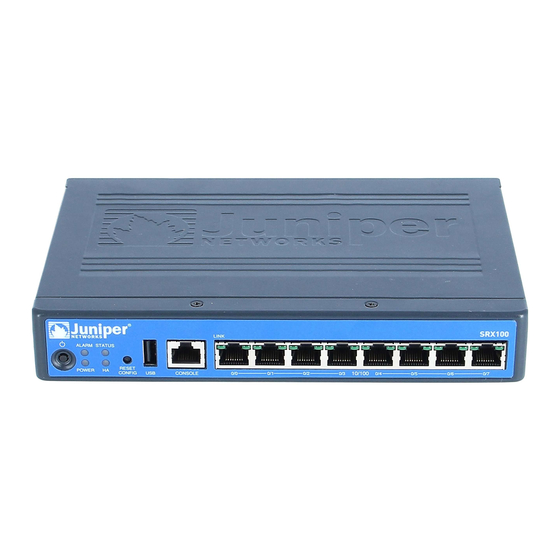
Dell PowerConnect J-SRX100 Skrócona instrukcja obsługi - Strona 3
Przeglądaj online lub pobierz pdf Skrócona instrukcja obsługi dla Przełącznik Dell PowerConnect J-SRX100. Dell PowerConnect J-SRX100 36 stron. Services gateway

M
2: O
S
IP A
ETHOD
BTAINING A
TATIC
Use the fe-0/0/0 port to connect to your ISP. Your ISP will have provided a static IP
address. You will not receive an IP address using the DHCP process.
If you are using this method to obtain an IP address on your services gateway, follow
the instructions from Part 7 to Part 10 in this document.
Part 7: Access the J-Web Interface
1.
Launch a Web browser on the management device.
2.
Enter http://192.168.1.1 in the URL address field. The J-Web login page is
displayed.
3.
Specify the default user name as root. Do not enter any value in the Password field.
4.
Click Log In. The J-Web Initial Setup page is displayed.
Part 8: Configure the Basic Settings
Configure the basic settings, such as Host Name, Domain Name and Root Password for
your services gateway.
IMPORTANT: Ensure that you have configured the IP address and root password before
you apply the configuration.
All fields marked with an asterisk (*) are mandatory.
NOTE:
If you have used Method 2 in Part 6 to obtain an IP address on your services gateway,
ensure that you make the following J-Web modifications:
Information in this document is subject to change without notice. All rights reserved. Reproduction of these materials in any manner whatsoever without the written permission of Juniper Networks is strictly forbidden. Trademarks used
in this text: Dell™, the DELL™ logo, and PowerConnect™ are trademarks of Dell Inc. Juniper Networks® and G33® are registered trademarks of Juniper Networks, Inc. in the United States and other countries. All other trademarks,
service marks, registered trademarks, or registered service marks are the property of their respective owners. Juniper Networks assumes no responsibility for any inaccuracies in this document. Juniper Networks reserves the right to
change, modify, transfer, or otherwise revise this publication without notice. Products made or sold by Juniper Networks or components thereof might be covered by one or more of the following patents that are owned by or licensed to
Juniper Networks: U.S. Patent Nos. 5,473,599, 5,905,725, 5,909,440, 6,192,051, 6,333,650, 6,359,479, 6,406,312, 6,429,706, 6,459,579, 6,493,347, 6,538,518, 6,538,899, 6,552,918, 6,567,902, 6,578,186, and 6,590,785. Copyright ©
2010, Juniper Networks, Inc. All rights reserved. Printed in USA. Part Number: 530-036265 REV 01, July 2010.
O
Y
S
G
DDRESS
N
OUR
ERVICES
ATEWAY
1.
Unselect the Enable DHCP on fe-0/0/0.0 check box.
2.
Enter the manual IP address provided by your ISP in the fe-0/0/0.0 address field.
The IP address must be entered in the a.b.c.d/xx format, where xx is the subnet
mask.
3.
Enter the IP address of the gateway in the Default Gateway field. The IP address for
the gateway is also provided by the ISP.
4.
Enter server names in the DNS name servers field. The server names will be
provided by your ISP.
5.
Apply the configuration.
Part 9: Apply the Basic Configuration
1.
Click Commit to save the basic configuration.
2.
Click Apply to apply the basic configuration.
To make any changes to the interface configuration, see the Branch SRX Series
NOTE:
Services Gateways Golden Configurations at
http://www.juniper.net/us/en/local/pdf/app-notes/3500153-en.pdf.
Part 10: Verify the Configuration
Access http://www.support.dell.com to ensure that you are connected to the internet.
This connectivity ensures that you can pass traffic through the services gateway.
If the http://www.support.dell.com page does not load, verify your configuration
NOTE:
settings, and ensure that you have applied the configuration.
After you have completed these steps, you can pass traffic from any trust port to the
untrust port.
Powering Off the Device
To power off the services gateway, you can shut it down in one of the following ways:
Graceful shutdown—Press and immediately release the Power button. The device
begins gracefully shutting down the operating system.
Immediate shutdown—Press the Power button and hold it for 10 seconds. The
device immediately shuts down. Press the Power button again to power on the
device.
You can reboot or halt the system in J-Web by selecting Maintain > Reboot.
NOTE:
For additional configuration information, see the Branch SRX Series Services Gateways
Golden Configurations at
http://www.juniper.net/us/en/local/pdf/app-notes/3500153-en.pdf.
For detailed software configuration information, see the software documentation
available at http://www.juniper.net/techpubs/software/junos-srx/index.html.
Contacting Dell
For technical support, see http://www.support.dell.com.
