Miller CS Series Instrukcja obsługi - Strona 10
Przeglądaj online lub pobierz pdf Instrukcja obsługi dla Latarka Miller CS Series. Miller CS Series 20 stron.
4-2. Required Torch Parts And Torch Assembly − WP Series Water-Cooled Torches
5
6
7
17
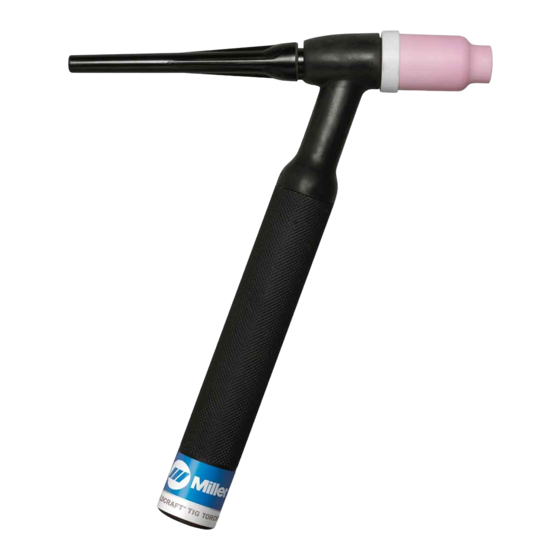
4-3. Required Torch Parts And Torch Assembly − WP Series Air-Cooled Torches
1
15
Assembling Torch Parts
1
Cup
2
Collet Body
3
Collet
4
Heat Shield
5
Backcap Insulator
6
O-Ring
7
Backcap
8
Torch Body/Torch Head
OM-251981 Page 6
Assembling Torch Parts
4A
2
3
4
8
9
12
4
3
2
8
!
Before welding, insure that the torch
head is firmly attached to the torch
body.
9
Handle
10 One-Piece Power Cable
11 Power Cable Adapter
12 International Style Flow-Through
Adapter
.
The adapter is needed only if torch is
equipped with one-piece cable.
13 Two-Piece Power Cable
1
1
4B
10
13
14
11
15
16
7
6
5
9
Or
13
1
Backcap
2
O-Ring
3
Collet
4
Torch Body (Standard)
4A Torch Body (Pencil)
4B Torch Body (w/Gas Valve)
5
Heat Shield
6
Collet Body
7
Cup
8
Gas Lens
9
Gas Lens Nozzle
10 Handle
11 Power Cable
12 Water Hose
13 Gas Hose
14 Power Cable Adapter
15 International Style Adapter
16 Water Hose For International Style
Adapter
Assembling Torch Body
Keep connections tight. Replace cup,
heat shield, and backcap as needed.
17 Tungsten Electrode (See Section 7)
Installing Tungsten
To adjust tungsten position, loosen back-
cap.
10
14
14 International Style Connector
.
The connector is needed only if torch is
equipped with two-piece cable (see
Section 4-7B).
Assembling Torch Body
Keep connections tight. Replace cup, heat
shield, and backcap as needed.
15 Tungsten Electrode (See Section 7)
Installing Tungsten
To
adjust
tungsten
position,
backcap.
804308-B
11
12
804305-A
loosen