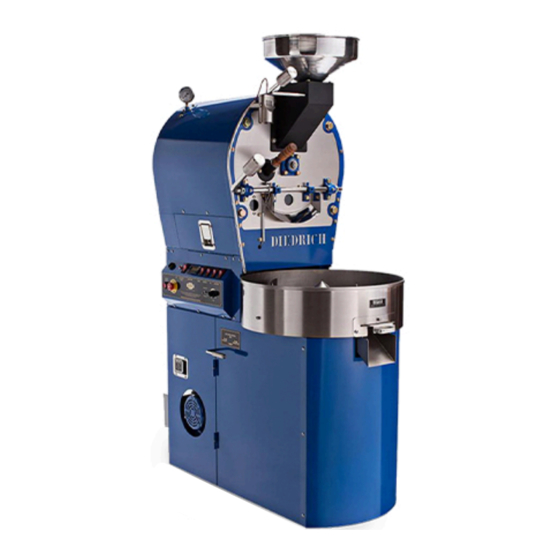
Diedrich Roasters IR-5 Skrócona instrukcja obsługi
Przeglądaj online lub pobierz pdf Skrócona instrukcja obsługi dla Urządzenia kuchenne Diedrich Roasters IR-5. Diedrich Roasters IR-5 2 stron. Manual roaster
Również dla Diedrich Roasters IR-5: Skrócona instrukcja obsługi (7 strony)

TECHNICAL SUPPORT HOTLINE
(888) 519-0069 M-F 7A-3:30P PST
You must familiarize with the components of this roaster
before utilizing this Quick Start Guide!!
(refer to Installation & Operation Manual pgs. 14,15, &16
INITIAL START-UP PROCEDURE
1. Ensure Emergency Stop Button is disengaged (out) position (If
pushed in, twist knob to release)
2. Ensure the "Pilot Only/Burners On" switch is in the "PILOT
ONLY" position (3).
3. Verify that the air flow handle in the "COOLING BIN" position.
4. Confirm that the "GAS" knob (4) is turned all the way to the left
(counterclockwise) = Minimum position.
5. A. For Standard roasters:
Activate the switches sequentially as follows:
• Drum (5)
• Blower (6)
• Gas (7)
B. For Universal roasters:
Turn on the switches sequentially as follows:
• Drum (5)
• Gas (7)
Wait for the
green
air light to illuminate,
• Blower (6) switch.
6. Once the pilot is lit, switch to the "Burners On" (3) position and
use the gas control knob to adjust the flame intensity (NOTE: IT
MAY TAKE SEVERAL ATTEMPTS AS AIR MAY NEED TO BE
PURGED FROM THE GAS LINE)
7. Move the Gas (7) knob to desired flame setting and watch the
"Bean Temperature Display" (1).
8. Allow the roaster warm to 400°F - 450°F
Check the exhaust and gas connections for leaks.
*PERFORM DRUM SEASONING PROCEDURE on other side prior to
roasting for consumption!!
*
MANUAL IR-5/IR-12 ROASTER
QUICK START GUIDE
ATTENTION!!
ALL SYSTEMS (Electrical, Gas, and HVAC) MUST BE
CONNECTED, FUNCTIONING AND INSPECTED (if required) PRIOR
TO USING THIS QUICK START GUIDE
COMPONENT DESCRIPTIONS:
1 = BEAN TEMP display: Drum bean temperature
2 = AIR INDICATOR LIGHT:
Standard Model roasters have a
red
airflow is diminished causing the gas ignition system to shut
down. (clean all roaster air ducts and impeller housing)
Universal Model roasters have a
green
illuminated during normal operation. When light goes out, this
indicates abnormal airflow caused by outside air disturbances.
3 = PILOT ONLY / BURNERS ON switch: Toggles
gas system from pilot to main burners
4 = GAS knob: Controls the flame intensity of burners
5 = DRUM switch: Starts drum rotation
6 = BLOWER switch: Starts blower motor
7 = GAS switch: Starts gas ignition system
8 = AGITATOR switch: Starts bean stir in Cooling Bin
9 = RESET switch: When temperature exceeds
485°F, the temperature high limit module will trip.
Once cool, reset used to reignite pilot/burners
10=EMERGENCY STOP button: Stops all functions of
the roaster
11=E-STOP RESET button: Twist the Emergency
Stop button (10) to release and press this button
to reset
"THROUGH COOLING BIN "
"50 / 50 "
Keep this guide with the roaster at all times
• Keep your roaster clean! – the most common issue
light. It is illuminated when
• Frequent cleaning will also keep the air velocity
light. It will be
• Don't forget to grease the bearings.
Turn the "Gas" switch (7) OFF and set the "Gas" (4) knob to the
1.
"MINIMUM" position
Make sure the "Pilot Only/Burners On" (3) toggle switch is in
2.
the "Pilot Only" position.
3.
After the temperature reading has dropped to 250ºF (120ºC) or
lower, set the "Blower" (6) and "Drum" (5) switches to "OFF".
4.
Remove the chaff from the lower compartments of the roaster.
"THROUGH ROASTING DRUM"
5.
Open the side doors to remove chaff and for general cleaning.
Inspect for smoldering chaff. If found, extinguish with water (a
6.
small spray bottle is recommended for this purpose).
7.
Using a vacuum, clean the cooled chaff out of the roaster.
Things to remember...
occurs when the Impeller Housing and associated
ducting is not scraped down to the metal surface and
vacuumed out. This roaster is equipped with an "Air
Pressure Switch" that will disrupt the gas ignition
system when excessive build-up (1/8" max.) is present.
more constant, rendering your coffee quality more
consistent.
SHUT DOWN PROCEDURE
