Olympus Camedia MCON-35 Instrukcje
Przeglądaj online lub pobierz pdf Instrukcje dla Obiektyw kamery Olympus Camedia MCON-35. Olympus Camedia MCON-35 2 stron. Macro extension lens pro
MACRO EXTENSION
LENS PRO
MCON-35
INSTRUCTIONS
BEDIENUNGSANLEITUNG
MODE D'EMPLOI
INSTRUCCIONES
1
●
2
●
1
E
This lens is for E-10 series Olympus digital cameras. It allows you to take close-up pictures with an easy
attachment to the front of the lens.
How to attach
1
Turn off the camera's power.
●
If a filter is already mounted on the camera lens, remove it.
2
Place the macro extension lens on the camera lens, then screw it in clockwise (illus.
●
Do not turn the macro extension lens forcefully.
How to photograph
1
Make sure your subject is within the shooting range.
2
(illus.
)
D
Dieser Konverter ist für Olympus Digitalkameras der Modellreihe E-10 vorgesehen. Ermöglicht
Nahaufnahmen mit einfacher Anbringung an der Objektiv-Vorderseite.
Anbringung an der Kamera
1
Die Kamera ausschalten.
●
Falls ein Objektivfilter an der Kamera angebracht ist, muß dieses abgenommen werden.
2
Den Nahaufnahme-Konverter an der Objektivfassung ansetzen und dann im Uhrzeigersinn
1
festschrauben (Abb.
).
●
Den Konverter ohne zu große Druckausübung festschrauben.
Fotografieren
1
Achten Sie darauf, daß sich das Motiv im
2
Aufnahmebereich befindet (Abb.
)
F
Ce convertisseur est prévu pour des appareils photo numériques Olympus de la série E-10. Il vous
permet de prendre des vues gros plan avec une fixation facile sur le devant de l'objectif.
Fixation
1
Couper l'alimentation de l'appareil photo.
●
Si un filtre est déjà monté sur l'objectif de l'appareil, le retirer.
2
Placer le convertisseur gros plan sur l'objectif de l'appareil, puis le visser dans le sens des aiguilles
1
d'une montre (Illustration
).
●
Ne pas tourner le convertisseur gros plan en forçant.
Prise de vues
1
S'assurer que le sujet est dans la plage de prise de
2
vues. (Illustration
)
S
Este objetivo es para las cámaras digitales Olympus de la serie E-10. Le permite fotografiar en primer
plano por medio de un acoplamiento fácil en la parte frontal del objetivo.
Colocación
1
Desactive la alimentación de la cámara.
●
Si ya tiene un filtro colocado en el objetivo de la cámara, retírelo.
2
Coloque el objetivo de extensión macro en el objetivo de la cámara, luego atorníllelo en el sentido de
1
las agujas del reloj. (ilust.
).
●
No gire el objetivo de extensión macro forzadamente.
Cómo fotografiar
1
Asegúrese de que su sujeto esté dentro del alcance
2
de la toma (ilust.
)
HOW TO ATTACH/ANBRINGUNG/
FIXATION/COLOCACION/
/
Camera/
Kamera/
Appareil photo/
Cámara/
1
Macro extension lens/
Nahaufnahme-Konverter/
Convertisseur gros plan/
Objetivo de extensión macro/
1
2
2
12cm
1
).
Shooting range
2
illus.
12cm
(4.7in.)
Aufnahmebereich
2
12cm
Plage de prise de vues
2
12cm
Gama de fotografiado
2
12cm
(4,7in.)
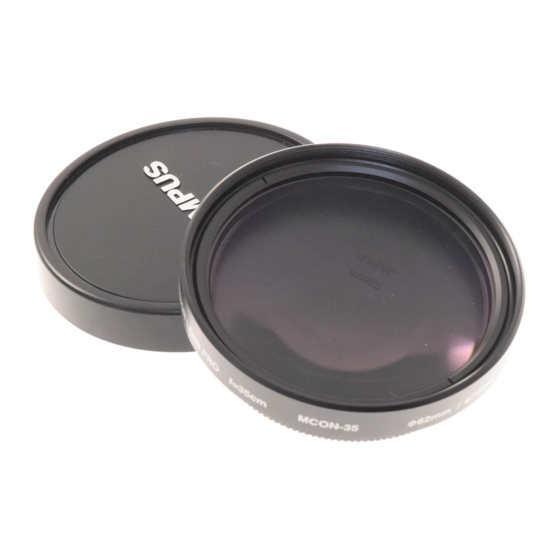
CONTENTS/INHALT/CONTENU/CONTENIDO/
Macro extension lens/
Nahaufnahme-Konverter/
Convertisseur gros plan/
Objetivo de extensión macro/
Case/
Aufbewahrungstasche/
Étui/
Estuche/
2
●
35cm
2
Look through the viewfinder and position the autofocus mark on the subject, then take the picture.
●
Use the zoom lever or move the camera to change the angle of view or the magnification. (See the
chart below.)
Working distance (cm)
Focal point
Zoom
extension lens)
WIDE
Close-up
TELE
Close-up
* Please also read the camera instructions before taking a picture.
35cm
(13.8 in.)
2
Die Kamera so halten , daß die Sucher-Autofocus-Markierung auf das Motiv ausgerichtet ist. Dann die
Aufnahme herstellen.
●
Der Blickwinkel und/oder der Vergrößerungsfaktor kann mit dem Zoomregler verändert werden.
Andernfalls die Kameraposition verändern. (Siehe die nachfolgende Tabelle.)
Arbeitsbereich (cm)
Zoom
Brennpunkt
(ab der Nahaufnahme-
Konverterlinse)
WIDE
Nahaufnahme
TELE
Nahaufnahme
* Vor dem Fotografieren bitte auch die zur Kamera gehörige Bedienungsanleitung lesen.
35cm
2
Regarder par le viseur et positionner les repères de mise au point automatique sur le sujet, puis
prendre la photo.
●
Utiliser le levier de zoom ou déplacer l'appareil pour changer l'angle de vue ou le grossissement.
(Voir le tableau ci-dessous.)
Point focal
Zoom
fonctionnement (cm) (du
convertisseur gros plan)
WIDE
Gros plan
TELE
Gros plan
* Veuillez également lire le mode d'emploi de l'appareil photo avant de prendre une photo.
35cm
2
Mire a través del visor y posicione la marca de enfoque automático en el sujeto, luego tome la fotografía.
●
Utilice el mando de zoom o mueva la cámara para cambiar el ángulo de visualización o ampliación
(Consulte la tabla de abajo).
Distancia de operación (cm)
Zoom
Punto focal
(desde el objetivo de
extensión macro)
WIDE
Primer plano
TELE
Primer plano
* Sírvase leer las instrucciones de la cámara antes de tomar un fotografiado.
35cm
(13,8 in.)
Picture size (mm)
Magnification
(from macro
35 (13.8 in)
333 x 251(13.1in. x 9.9 in.)
1/38 X
12 (4.7 in)
147 x 110(5.8 in. x 4.3 in.)
1/17X
35 (13.8 in)
86 x 65(3.4 in. x 2.6 in.)
1/9.9X
12 (4.7 in)
49 x 37(1.9 in. x 1.5 in.)
1/5.6X
Bildgröße (mm)
Vergrößerung
35
333 x 251
1/38 X
12
147 x 110
1/17X
35
86 x 65
1/9,9X
12
49 x 37
1/5,6X
Distance de
Taille d'image (mm)
Agrandissement
35
333 x 251
1/38 X
12
147 x 110
1/17X
35
86 x 65
1/9,9X
12
49 x 37
1/5,6X
Tamaño de la fotografía
Ampliación
(mm)
35 (13,8 in)
1/38 X
333 x 251(13,1in. x 9,9 in.)
12 (4,7 in)
147 x 110(5,8 in. x 4,3 in.)
1/17X
35 (13,8 in)
86 x 65 (3,4 in. x 2,6 in.)
1/9,9X
12 (4,7 in)
49 x 37(1,9 in. x 1,5 in.)
1/5,6X
Front cap/
Vordere Schutzkappe/
Bouchon avant/
Tapa frontal/
Rear cap/
Hintere Schutzkappe/
Bouchon arrière/
Tapa trasera/
Instructions/
Bedieungsanleitung/
Mode d'emploi/
Instrucciones/