Olympus DIEGO ELITE Instrukcja konfiguracji i obsługi - Strona 2
Przeglądaj online lub pobierz pdf Instrukcja konfiguracji i obsługi dla Sprzęt medyczny Olympus DIEGO ELITE. Olympus DIEGO ELITE 3 stron.
SETUP AND OPERATION – QUICK-REFERENCE GUIDE
7
Attach irrigation: Lift the top of the pump and ensure
the black sleeve of the irrigation tubing is centered. It is
important to ensure that enough tubing is left to reach the IV
bag. Close the top. Thread the tubing up through the keeper
on the side of the console. Hang fluid, spike the bag, and
press "Prime" on the console.
8
Ensure the
communication cable
between the console
and suction module is
connected. Power cord(s)
need to be attached to
the back of the unit(s)
and wall outlet(s).
If using the Olympus
suction module, insert the filter end of the Olympus suction
tubing (EGTS102SF) into the suction connection on the front of
the optional suction module. Attach the blue suction connector
at the other end of the suction tubing to the suction canister.
9
Activation: The foot pedal activates the handpiece for
cutting and drilling.
Toggle stop: Tap once to open
or close the blade window
10
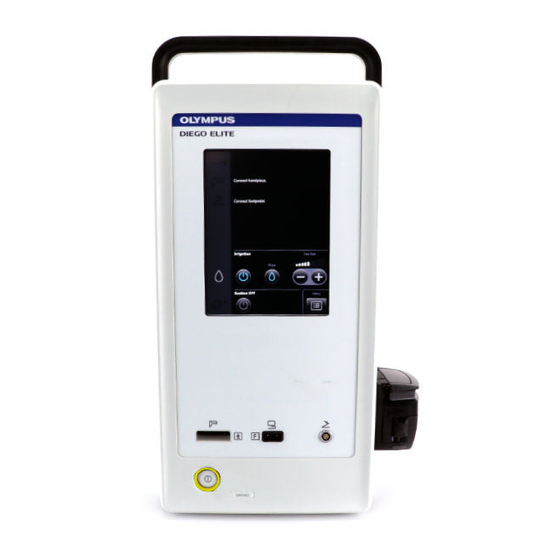
"Ready" appears when setup
is complete.
Cutting active:
A green background appears behind
max RPM while the foot switch is being
pressed.
RF active:
A blue background appears behind RF
power when the blue RF activation button
on the blade is pressed.
When both cutting and RF are activated,
both backgrounds illuminate.
This setup guide is only a summary of the DIEGO ELITE instructions for use (IFU). For detailed operating instructions, be sure to follow the
DIEGO ELITE instruction manual that was included with your device when purchased.
Suction
Blade
5000
Max RPM
Constant
Variable
Monopolar RF
10
Irrigation
Flow Rate
Prime
Suction
MENU
RF activation
button
Specifications, design, and accessories are subject to change without any notice or obligation on the part of the manufacturer.
Postbox 10 49 08, 20034 Hamburg, Germany
Wendenstrasse 14–18, 20097 Hamburg, Germany
Phone: +49 (0)40 237 730, Fax: +49 (0)40 230 761
www.olympus-europa.com
11
Clogging: Depending on
the tubing you are using,
you have two options.
The declog tube set requires bulb
assembly prior to the start of the
procedure. Ensure that the blade
window is fully submerged in water
before activating the bulb.
12
Using image guidance systems (IGS): Any blade or burr
listed in the image guidance systems compatible blades/
burrs table (please refer to section 2.15 of the IFU) can be
used with the BRAINLAB optical image guidance system by
attaching the universal adapter (provided by BRAINLAB) to
the boss attachment point on the declog tube set.
13
End of procedure: Turn the unit off. Disconnect the handpiece
and grounding pad from the console. Press both blade release
buttons to remove the blade. Squeeze the tube-set release to
remove the tubing from the handpiece. Immediately following the
case, wipe the handpiece with a moistened cloth. Clean, disinfect,
and sterilize the handpiece according to IFU instructions.
Stylets are packaged with standard tube
sets. Apply gentle force when clearing
obstructions.
Blade
Tube-set
release
release