Olympus U-LLG150 Instrukcja obsługi - Strona 8
Przeglądaj online lub pobierz pdf Instrukcja obsługi dla Sprzęt laboratoryjny Olympus U-LLG150. Olympus U-LLG150 20 stron. Light guide illumination system
2
ASSEMBLY
1
a
Fig. 1
2
4
3
Fig. 2
6
Fig. 3
4
1
CAUTION
CAUTION
5
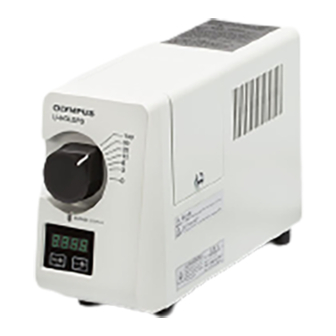
Mounting the Light Guide
1
a
Hold the connector
of the light guide and insert it to the light guide
socket of the light source unit.
2
Loosen the light guide fixing screws with the Allen screwdriver provided
with the microscope.
? Make sure that the light guide screw is loosened enough. If not, the
connector of light guide will hit the light guide screw and it can not
be inserted to the right position.
3
Insert the other light guide connecter to the light guide adapter.
4
Tighten the light guide fixing screws firmly by using the Allen
screwdriver provided with the microscope.
If the light guide fixing screws are not tightened firmly, the light
guide can slip out and cause fire.
5
Mount the light guide adapter to the illuminator.
6
Tighten the fixing screw with the Allen screwdriver provided with the
microscope.
• Never subject cords and liquid light guides to excessive bending
or twisting because they can easily be damaged.
• Do not turn on the lamp without attaching the liquid light guide
and liquid light guide adapter to the microscope. The UV light
is included in the lights from this lamp. Looking directly into the
light may damage your eyes. Also, it could cause fire.
(Figs. 1 to 3)