Cisco Cisco 7960 Podręcznik użytkownika - Strona 13

Przeglądaj online lub pobierz pdf Podręcznik użytkownika dla Telefon IP Cisco Cisco 7960. Cisco Cisco 7960 19 stron. Ip phone & unity voicemail
Również dla Cisco Cisco 7960: Podręcznik użytkownika (12 strony), Indywidualna instrukcja obsługi (2 strony), Podręcznik (35 strony), Podręcznik użytkownika (15 strony), Instrukcja instalacji i konfiguracji (10 strony), Podręcznik użytkownika (23 strony), Podręcznik użytkownika (14 strony), Podręcznik referencyjny (2 strony), Skrócona instrukcja obsługi (2 strony), Podręcznik użytkownika (28 strony), Podręcznik użytkownika (16 strony), Skrócona instrukcja obsługi (2 strony), Podręcznik użytkownika (9 strony), Podręcznik referencyjny (4 strony), Skrócona instrukcja obsługi (12 strony), Podręcznik (8 strony), Skrócona instrukcja obsługi (12 strony), Podręcznik użytkownika (20 strony), Podręcznik użytkownika (14 strony), Skrócona instrukcja obsługi (12 strony), Podręcznik administratora (10 strony), Podręcznik użytkownika (6 strony), Skrócona instrukcja obsługi (2 strony), Podręcznik referencyjny (17 strony), Skrócona instrukcja obsługi (2 strony), Podręcznik użytkownika (3 strony), Skrócona instrukcja obsługi (2 strony), Instrukcja szybkiej instalacji (1 strony), Podręcznik (21 strony), Podręcznik użytkownika (3 strony), Pierwsze kroki (50 strony), Skrócona instrukcja obsługi (6 strony), Skrócona instrukcja obsługi (2 strony), Skrócona instrukcja obsługi (2 strony), Skrócona instrukcja obsługi (2 strony), Podręcznik dla początkujących (27 strony), Podręcznik referencyjny (3 strony), Podręcznik użytkownika (12 strony), Podręcznik użytkownika (12 strony)
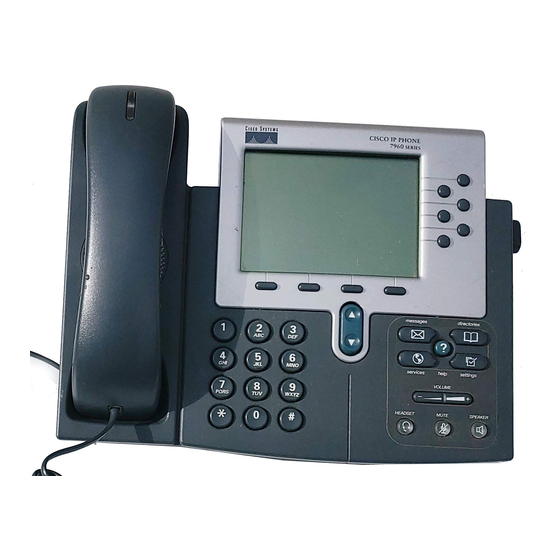
Cisco Cisco 7960 Podręcznik użytkownika
• cBarge—Use this soft key to add yourself to an existing call on a shared line and to turn the call into a standard conference
call. This feature is available only on phones that use shared lines.

Place a Conference Call

To place a three-party conference call, use the following method:
1. During a call, press the more soft key and then the Confrn soft key to open a new line and put the first party on hold.
2. Place a call to another number.
3. When the call connects, press the Confrn soft key again to add the new party to the existing call with the first party.
To establish a conference call between two callers to a Cisco Unified IP phone, one active and the other on hold, press the Confrn
soft key.
To establish a conference call between two callers already present on a Cisco Unified IP phone, using separate line buttons, one
active and the other on hold, use the following method:
1. Press the Confrn soft key.
2. Press the Line button of the call you want to add to the three-party conference.

End a Conference Call

To end the conference call, use one of the following methods:
• Hang up the handset.
• Press the EndCall soft key.
Alternate Methods to End a Conference Call
Call initiators may use one of the following methods (functions vary according to your system configuration):
• To end the conference and remain connected to the most recent call, press the Confrn soft key. The older call is placed on
hold.
• To disconnect from the conference, hang up the handset. The other parties remain on the conference call.

Place a Call from Your Local Directory

To access the local phone directory established by the system administrator, use the following method:
1. Press the Directories button.
2. Press the Navigation Up or Down button or press 4 to select the Local Directory.
3. Press the Navigation Up or Down button to select the Last, First, or Number field search option.
4. Using the keypad, enter the last name or first name for the entry.
When entering letters, select the appropriate number key of the letter you want, and press that key a number of times that
equals the position of the target letter. For example, to enter a B, press the 2 key two times, and to enter a C, press the 2
key three times. Use the backspace (<<) soft key to make corrections while entering data.
5. Press the Search soft key to find your selection.
6. If your search results in multiple listings, use the Navigation Up or Down button to select the correct number.
7. Press the Dial soft key to dial the selected number.
13