Cisco Cisco 7960 Skrócona instrukcja obsługi - Strona 5

Przeglądaj online lub pobierz pdf Skrócona instrukcja obsługi dla Telefon IP Cisco Cisco 7960. Cisco Cisco 7960 12 stron. Ip phone & unity voicemail
Również dla Cisco Cisco 7960: Podręcznik użytkownika (19 strony), Podręcznik użytkownika (12 strony), Indywidualna instrukcja obsługi (2 strony), Podręcznik (35 strony), Podręcznik użytkownika (15 strony), Instrukcja instalacji i konfiguracji (10 strony), Podręcznik użytkownika (23 strony), Podręcznik użytkownika (14 strony), Podręcznik referencyjny (2 strony), Skrócona instrukcja obsługi (2 strony), Podręcznik użytkownika (28 strony), Podręcznik użytkownika (16 strony), Skrócona instrukcja obsługi (2 strony), Podręcznik użytkownika (9 strony), Podręcznik referencyjny (4 strony), Podręcznik (8 strony), Skrócona instrukcja obsługi (12 strony), Podręcznik użytkownika (20 strony), Podręcznik użytkownika (14 strony), Skrócona instrukcja obsługi (12 strony), Podręcznik administratora (10 strony), Podręcznik użytkownika (6 strony), Skrócona instrukcja obsługi (2 strony), Podręcznik referencyjny (17 strony), Skrócona instrukcja obsługi (2 strony), Podręcznik użytkownika (3 strony), Skrócona instrukcja obsługi (2 strony), Instrukcja szybkiej instalacji (1 strony), Podręcznik (21 strony), Podręcznik użytkownika (3 strony), Pierwsze kroki (50 strony), Skrócona instrukcja obsługi (6 strony), Skrócona instrukcja obsługi (2 strony), Skrócona instrukcja obsługi (2 strony), Skrócona instrukcja obsługi (2 strony), Podręcznik dla początkujących (27 strony), Podręcznik referencyjny (3 strony), Podręcznik użytkownika (12 strony), Podręcznik użytkownika (12 strony)
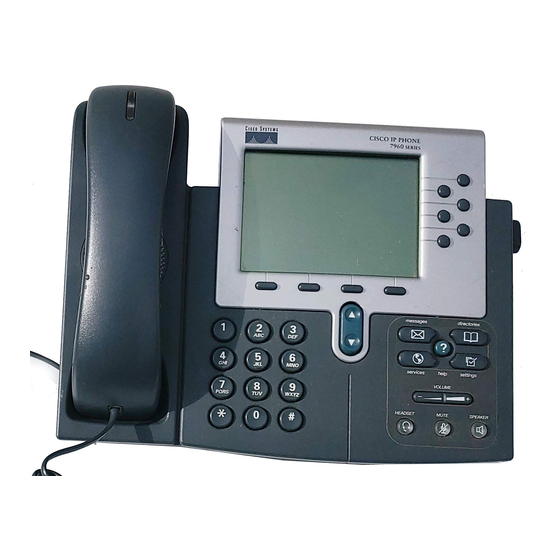
Cisco Cisco 7960 Skrócona instrukcja obsługi

Basic Features

Installing the IP Phone and Connecting to the Network

1. Connect an Ethernet cable to the Network port (middle port) on the phone.
2. Connect the handset and headset (if applicable) to their respective ports.
3. Connect the Ethernet cable from your Desktop PC to the Access Port on the IP Phone (optional).
4. Connect the power plug to the DC48V AC Adapter port (optional).
Note:
Before successfully installing the phone, the system administrator must prepare the network
for the phone.

Adjusting the Height of the Footstand

1. Push the footstand adjustment knob on the right-hand side of the phone.
2. With the button depressed, adjust the footstand to the desired height.
3. Depress the footstand adjustment knob.

Placing a Call

There are six options for placing a new call.
Lift the Handset and dial the number.
Press a Line button and dial the number.
Press the Speaker button and dial the number.
Press the Headset button and dial the number.
Press the NewCall soft key and dial the number.
Press a pre-configured Speed Dial button.
Internal Extension:
Dial the 4-digit extension
External Local Call:
Dial 3 + the entire 7-digit phone number
Long Distance :
Dial 3 + 1 the entire 10-digit phone number (area code + number)
Notes: After you press the 3 (for an outside line) you will hear a dial tone again to let you know you are
accessing an external line.
Pick up the handset. If you do not hear a dial tone, press an available line button to begin
making the call.
Press the SPEAKER button. If you do not hear a dial tone, press an available line button to begin
to make the call or press the NewCall soft key. If you do not hear a dial tone, press an
available line button to begin to make the call (the call will dial with the speakerphone on).

Answering a Call

There are four options for answering a call.
Lift the Handset.
Press the Answer soft key.
Press the Speaker button.
Press the Headset button.
UMR Information Technology
Quick Start Guide: Cisco 7940/7960 IP Telephone – 5