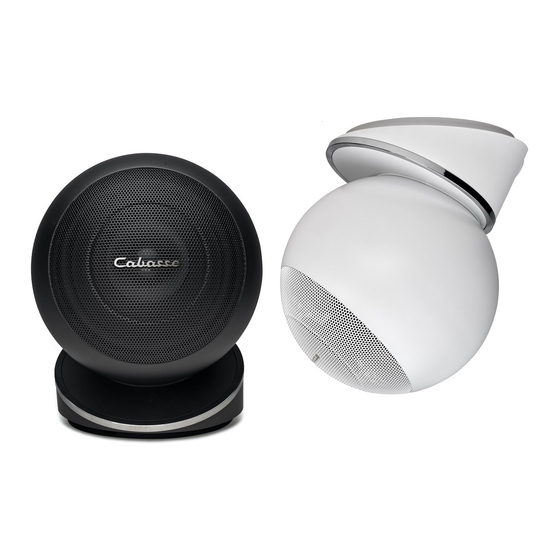
CABASSE Furio Instrukcja obsługi - Strona 8
Przeglądaj online lub pobierz pdf Instrukcja obsługi dla System głośników CABASSE Furio. CABASSE Furio 12 stron.
Również dla CABASSE Furio: Instrukcja obsługi (4 strony)

e n g l i s h
With the iO SYSTEM, Cabasse proposes a Hi Fi / audio video system based on the Spatially
Coherent Source (SCS) principles coming from our high end ARTIS range of speakers.
With these 2-way very compact speakers combined with a Furio active subwoofer,
you can get a very high quality system, either in a 2.1 configuration (standard stereo),
in a 5.1 configuration (5 channels system), 6.1 or 7.1...
The Furio Cabasse subwoofer
is dedicated to iO SYSTEM.
The Jupiter II and Thor II Cabasse sub-
woofer series can be used with iO speakers. If you wish to
use another active subwoofer, check that the frequency
bandwidth of the subwoofer is adjustable up to 200 Hz with
a very 24 dB slope at 200 Hz.
We recommend the use of the Furio, Jupiter II or Thor II sub-
woofers for their power handling capacity, especially for a
3 channels or more set-up.
Attention, not a must in a 2.1 set-up, the Max Cabasse
module is absolutely necessary with 3 or more iO spea-
kers when the AV receiver does not allow stereo use of a subwoofer
and/or adjustment of the subwoofer bandwidth up to 200 Hz.
SET-UP
The components of your system:
2, 3 or 5 iO speakers
1 Furio active subwoofer
1 Cabasse Max module if your system consists in 3 iO
speakers or more.
iO speaker on base
The wall mountable version of the iO speaker requires a single
screw to be positioned on a wall
is also designed for the iO speaker to be positioned on furni-
ture like a bookshelf or a TV-set.
The magnetic link between the sphere and its foot enables a very
easy orientation towards the listening area
ted with 3 cables outputs (in its centre and in both ends) and
the bottom panel integrating the Cabasse logo can be turned
180°, so that you can choose the most elegant way for the
cables.
Attention, the vent hole located at the back of the sphere should
not be sealed by the base.
iO speaker stand version
The stand version is supplied with adjustable spikes for a per-
fect stability even if the floor is not horizontal.
iO SYSTEM positioning
Positioning of the speakers: if possible, try to match with the
drawing, with the Furio subwoofer in the front area facing the lis-
tening spot. Its position against a wall reinforces the extreme low
1
. The base of this version
2
. The foot is fit-
3
register and limits the reflections between 80 and 200 Hz. Howe-
ver to obtain the best result, it is always necessary to carry out
tests according to the acoustics of the room.
Attention, on some sensitive TV-sets, the magnetic shielding of the
iO speaker might not be effective enough because of the radia-
tions throughout the diaphragm of the tweeter. You should then place the
iO speaker 10 cm away from the top of the TV.
CONNECTIONS
It is imperative to respect the correct phasing when connecting:
+ to + (red) and - to - (black). To connect the speaker cable to
the terminals of the iO speaker, pull out the bottom plate from
the base. If your cables are coming out from the wall just
behind iO speaker, have the cables go through the bottom
plate before connecting them to the iO speaker terminals.
Configuration 2.1 (stereo)
2 iO speakers + 1 Furio subwoofer
Connect with speaker cables the amplifier outputs to the ter-
minals HIGH LEVEL INPUT L (left) and HIGH LEVEL INPUT R
(right) of the Furio subwoofer and connect the outputs HIGH
LEVEL OUTPUT L (left) and HIGH LEVEL OUTPUT R (right)
of the Furio subwoofer to the iO speaker inputs
Configuration 5.1 with the Max
5 iO speakers + 1 Furio subwoofer or 2 main
speakers + 3 iO speakers + 1 Furio subwoofer
Connect each speaker output of the 5.1 amplifier directly to the
matching iO speaker (front right, front left, centre, etc.). Connect
all the 5 sets of inputs of the Max Cabasse module to the spea-
ker outputs of the 5.1 amplifier, in parallel with the speaker cables
7
connected to the iO speakers
connected to any speaker outputs of the amplifier, but be very
careful in not mixing polarities: always connect + to + (or red to
red and black to black). Connect the CINCH RCA output of the
Max Cabasse module to one of the CINCH RCA LINE IN post of
the subwoofer with a shielded interconnect cable. Connect the
subwoofer CINCH RCA output of the amplifier to the second CIN-
CH RCA LINE IN post of the subwoofer.
Then adjusts the set-up menu of your audio video amplifier:
FRONT
CENTER
SURROUND
SUBWOOFER / LFE
4
5
.
6
8
or
. The 5 inputs can be
LARGE
LARGE
LARGE
YES
