Dillinger Labs Aquarius Instrukcja obsługi - Strona 4
Przeglądaj online lub pobierz pdf Instrukcja obsługi dla Głośniki Dillinger Labs Aquarius. Dillinger Labs Aquarius 19 stron.
Również dla Dillinger Labs Aquarius: Instrukcja obsługi (18 strony)

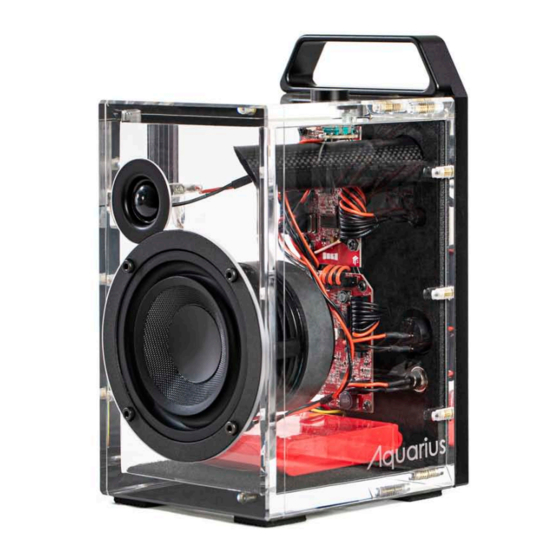
9. Drivers: Woofer/Tweeter
We have selected the drivers
for Aquarius with great care.
The woofer's frame is a cast
aluminium basket with a
carbon fibre cone. The ceramic
core screams "attitude" with a
punchy, dynamic and clean sound.
The tweeter, on the other hand,
provides a smooth, mellow response from its silk dome.
Besides the superior material quality of the woofer and tweeter,
the mounting location of the tweeter plays an important role. To
widen the stereo image delivered by Aquarius, the tweeters are
pushed to the extreme left and right in their respective speaker.
10. Feet
Keeping a powerful speaker like Aquarius in one place is no
small feet. Get it? Feet??
Take a moment and gaze upon Aquarius' Feet. Whatever
surface you place these speakers on, the Feet will never allow
the speaker to creep. Aquarius speakers will stay exactly where
you want them even at maximum volume.
11. The Back Plate
The back plate serves as the backbone of Aquarius - holding it
all together and looking good while doing it.
Aquarius' back plate is manufactured by machining a large
block of aluminium into its final shape. This manufacturing
technique is deliberately chosen to achieve the rigid structure
required to endure the extensive vibration your speakers will
experience through their long lifetime.
The back plate acts as a two-pound aluminium heatsink for the
electronics — especially the Class-D Amplifier. Thanks to the
large surface contact between the amp and the backplate, any
heat dissipated is effortlessly diverted into the aluminium.
Excellent heat transfer ability allows us to drive the amp at its
maximum power level indefinitely.
The backplate also sports the
SKAA icon. When you see this,
you know good things are coming.
12. One Control
The Bond Button/Knob gives you full control of your
speakers with a push and twist.
Want to change the volume?
— rotate the knob.
Want to search the Green List for your favourite Transmitters?
— single click the Bond Button.
Want to play audio from a new Transmitter?
— double-click the Bond Button.
Check out the SKAA Receiver's User Guide later in this
manual for a complete list of SKAA commands.
Power users: check out our video diving deep into the Bond
Button and the Green List here.
13. The Tuned Port
The Port of Aquarius has a few seemingly unremarkable traits
that make it quite remarkable, indeed. We've made it as long
as possible with a 45° slice inside the speaker which leads to
a gentle flare on the back plate; choices that achieve four
important goals:
1. Improve bass performance — all the way down to 55Hz
2. Minimize resonant frequencies
3. Near-perfect elimination of chuffing
4. Port turbulence prevention
45
O
