croydon FRG4 Instrukcja obsługi
Przeglądaj online lub pobierz pdf Instrukcja obsługi dla Komercyjny sprzęt spożywczy croydon FRG4. croydon FRG4 2 stron.
INSTRUCTION MANUAL
INSTRUCTION MANUAL
INSTRUCTION MANUAL
INSTRUCTION MANUAL
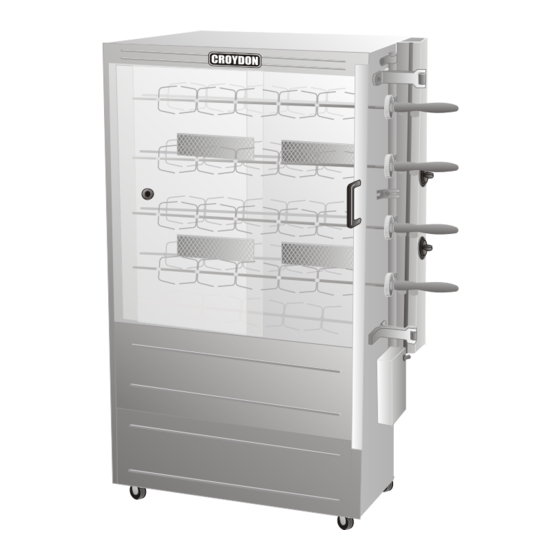
CHICKEN ROTISSERIE 4 SPITS - MODEL: FRG4-250001 A6
CHICKEN ROTISSERIE 4 SPITS - MODEL: FRG4-250001 A6
CHICKEN ROTISSERIE 4 SPITS - MODEL: FRG4-250001 A6
CHICKEN ROTISSERIE 4 SPITS - MODEL: FRG4-250001 A6
- Please read these instructions carefully before operating this appliance.
- Please read these instructions carefully before operating this appliance.
- Please read these instructions carefully before operating this appliance.
- Please read these instructions carefully before operating this appliance.
- This appliance is designed to operate on alternative current (A.C.) Only
- This appliance is designed to operate on alternative current (A.C.) Only
- This appliance is designed to operate on alternative current (A.C.) Only
- This appliance is designed to operate on alternative current (A.C.) Only
- DO NOT CONNECT TO DIRECT CURRENT (D.C.).
- DO NOT CONNECT TO DIRECT CURRENT (D.C.).
- DO NOT CONNECT TO DIRECT CURRENT (D.C.).
- DO NOT CONNECT TO DIRECT CURRENT (D.C.).
- Care should be taken when operating this appliance, as HOT SURFACES may cause burns.
- Care should be taken when operating this appliance, as HOT SURFACES may cause burns.
- Care should be taken when operating this appliance, as HOT SURFACES may cause burns.
- Care should be taken when operating this appliance, as HOT SURFACES may cause burns.
- The installation area must be well ventilated to eliminate gases resulting of combustion.
- The installation area must be well ventilated to eliminate gases resulting of combustion.
- The installation area must be well ventilated to eliminate gases resulting of combustion.
- The installation area must be well ventilated to eliminate gases resulting of combustion.
-
-
-
-
It's recommended to have at least 10 inches of free space around the equipment.
It's recommended to have at least 10 inches of free space around the equipment.
It's recommended to have at least 10 inches of free space around the equipment.
It's recommended to have at least 10 inches of free space around the equipment.
- For safety reasons DO NOT install the equipment next of combustible materials.
- For safety reasons DO NOT install the equipment next of combustible materials.
- For safety reasons DO NOT install the equipment next of combustible materials.
- For safety reasons DO NOT install the equipment next of combustible materials.
- When not in use for long period unplug the appliance.
- When not in use for long period unplug the appliance.
- When not in use for long period unplug the appliance.
- When not in use for long period unplug the appliance.
- As metallic parts are good conductors of heat, let it cool before handling.
- As metallic parts are good conductors of heat, let it cool before handling.
- As metallic parts are good conductors of heat, let it cool before handling.
- As metallic parts are good conductors of heat, let it cool before handling.
OPERATION
OPERATION
OPERATION
OPERATION
- After the Electrical and Gas installations are done, your equipment is ready to start.
- After the Electrical and Gas installations are done, your equipment is ready to start.
- After the Electrical and Gas installations are done, your equipment is ready to start.
- After the Electrical and Gas installations are done, your equipment is ready to start.
- Bring the lighter flame close to one of the burners and turn the On/Off Knob to a position of full
- Bring the lighter flame close to one of the burners and turn the On/Off Knob to a position of full
- Bring the lighter flame close to one of the burners and turn the On/Off Knob to a position of full
- Bring the lighter flame close to one of the burners and turn the On/Off Knob to a position of full
power. The burner flame will come on. This procedure is to be taken to others burners.
power. The burner flame will come on. This procedure is to be taken to others burners.
power. The burner flame will come on. This procedure is to be taken to others burners.
power. The burner flame will come on. This procedure is to be taken to others burners.
- When all burners be lit your equipment is ready to use.
- When all burners be lit your equipment is ready to use.
- When all burners be lit your equipment is ready to use.
- When all burners be lit your equipment is ready to use.
- Place the spits (each spit can carry up to 5 chickens) on the equipment.
- Place the spits (each spit can carry up to 5 chickens) on the equipment.
- Place the spits (each spit can carry up to 5 chickens) on the equipment.
- Place the spits (each spit can carry up to 5 chickens) on the equipment.
- Turn on the Motor switch located at the right side panel.
- Turn on the Motor switch located at the right side panel.
- Turn on the Motor switch located at the right side panel.
- Turn on the Motor switch located at the right side panel.
- Wait about 1hour and 45 minutes, with spits rotating, for the chickens to be finished.
- Wait about 1hour and 45 minutes, with spits rotating, for the chickens to be finished.
- Wait about 1hour and 45 minutes, with spits rotating, for the chickens to be finished.
- Wait about 1hour and 45 minutes, with spits rotating, for the chickens to be finished.
- Depending on the time and of the power adjustment of the burner, the chickens will be more or less
- Depending on the time and of the power adjustment of the burner, the chickens will be more or less
- Depending on the time and of the power adjustment of the burner, the chickens will be more or less
- Depending on the time and of the power adjustment of the burner, the chickens will be more or less
roasted.
roasted.
roasted.
roasted.
CLEANING PROCEDURE
CLEANING PROCEDURE
CLEANING PROCEDURE
CLEANING PROCEDURE
- Place the burners protectors on position.
- Place the burners protectors on position.
- Place the burners protectors on position.
- Place the burners protectors on position.
- Remove the spits and clean it with soaped water after the heavy fat was removed.
- Remove the spits and clean it with soaped water after the heavy fat was removed.
- Remove the spits and clean it with soaped water after the heavy fat was removed.
- Remove the spits and clean it with soaped water after the heavy fat was removed.
- Clean the cabinet with a cloth humidified with soaped water.
- Clean the cabinet with a cloth humidified with soaped water.
- Clean the cabinet with a cloth humidified with soaped water.
- Clean the cabinet with a cloth humidified with soaped water.
- Always maintain the gears and endless-screws with grease.
- Always maintain the gears and endless-screws with grease.
- Always maintain the gears and endless-screws with grease.
- Always maintain the gears and endless-screws with grease.
- Do not use any kind of abrasive material for cleaning.
- Do not use any kind of abrasive material for cleaning.
- Do not use any kind of abrasive material for cleaning.
- Do not use any kind of abrasive material for cleaning.
- Not to use water jet on the equipment.
- Not to use water jet on the equipment.
- Not to use water jet on the equipment.
- Not to use water jet on the equipment.
- Remove the cap of the drain located in the inferior part for the discharge of every residue of water
- Remove the cap of the drain located in the inferior part for the discharge of every residue of water
- Remove the cap of the drain located in the inferior part for the discharge of every residue of water
- Remove the cap of the drain located in the inferior part for the discharge of every residue of water
and fat.
and fat.
and fat.
and fat.
MAINTENANCE
MAINTENANCE
MAINTENANCE
MAINTENANCE
- Always maintain your equipment clean and in perfect operation conditions, those providences, will
- Always maintain your equipment clean and in perfect operation conditions, those providences, will
- Always maintain your equipment clean and in perfect operation conditions, those providences, will
- Always maintain your equipment clean and in perfect operation conditions, those providences, will
help your equipment to last longer.
help your equipment to last longer.
help your equipment to last longer.
help your equipment to last longer.
- To guarantee a good performance, we recommended an annual revision of the equipment.
- To guarantee a good performance, we recommended an annual revision of the equipment.
- To guarantee a good performance, we recommended an annual revision of the equipment.
- To guarantee a good performance, we recommended an annual revision of the equipment.
CROYDONMAQ INDUSTRIAL LTDA.
CROYDONMAQ INDUSTRIAL LTDA.
CROYDONMAQ INDUSTRIAL LTDA.
CROYDONMAQ INDUSTRIAL LTDA.
Estrada São Lourenço, 891 - Capivari - Duque de Caxias.
Estrada São Lourenço, 891 - Capivari - Duque de Caxias.
Estrada São Lourenço, 891 - Capivari - Duque de Caxias.
Estrada São Lourenço, 891 - Capivari - Duque de Caxias.
CROYDON
CROYDON
CROYDON
CROYDON
RJ - Brasil - CEP 25243-150
RJ - Brasil - CEP 25243-150
RJ - Brasil - CEP 25243-150
RJ - Brasil - CEP 25243-150
Phone: 55 21 2776-1928 / 55 21 2676-1512
Phone: 55 21 2776-1928 / 55 21 2676-1512
Phone: 55 21 2776-1928 / 55 21 2676-1512
Phone: 55 21 2776-1928 / 55 21 2676-1512
e-mail: [email protected]
e-mail: [email protected]
e-mail: [email protected]
e-mail: [email protected]
Fax: 55 21 2676-2522
Fax: 55 21 2676-2522
Fax: 55 21 2676-2522
Fax: 55 21 2676-2522
CROYDON
CROYDON
CROYDON
CROYDON
FRG4-250001 A6
FRG4-250001 A6
FRG4-250001 A6
FRG4-250001 A6