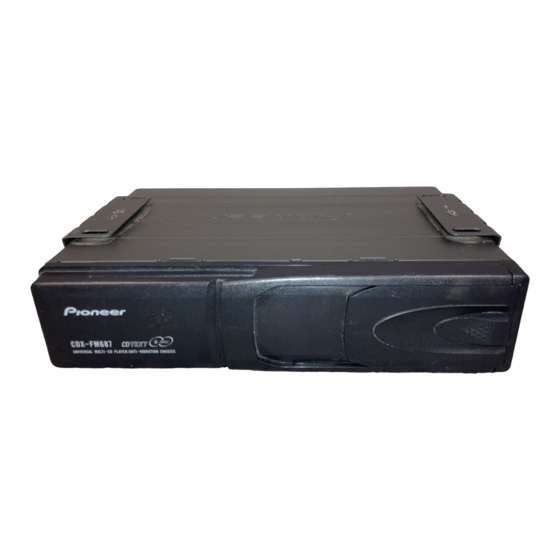
Pioneer CDX-FM1287 - CD Changer Instrukcja instalacji - Strona 6
Przeglądaj online lub pobierz pdf Instrukcja instalacji dla Odbiornik samochodowy Pioneer CDX-FM1287 - CD Changer. Pioneer CDX-FM1287 - CD Changer 9 stron. 6-disc/12-disc universal multi-cd system
Również dla Pioneer CDX-FM1287 - CD Changer: Instrukcja instalacji (4 strony), Instrukcja obsługi (34 strony)

2
φ 4 ~ 4.5 mm
The following steps are the same for horizontal or vertical
installation.
Los pasos siguientes son los mismos para la instalación
horizontal o vertical.
English
• Consult with your nearest dealer if
• Si para la instalación es necesario practicar
orificios o efectuar otras modificaciones en
installation requires the drilling of holes or
el vehículo, póngase en contacto con el
other modifications of the vehicle.
distribuidor más cercano.
• Before finally installing the unit, connect
• Antes de instalar finalmente la unidad,
the wiring temporarily and make sure it is
conecte temporalmente el cableado y
all connected up properly and the unit and
asegúrese de que esté todo correcto y
apropiadamente, y que la unidad y el
the system work properly.
sistema trabajan apropiadamente.
• Use only the parts included with the unit to
• Utilice únicamente las partes
ensure proper installation. The use of
suministradas con la unidad a fin de
unauthorized parts can cause
asegurar una instalación correcta. El uso
malfunctions.
de partes no autorizadas puede causar
desperfectos.
• When mounting the player, make sure
• Cuando monte el reproductor, asegúrese
none of the leads are trapped between the
que ninguno de los conductores esté
player and the surrounding metalwork or
retenido entre el reproductor y la armazón
fittings.
o los accesorios.
Location
Ubicación
• Install the unit where it does not get in the
• Instale la unidad donde no estorbe al
driver's way and cannot injure the
conductor ni pueda herir a los pasajeros si
passenger if there is a sudden stop, like an
ocurre una detención repentina, como en
una frenada de emergencia.
emergency stop.
• Asegúrese de instalar el reproductor sobre
• Be sure to mount the player on a rigid
una superficie rígida que sea lo
surface which is firm enough to hold the
suficientemente firme como para sostener
player in the proper position under all
el reproductor en la posición apropiada en
circumstances. Failure to do so may affect
todas las circunstancias. Si no lo hace así
puede afectar el rendimiento óptimo del
the optimum performance of the player.
reproductor.
• Before drilling a hole into the trunk,
• Antes de perforar un orificio en la
confirm that there is nothing behind the
maletera, confirme que no haya nada
hole. Never drill a hole in the fuel tank or
detrás del orificio. No perfore un orificio en
any other important part.
el tanque de combustible ni en cualquier
parte importante.
• Do not mount the player near the heater
• No instale el reproductor cerca de la salida
outlet, where it would be affected by heat,
del calefactor, donde sería afectado por el
or near the doors, where rainwater might
calor, o cerca de las puertas, donde podría
splash onto it.
caerle la lluvia.
• Do not mount the player on the spare tire
• No instale el reproductor en el tablero de
la llanta de repuesto o en cualquier otro
board or any other unstable place.
lugar inestable.
• Mount the player in a place where it does
• Instale el reproductor en un lugar en que
not prevent the spare tire, jack, or tools
no dificulte la extracción de la llanta de
from being easily removed.
repuesto, gato o herramientas.
• Do not mount the player anywhere that
• No instale el reproductor en un sitio que
reciba el sol y se recaliente, como sobre el
gets the sun and so becomes hot, like on
tablero de mando o el compartimiento
the dashboard or the rear shelf.
trasero.
• Mount the player on a flat surface.
• Monte el reproductor en una superficie
plana.
Suspending the player from the parcel
shelf with hex-screws
Suspendiendo el reproductor del anaquel
• Ideally, when the player is being mounted
de paquetes con tornillos hexagonales
under the parcel shelf, two persons should
• Idealmente, cuando se monta el
work together. One person should hold the
reproductor bajo el anaquel de paquetes,
player, and the other should tighten the
dos personas deberían trabajar juntas. Una
persona podría sostener el reproductor, y
hex-nuts. If you do this job on your own,
la otra podría apretar las tuerca hexagonal.
take great care not to drop or knock the
Si hace este trabajo por su cuenta, tenga el
player.
máximo cuidado para no dejar caer ni
• When suspending the player under the
golpear el reproductor.
parcel shelf, be sure that it is firmly
• Cuando suspenda por debajo del estante
de paquetes, asegúrese de instalar la
installed on a solid surface. If the unit is
unidad firmemente en una superficie
not firmly installed, skipping will occur.
sólida. Si la unidad no está instalada
firmemente, puede haber saltos u
omisiones de sonido durante la
reproducción.
3
C
C
Español
2
φ 6.5 ~ 7 mm
Mounting angle/
Angulo de montaje
Top
Use any angle in
Superior
this range (up to
90 degrees).
Utilice cualquier
ángulo en esta
gama (hasta 90
grados).
Angle switching dial adjustment
Set the dial so that its slot is closest to the horizontal direction with respect to the ground surface.
Ajuste del control de cambio de ángulo
Ponga el control de forma que su ranura quede lo más posible en sentido horizontal con respecto
a la superficie del suelo.
3
E
E
D
D
The player cannot
be installed in this
direction.
El reproductor no
puede instalarse
en esta dirección.
The angle switching dial must be set on both sides of the
player to the same position.
Se debe ajustar el cuadrante de conmutación de ángulo
en ambos lados del reproductor a la misma posición.
Angle switching
dial
Control de
cambio de
ángulo
5 steps
5 pasos
