Dinex Smart-Therm STS 3 DXSMA2081 Instrukcja obsługi i konserwacji - Strona 3
Przeglądaj online lub pobierz pdf Instrukcja obsługi i konserwacji dla Ładowarka Dinex Smart-Therm STS 3 DXSMA2081. Dinex Smart-Therm STS 3 DXSMA2081 7 stron.

INSTALLATION
The Smart•Therm STS III Charger can be installed on top of a flat, level
countertop or shelving, being careful to maintain at least two inches of
clearance on all sides of the charger for cooling. Do not place over paper
or loose material that may inhibit air flow into the bottom air intakes.
®
Consider the Dinex
Induction Stand (Accessory product)
DXPICTABLEM (Mobile with casters) DXPICTABLE (Not mobile).
1. The charger must be plugged into an appropriate grounded power
receptacle. Check rating plate on the charger to verify correct
voltage.
IMPORTANT: Each charger should be connected to its own
!
dedicated circuit. They should not be connected to circuits sharing
compressors or other heavy current draw devices (i.e. plate heaters,
steam tables, etc.)
2. Do not move the Smart•Therm STS III Charger when it is electrically
connected.
3. An air filter is mounted to the bottom of the unit. Assure it is
seated and free of excessive debris or grease.
OPERATION INSTRUCTIONS
Smart•Therm STS III Induction System
1. Make sure that your Smart•Therm STS III Charger is plugged into an
energized circuit as described in the previous section. This should
be a dedicated circuit, not shared with any devices utilizing motors,
compressors, or components requiring a heavy current draw.
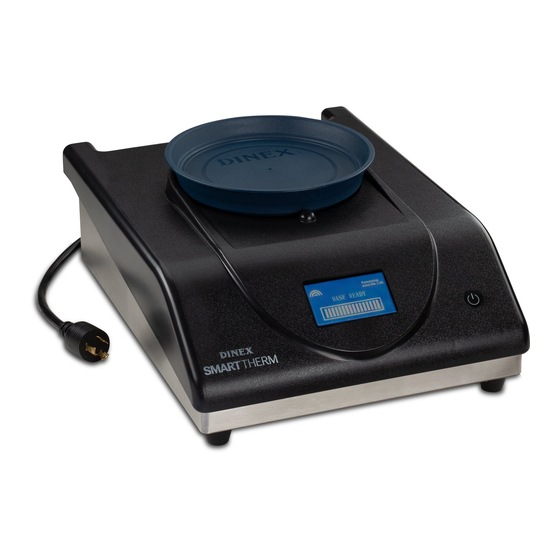
User Interface:
POWER key will turn the unit on and off.
LCD DISPLAY provides feedback on the status of bases charging
and equipment operation.
2. The Smart•Therm STS III Charger is turned on by pressing the
POWER button on the right front of the user interface for 2 seconds
until the display lights up and 1 audible beep is heard. The LCD
display will show "WAITING FOR BASE" indicating the
Smart•Therm STS III Charger is turned on and ready for use.
3. Place a Dinex Smart base on the charger within the positioning rails,
making sure the base is seated flat on the top. Charging will start
automatically.
4. The LCD display will show "CHARGING" and a status bar that will
increase through the charging process until filled when a base is
fully charged. If the base is removed prior to the status bar being
completely filled, the base will not be fully charged and may result
in a lower delivery temperature.
!
INFORMATION: The display will flash "BASE NOT READY" and
you will hear continuous beeps for 30 seconds if you remove the
base before it is fully charged.
5. Your Smart•Therm STS III charger and Smart Base system
uniquely knows the heat level of your bases. You may return a
base to the charger at any time, and your Smart•Therm STS III
charger will top off the heat in your base to assure proper delivery
temperature.
6. If the phrase "WAITING FOR BASE" still appears after placing a
base on the charger, remove the base and reposition – assuring
the base is seated flat to the top, and within the positioning rails.
7. After the status bar is completely filled the charger will display
"BASE READY" and beep 4 times indicating that base is at full
temperature. Charge time for a base will be between 16 to 20
seconds. Low incoming voltage may increase charging time.
!
INFORMATION: Fluctuations in voltage may affect heating time.
8. If a base is left on the charger top after fully charged, the charger
will keep the base fully charged for up to 90 minutes by adding a
small charge every 30 seconds. One audible beep will sound at
every small charge. If the base is not removed after 90 minutes,
the charger will beep 2 times and shut off.
9. If the charger has no base on its top and sees no activity after 2
minutes, it will beep 2 times and shut off.
10. Power off the Smart•Therm STS III Charger by depressing
the POWER button.
Smart•Therm STS III | 3
