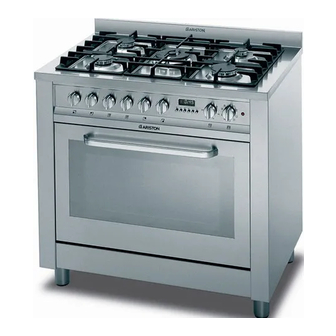
Ariston CP 859 MT X AUS S Instrukcja obsługi - Strona 6
Przeglądaj online lub pobierz pdf Instrukcja obsługi dla Piekarnik Ariston CP 859 MT X AUS S. Ariston CP 859 MT X AUS S 16 stron. Cooker and oven
Również dla Ariston CP 859 MT X AUS S: Instrukcje użytkowania i instalacji (13 strony), Specyfikacje (13 strony)

3. Replace all the components by following the above
AUS
instructions in reverse.
Replacing the nozzles on separate "double flame "
burners
1. remove the grids and slide the burners from their
housings. The burner consists of 2 separate parts (see
figure);
2. unscrew the burers with a 7 mm wrench spanner. The
internal burner has a nozzle, the external burner has
two (of the same size). Replace the nozzle with models
suited to the new type of gas (see "Table of burner and
nozzle specifications").
3. replace all the components by repeating the steps in
reverse order.
Adjusting the hob burners' minimum setting:
1. Turn the tap to the minimum position.
2. Remove the knob and adjust the regulatory screw, which
is positioned inside or next to the tap pin, until the flame is
small but steady.
! If the appliance is connected to a liquid gas supply, the
regulatory screw must be fastened as tightly as possible.
3. While the burner is alight, quickly change the position of
the knob from minimum to maximum and vice versa several
times, checking that the flame is not extinguished.
! The hob burners do not require primary air adjustment.
! After adjusting the appliance so it may be used with a
different type of gas, replace the old rating label with a new
one which corresponds to the new type of gas (these labels
are available from Authorised Technical Assistance Centres).
! Should the gas pressure used be different (or vary slightly)
from the recommended pressure, a suitable pressure regulator
must be fitted to the inlet hose in accordance with current
national regulations relating to "regulators for channelled gas".
6
Safety Chain
! In order to prevent the appliance from overturning
accidentally, for example in case of a child climbing onto
the oven door, the safety chains MUST be installed!
The cooker is provided with safety chains that must be fixed
with a screw (not supplied as accessory) on the wall behind
the appliance, at the same height as the fixing point on the
appliance.
Make sure that the chains are fixed in the back of the
cooker, as shown in the drawing, in such way to be tight
and parallel to the floor.
! When the installation process is complete, the chains must
be kept in tension!
TABLE OF CHARACTERISTICS
Oven
dimensions
32,9 x 59,5 x 39,4 cm
HxLxP
Volume
lt. 78
Voltage and
230-240V~ 50Hz (see data plate)
frequency
Power supply Max 2850-3150 W
may be adapted for use with any type
Burners
of gas shown on the data plate.
Directive 2002/40/EC on the label of
electric ovens.
Standard EN 50304-60350
ENERGY
Energy consumption for Natural
LABEL
convection – heating mode:
Convection mode
Declared energy consumption for
Forced convection Class – heating
mode:
Fan assisted.
This appliance conforms to the following
European Economic Community directives:
- 2006/95/EEC dated 12/12/06 (Low
Voltage) and subsequent amendments
- 2004/108/EEC dated 15/12/04
Electromagnetic Compatibility) and
subsequent amendments
- 93/68/EEC dated 22/07/93 and
subsequent amendments.
- 2009/142/EEC dated 30/11/09 (Gas) and
subsequent amendments.
- 2012/19/EEC and subsequent
amendments.
