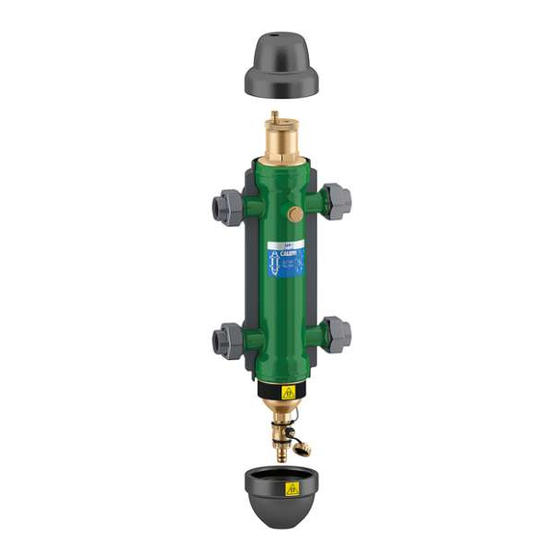
CALEFFI 5495 SEP4 Podręcznik - Strona 11
Przeglądaj online lub pobierz pdf Podręcznik dla Systemy filtracji wody CALEFFI 5495 SEP4. CALEFFI 5495 SEP4 16 stron. 4-in-1 hydraulic, air, dirt and magnetic separator, ansi flanged
Również dla CALEFFI 5495 SEP4: Instrukcja instalacji, uruchomienia i serwisowania (4 strony), Instrukcja instalacji, uruchomienia i serwisowania (4 strony)

Procedura di
1. Sfilare le due coperture di testa alle estremità
installazione e
2. Aprire i due gusci laterali
di assemblaggio
3. Procedere all'installazione del separatore
coibentazione
Procedure for
4. Togliere la pellicola dell'adesivo già
installation and
insulation
5. Assemblare i due gusci della
assembly
Installation ünd
6. Completare con le due coperture di testa.
Montage der
N.B.: Se il separatore idraulico viene
Isolierung
Procédure
d'installation et
d'assemblage de
l'isolant
Procedimiento de
N.B.: Sigillante consigliato: ns. cod. 615500.
instalación
y de montaje del
1. Extract the head covers at the two ends.
aislamiento
2. Open the two side shells.
Procedimento
3. Install the multifunction separator on the system.
para a instalação
4. Peel off the film of adhesive already applied on the surfaces.
e montagem do
5. Assemble the two insulation shells.
isolamento
6. Complete with the two head covers.
Plaatsing
N. B. If the hydraulic separator is used with chilled water, spread a
isolatieschalen
thin layer of sealant on theo uter edge of the insulation, wait until the
Процедура
установки и
solvent evaporates (10 minutes approx.) and re-close.
сборки изоляции
N.B.: Recommended sealant: our code 615500.
1. Entfernen sie die beiden Abdeckungen an den Enden.
2. Entfernen sie die beiden Seitenschalen.
3. Installieren sie die multifunktionale Hydraulische Weiche in die
4. Entfernen Sie die Schutzstreifen von den Klebflächen.
5. Montieren sie die beiden Seitenschalen.
6. Stecken sie die Abdeckungen auf die Enden auf.
Wird die Hydraulische Weiche mit gekühltem Wasser betrieben, muss
auf dem äußeren Rand der Dämmung eine dünne Schicht Dichtmittel
aufgetragen, abgewartet werden, bis das Lösungsmittel verdampft
(etwa 10 min) und die Verbindung dann geschlossen werden.
1. Dévisser les deux coques situées aux extrémités
2. Ouvrir les deux coques latérales
3. Procéder à la pose du séparateur multifonction
4. Ôter la pellicule adhésive déjà appliquée
5. Assembler les deux coques d'isolation
6. Completer avec les deux coques des extrémités.
Si le séparateur hydraulique est utilisé avec de l'eau glacée, étaler sur
le bord extérieur du calorifugeage une légère couche de colle, attendre
que le solvant soit évaporé (environ 10 minutes) et refermer.
N.B.: Produit d'étanchéité préconisé : notre réf. 615500
1. Tire las dos tapas de los extremos
2. Abra las dos tapas laterales
3. Proceder con la instalación del separador multifunción
4. Retire plástico adhesivo ya aplicado a las superficies
multifunzione sull'impianto
applicato sulle superfici
coibentazione
utilizzato con acqua refrigerata, stendere
sul bordo esterno della coibentazione un
leggero strato di sigillante, attendere che il
solvente sia evaporato (ca. 10 minuti) e
richiudere.
Anlage.
11
