decreased at pump nozzle to suit pump capacity and
particular conditions of installation. Use eccentric
reducers on suction connection with flat side uppermost.
• Layout the suction line with a continual rise towards the
pump without high points, thus eliminating possibility of
air pockets that may prevent the pump from operating
effectively.
• A strainer of three or four times the area of the suction
pipe, installed in the suction line, will prevent the entrance
of foreign materials into the pump. C/af" (5 mm) diameter
perforations in the strainer is typical.
• In open systems, test suction line for air leaks before
starting; this becomes essential with long suction line or
static lift.
• Install, at the pump suction, a straight pipe of a length
equivalent to 4 or 6 times its diameter; this becomes
essential when handling liquids above 120°f (49°c).
Armstrong suction guides may be used in place of the
straight pipe run and in-line strainer.
• Install an isolation valve in both suction and discharge
lines on flooded suction application; these valves are used
primarily to isolate the pump for inspection or repair
• Install a non-slam non-return check valve in discharge line
between pump and isolation valve to protect pump from
excessive back pressure and to prevent water running
back through the pump in case of driver failure on open
systems. An Armstrong Flo-Trex valve may be used in
place of non-return check valve and isolation valve on
pump discharge
caution:
The discharge valve only is to be used to throttle pump
flow, not the suction valve. Care must be taken in the
suction line layout and installation, as it is usually
the major source of concern in centrifugal pump
applications
4 .
alignment
• Alignment is unnecessary on close-coupled pumps,
Series 436 0 & 438 0 as there is no shaft coupling.
• Series 430 0 units are accurately aligned at the factory
prior to being shipped and do not need re-aligning when
installed.
• Alignment on a Series 430 0 unit may be verified by
assuring an equal and parallel gap between coupling
halves on both sides of the coupling
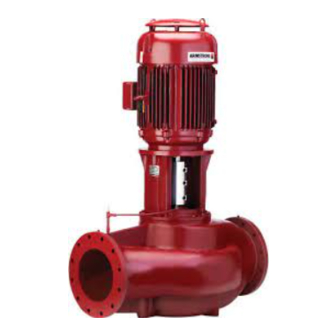
Series 4300, 4360 and 4380
Vertical in–line pumps
oper ation
5 .
starting pump
• Ensure that the pump turns freely by hand, or with some
mechanical help such as a strap and lever on larger
pumps. Ensure that all protective guarding is securely
fixed in position.
• The pump must be fully primed on start up. Fill the
pump casing with liquid and rotate the shaft by hand to
remove any air trapped in the impeller. On Series 430 0
any air trapped in the casing as the system is filled must
be removed by the manual air vent in the seal flush line.
Series 436 0 & 438 0 units are fitted with seal flush/vent
lines piped to the pump suction area. When these units
operate residual air is drawn out of the pump towards the
suction piping.
• On pump start up the flush line must be vented and the
pump must not be dry run.
• Bump or energize the motor momentarily and check that
the rotation corresponds with the directional arrow on the
pump casing.
• To reverse rotation of a three phase motor, interchange
any two power leads.
• Start the pump with the discharge valve closed and the
suction valve open, then gradually open the discharge
valve when the motor is at operating speed. The dis-
charge valve may be cracked or open slightly at start up
to help eliminate trapped air.
• When stopping the pump: Close the discharge valve and
de-energize the motor.
• Do not run the pump against a closed discharge valve for
an extended period of time. (A few minutes maximum)
• Star-Delta motor starters should be fitted with electronic/
mechanical interocks that have a timed period of no more
than 40 milli-seconds before switching from star (Start-
ing) to delta (Run) connection yet allow the motor to
reach full star (Starting) speed before switching to delta
(Run).
• Should the pump be noisy or vibrate on start-up a com-
mon reason is overstated system head. Check this by
calculating the pump operating head by deducting the
suction pressure gauge value from the discharge gauge
reading. Convert the result into the units of the pump
head as stated on the pump nameplate and compare the
values. Should the actual pump operating head be signifi-
cantly less than the nameplate head value it is typically
permissible to throttle the discharge isolation valve until
the actual operating head is equal to the nameplate value.
Any noise or vibration usually disappears. The system de-
signer or operator should be made aware of this soon as
some adjustment may be required to the pump impeller
diameter or drive settings, if applicable, to make the pump
suitable for the system as installed.
insta l la t ion &
o per ating instr uct io n s
7

