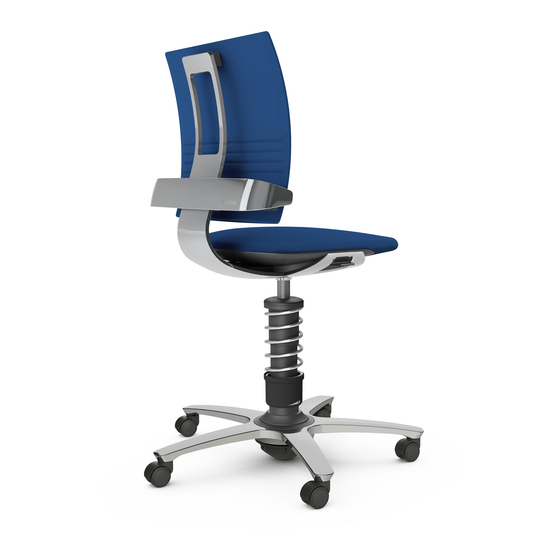
Aeris 3Dee Montaż i ustawienia - Strona 2
Przeglądaj online lub pobierz pdf Montaż i ustawienia dla Wyposażenie wnętrz Aeris 3Dee. Aeris 3Dee 2 stron. Active office chair
Również dla Aeris 3Dee: Skrócona instrukcja obsługi (2 strony)

Montage
Bitte achten Sie darauf, eine weiche Unterlage zu verwenden
1. Stecken Sie die Rollen in das Fußkreuz.
2. Stecken Sie das Federbein mit der Öffnung nach unten lose auf die Öffnung im Fußkreuz.
Halten Sie mit einer Hand den Gummiring am Fußkreuz fest und drehen Sie mit der anderen
Hand das Federbein langsam bis es spürbar in das Fußkreuz absinkt.
3.1 Stecken Sie die Öffnung des Sitzes auf die Gasdruckfeder. 3.2 Fixieren Sie mit einer Hand
das Federbein, mit der anderen Hand drehen Sie den Sitz bis er spürbar
3.3
WICHTIG:
Prüfen Sie, ob die beiden weißen Pfeile unter dem Sitz zueinander zeigen.
Nehmen Sie dann Platz und federn Sie mehrmals auf- und ab damit sich die Verbindungen
nicht mehr lösen.
4.1 Sichern Sie den Stuhl gegen Wegrollen. 4.2 Stecken Sie die Lehne langsam und gerade
ein bis sie hörbar einrastet und nicht mehr abziehbar ist. 4.3 Schrauben Sie die Lehne fest.
(Schrauben und Inbusschlüssel anbei.)
1.
2.
3.1
4.2
3.3
3.2
Assembly
Make sure that you use a soft surface to assemble your 3Dee
1. Slot all the castors into the upturned base.
2. Loosely insert the spring strut into the opening of the base. Hold the rubber ring on the base
with one hand and with the other hand slowly turns the spring strut until you feel it fall into
place in the base.
3.1 Place the seat opening on the gas spring. 3.2 Hold the spring strut with one hand and with
the other hand turn the seat until you feel it fall into place. 3.3
white arrows under the seat are aligned with each other. Then sit on the seat and bounce up
and down forcefully a few times so that the connections can no longer separate.
4.1 Secure the chair against rolling away. 4.2 Slot the backrest slowly and perfectly straight
into the opening until you hear it click into place and you can no longer pull it out again.
4.3 Screw the backrest tight with the screws and Allen key provided.
absinkt.
4.3
IMPORTANT:
Make sure that the
Einstellungen
Tipps für den Anfang
A Höhe: Mit dem Sitzhebel können Sie die Höhe verstellen. Ihre Beinwinkel (Ober-/
Unterschenkel) sollte etwas über 90° betragen.
B Feder: Optimal ist es, wenn Sie weich vertikal schwingen ohne „aufzusitzen". Den
Stuhl kippen und auf die Lehne legen. Einstellung durch Drehung am Federbein
nach links – für viel Schwingung /wenig Gewicht, Drehung der Manschette nach
rechts (STOP beachten!) – für wenig Schwingen/ mehr Gewicht.
C Seitliche Flexibilität: 3Dee vorsichtig kippen und auf die Lehne legen. Das
Handrad nach links für mehr oder nach rechts für weniger Flexibilität drehen.
D Lehnengegendruck: Drehen Sie die Flügelschraube nach links (-) : ca. 15 x für
weiche Federung, bzw. min. Gegendruck. Für feste Federung, bzw. mehr
Gegendruck die Schraube nach rechts, Richtung „+" (ca. 15x)
E Lordosenwölbung: Setzen Sie sich auf den Sitz ohne sich anzulehnen, greifen Sie
mit beiden Händen hinten an den Verstellbügel der Lehne. Drücken Sie den
Hebelrechts innen und schieben Sie den Verstellbügel bis zur gewünschten
Position.
C
A
B
D
E
Settings
Good to know
A Height: Adjust the height with the lever under the seat. The open angle of your legs (thigh to
lower leg) should be just over 90°.
B Spring: Adjust the vertical bounce that you can move up and down without bumping on the
floor. Lay the chair on the backrest. Turn the spring strut left – for maximum movement/ low
weight. Turn right (observe STOP mark!) – for reduced movement/ more weight.
C Side Flex : Turn over the 3Dee and lay it on the backrest. Turn the hand-wheel to the left for
more flex / to the right for less flex.
D Backrest tension: Turn the butter-fly nut to the left in the "–" direction (about 15 times) for a
softer setting. Turn right in the "+" direction for more tension.
E Lumbar support: Sit on the chair without resting against the backrest and grasp the adjusting
bar of the backrest left and right with both hands. Press the lever on the inside on the right and
move the adjusting bar up or down into the required position.
