ClearSounds Talk500-ER Podręcznik szybkiej konfiguracji - Strona 2
Przeglądaj online lub pobierz pdf Podręcznik szybkiej konfiguracji dla Telefon ClearSounds Talk500-ER. ClearSounds Talk500-ER 4 stron. Amplified sos alert telephone
Również dla ClearSounds Talk500-ER: Cechy (1 strony)

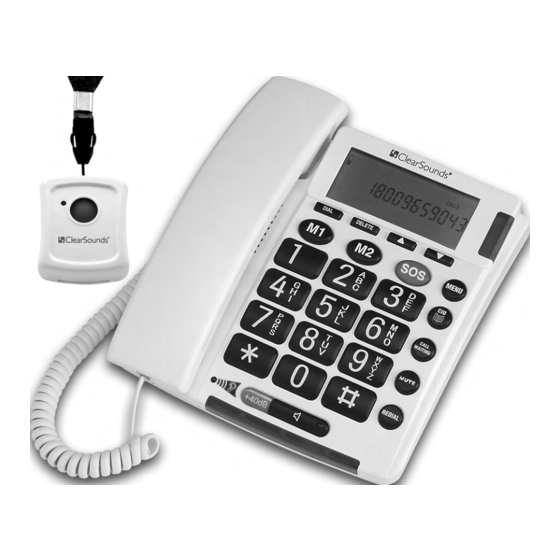
TALK500ER EMERGENCY RESPONSE TELEPHONE
The TALK500ER phone is designed to assist you in getting help when you need it by automatically
making SOS Emergency Calls when activated. The faster you can get help; the lesser any long term
effect an emergency will have. You can also use the pendant to answer a call and not have to rush to the
phone when it rings. This can provide excellent fall prevention assistance.
The pendant that comes with the phone is the primary emergency control device for the phone. By
simply pressing the button on the remote pendant or pressing and holding the red button on the phone,
the
TALK500ER will start to automatically call the preprogrammed numbers(up to 30 numbers that you or
a family member set up in the phone) to alert someone you need assistance. If the first number cannot
respond, the phone will automatically call the next number and so on. The people who answer will hear
your prerecorded message alerting them that help is needed. When they hear the message and if they
want to talk with you, they simply press 0 on their phone to activate the speakerphone on your phone
allowing two-way communication. After pressing 0, you will have approximately 3 minutes to talk and
confirm they can help you. If they can provide assistance, they would then press the numbers 1 and 2 in
rapid sequence to stop the phone from calling the next number. The line will also remain open and they
can continue to talk with you while help arrives. If they cannot provide the assistance and do not type the
1 and 2, the TALK500ER phone will automatically initiate a call to the next number on your list and will
repeat until someone can respond with assistance.
It is recommended that you keep your emergency list to a small number of people (5 or 6) who have a
good chance of being able to respond to a call and who are reasonably close by to facilitate getting to you
quickly. If you wish you can have as many as 30 numbers on that list.
It is very important that you let people know that they are on your call list, that they agree to be on the list,
and that they understand how the emergency call process works. There are information cards included
with your phone that you can give to people on your list.
Installing Batteries in the Phone
Your telephone requires four AA batteries (not supplied) in case of network power failure for LCD backup
& operations. When the low battery icon appears on the display or the display dims, replace the batteries
with new batteries. Note: Should you choose not to install batteries - the telephone numbers in memory
and the voice recordings are stored in non-volatile flash memory and will not be lost.
1. Before opening the battery compartment, make sure the telephone is disconnected from the
telephone line and the power supply.
2. Use a flat-blade screwdriver to lift the battery compartment door.
3. Insert 4 AA batteries into the compartment as indicated by the polarity symbols.
4. Snap the battery compartment door back into place.
Installing Batteries in the Pendant
Your pendant comes with one 12V A23 battery. When the LED on the pendant dims, it is time to replace
the pendant battery. Using a screwdriver, open the battery cover, insert a new battery with the correct
polarity, and replace the battery cover.
Battery Notes:
1. Replace batteries quickly to save records.
2. Use only fresh batteries of the required size and recommended type.
3. Do not mix batteries of different size or type.
4. Always remove old or weak batteries. Batteries can leak chemicals than can damage electronic
parts.
Connecting the Telephone
1. Plug one end of the telephone line cord into the TEL.LINE jack at the back of the telephone base.
2. Plug the other end of the telephone line cord into the phone jack on the wall.
HOW THE TALK500ER WORKS
