DJO Donjoy IROM Skrócona instrukcja obsługi
Przeglądaj online lub pobierz pdf Skrócona instrukcja obsługi dla Produkty higieny osobistej DJO Donjoy IROM. DJO Donjoy IROM 2 stron. Telescopic post-op knee braces
ENGLISH
BEFORE USING THE DEVICE, PLEASE READ THE FOLLOWING INSTRUCTIONS COM-
PLETELY AND CAREFULLY. CORRECT APPLICATION IS VITAL TO THE PROPER FUNC-
TIONING OF THE DEVICE.
INTENDED USER PROFILE:
The intended user should be a licensed medical professional, the patient or the patient's caregiver. The user
should be able to read, understand and be physically capable of performing the directions, warnings and
cautions in the information for use.
INDICATIONS:
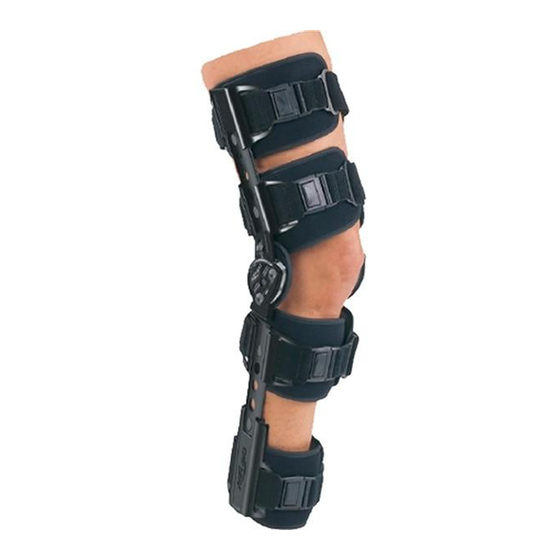
The DonJoy Telescoping Post-Op Brace is designed to aid in immobilization of the leg and provide protected
range of motion following ACL, PCL, LCL and MCL surgeries and meniscal repairs. Providing immobilization
or controlled movement of the limb or body segment. Providing mild protection of a limb or body segment for
acute and prophylactic care.
CONTRAINDICATIONS: None.
WARNINGS AND PRECAUTIONS:
1
• Loss of circulation, patient discomfort and patient re-injury are potential effects caused by device failure.
2
• ROM settings should not be changed without supervision of a medical professional.
• This product must be prescribed and fitted by a healthcare professional.
• The frequency, duration of use and directions for use should be determined by your healthcare professional.
• If you develop an allergic reaction and/or experience itchy, red skin after coming into contact with any part
of this device, please stop using it and contact your healthcare professional immediately.
• If pain, swelling, changes in sensation or other unusual reactions occur while using this product, you should
contact your doctor immediately.
• The support should be snug but not impair circulation.
• Do not use over open wounds.
• Do not use the device if it is damaged and/or the packaging has been opened.
NOTE: Contact manufacturer and competent authority in case of a serious incident arising due to usage of this
device.
APPLICATION INSTRUCTIONS:
1) Unfasten the buckle on each strap of the brace and remove foam wraps from brace. Wrap foam calf and
thigh pads snugly around leg and attach anteriorly (front of leg).
2) Adjust bar length by pushing in the gray button and sliding the extension bar to desired length. The button
must fully extend up after adjustment to insure a secure position and both bars must be equal in length.
The post-op bars may be extended the full length of the leg to the ankle.
3) Position and press into place the lateral side (outside) bar assembly aligning the hinge with the patella
(kneecap) and midline of the leg. The lateral malleolus and greater trochanter at the hip serve as good
reference points for midline alignment. Repeat for the medial (inside) bar. Make sure medial and lateral
hinge height is equal.
4) Adjust straps lengths to the leg, and then snap-in buckles starting with the two straps closest to the knee.
Cinch straps to secure in place. Fasten remaining buckles and straps.
3
4
5) For easy one-piece removal, unfasten the buckles and open the foam pads. The brace can then be
removed and reapplied as a single unit.
INSTRUCTIONS FOR BAR ADJUSTMENT:
The length of the thigh and calf bars may be adjusted to fit the length of the leg. Adjust bar length by
pushing in the gray button and sliding the extension bar to desired length. The button must fully extend up
after adjustment to insure a secure position and both bars must be equal in length. Bars may need to be
readjusted for malleolus comfort. The extension bar may be removed by carefully sliding the bar completely
out.
INSTRUCTIONS FOR HINGE ADJUSTMENT:
IROM HINGE: A Press down, slide out, and lift up the hinge security latch. Rotate the cover
until the desired flexion or extension pin is exposed. Remove the pin and place it in the
desired degree setting. Rotate the cover so that the security latch is past the pin and replace
the latch.
ELS HINGE: B To engage the hinge, the leg must be fully extended. Push the button on the
back of the hinge inward and then forward. To unlock the hinge, push the button on the front of the hinge
inward and then back.
TROM HINGE: C To adjust flexion and extension, push in button then adjust tab to desired position. The hinge
bar may need to be moved to allow adjustment. To lock hinge, adjust to desired position, push in button and
insert tab into lock position.
NOTE: The button must fully extend up after adjusting the flexion and extension angle or inserting the lock
5
A
to insure a secured position.
USE AND CARE:
• The hinge bars may be bent to add varus or valgus contouring.
• Hand wash foam liners in cold water with mild detergent. AIR DRY ONLY, DO NOT HEAT DRY.
• All foam may be trimmed.
FOR SINGLE PATIENT USE ONLY.
RX PRODUCT
LATEX
NOT MADE WITH NATURAL RUBBER LATEX.
WARRANTY: DJO, LLC will repair or replace all or part of the unit and its accessories for
material or workmanship defects for a period of six months from the date of sale.
NOTICE: WHILE EVERY EFFORT HAS BEEN MADE IN STATE-OF-THE-ART TECHNIQUES TO OBTAIN
THE MAXIMUM COMPATIBILITY OF FUNCTION, STRENGTH, DURABILITY AND COMFORT, THIS DEVICE
IS ONLY ONE ELEMENT IN THE OVERALL TREATMENT PROGRAM ADMINISTERED BY A MEDICAL
PROFESSIONAL. THERE IS NO GUARANTEE THAT INJURY WILL BE PREVENTED THROUGH THE USE
OF THIS PRODUCT.
CAUTION: FEDERAL LAW (U.S.A.) RESTRICTS THIS DEVICE TO SALE BY OR ON THE ORDER OF A LICENSED
B
C
HEALTH CARE PROFESSIONAL.
ESPAÑOL
ANTES DE UTILIZAR ESTE DISPOSITIVO, LEA POR FAVOR ESTAS INSTRUCCIONES
COMPLETA Y DETENIDAMENTE. EL USO CORRECTO ES FUNDAMENTAL PARA EL
FUNCIONAMIENTO APROPIADO DE ESTE DISPOSITIVO.
PERFIL DE USUARIO PREVISTO:
El usuario previsto debe ser un profesional médico autorizado, el paciente o el cuidador del paciente. El
usuario debe poder leer, comprender y ser físicamente capaz de seguir todas las instrucciones, advertencias
y precauciones proporcionadas en la información de uso.
INDICACIONES:
El soporte postoperatorio telescópico DonJoy está diseñado para ayudar a la inmovilización de la pierna y
proporcionar un rango de movimiento protegido después de cirugías de LCA, LCP, LCL y LCM, y reparaciones
de menisco. Proporciona inmovilización o movimiento controlado a la extremidad o segmento corporal.
Proporciona una protección leve de una extremidad o segmento corporal para atención aguda y profiláctica.
CONTRAINDICACIONES: Ninguna
ADVERTENCIAS Y PRECAUCIONES:
• La pérdida de circulación, las molestias del paciente y la repetición de las lesiones son posibles efectos
causados por la falla del dispositivo.
• Las configuraciones de ROM no se deben cambiar sin la supervisión de un profesional médico.
• Este producto debe ser prescrito y ajustado por un profesional sanitario.
• El profesional sanitario debe determinar la frecuencia, duración e instrucciones de uso.
• Si tiene una reacción alérgica o experimenta picazón y la piel se enrojece después de entrar en contacto con
cualquier parte de este dispositivo, deje de usarlo y póngase en contacto inmediatamente con el profesional
sanitario.
• Si sufre algún dolor, inflamación, cambios de sensibilidad o cualquier otra reacción poco frecuente durante el
uso de este producto, póngase en contacto con su médico inmediatamente.
• El soporte debe quedar bien ajustado, pero sin impedir la circulación.
• No debe aplicarse sobre heridas abiertas.
• No utilice el dispositivo si está dañado y/o si el empaque está abierto.
NOTA: Póngase en contacto con el fabricante y con la autoridad competente en caso de que se produjese un
incidente grave debido al uso de este dispositivo.
INSTRUCCIONES DE APLICACIÓN:
1) Desabroche la hebilla de cada correa de la rodillera y saque las bandas de gomaespuma. Envuelva
firmemente la pierna con las.
2) Ajuste la longitud de la barra pulsando el botón gris y deslizando la barra de extensión hasta la longitud
deseada. El botón ha de estar totalmente extendido hacia arriba tras el ajuste para garantizar una posición
segura y las barras han de tener la misma longitud. Las barras postoperatorias pueden extenderse en toda
la longitud de la pierna hasta el tobillo.
3) Coloque y presione en su sitio el conjunto de la barra del lado lateral (exterior) alineando la articulación
mecánica con la rótula y la línea central de la pierna. El maleolo lateral y el trocánter mayor de la cadera
sirven de buenos puntos de referencia para la alineación con la línea central. Repita la operación con la
barra medial (interior). Asegúrese de que la altura de las articulaciones mecánicas medial y lateral es la
misma.
4) Ajuste las longitudes de las correas a la pierna y, a continuación, abroche las hebillas comenzando por las
dos correas más cercanas a la rodilla. Sincronice las correas para fijarlas en su sitio. Abroche las hebillas
y correas restantes.
5) Para poder retirar la férula en una sola pieza, afloje las hebillas y abra las almohadillas de gomaespuma.
Ahora la rodillera puede retirarse y colocarse como una sola unidad.
INSTRUCCIONES PARA AJUSTAR LA BARRA:
Es posible ajustar las barras de muslo y pantorrilla para que se adapten a la longitud de la pierna. Ajuste
la longitud de la barra pulsando el botón gris y deslizando la barra de extensión hasta la longitud deseada.
El botón ha de estar totalmente extendido hacia arriba tras el ajuste para garantizar una posición segura
y las barras han de tener la misma longitud. La barra de extensión puede retirarse haciendo deslizar
cuidadosamente la barra completamente hacia fuera.
INSTRUCCIONES PARA EL AJUSTE DE LAS ARTICULACIONES:
ARTICULACIÓN IROM: A Presione hacia abajo, deslice hacia afuera y
levante el fiador de seguridad de la articulación. Gire la cubierta hasta que quede a la vista la clavija de
flexión o de extensión deseada. Retire la clavija y colóquela en el ajuste de grados deseado. Gire la cubierta
hasta que el fiador de seguridad quede al otro lado de la clavija y vuelva a colocar el fiador en su lugar.
ARTICULACIÓN ELS: B Para fijar la articulación, la pierna tiene que estar completamente extendida. Presione
el botón de la parte posterior de la arti-culación hacia adentro y después hacia adelante. Para desbloquear la
articulación, presione el botón de la parte delantera de la articulación hacia dentro y después hacia atrás.
ARTICULACIÓN MECÁNICA TROM: C Para ajustar la flexijón y la extension, pulse el botón y ajuste la
lengüeta a la posición deseada. Para bloquear la articulación mecánica, ajústela a la posición deseada, pulse
el botón e introduzca la lengüeta en la posición de bloqueo.
NOTA: El botón ha de estar totalmente extendido hacia arriba tras ajustar los ángulos de flexión y extensión
o insertando el bloqueo para fijarlo en la posición.
EMPLEO Y CUIDADO:
• Las barras de la articulación pueden curvarse para añadir un contorno varo o valgo.
• Lave los forros de gomaespuma a mano, en agua fría y con un detergente suave. SEQUE AL AIRE
ÚNICAMENTE; NO SEQUE AL CALOR.
• Toda la gomaespuma puede recortarse.
PARA USO EXCLUSIVO DE CADA PACIENTE.
PRODUCTO DE VENTA CON RECETA MÉDICA
LATEX
NO FABRICADO CON LÁTEX DE CAUCHO NATURAL.
GARANTÍA: DJO, LLC se compromete a reparar o sustituir la totalidad o parte del
producto y sus accesorios, por defectos del material o de la fabricación, durante los seis
meses siguientes a la fecha de venta.
AVISO: SI BIEN SE HAN HECHO TODOS LOS ESFUERZOS CON TÉCNICAS AVANZADAS PARA OBTENER
LA MÁXIMA COMPATIBILIDAD DE FUNCIONALIDAD, DURABILIDAD DE LA RESISTENCIA Y COMODIDAD,
ESTE DISPOSITIVO NO ES MÁS QUE UN ELEMENTO EN EL PROGRAMA DE TRATAMIENTO GENERAL
ADMINISTRADO POR EL PROFESIONAL MÉDICO. NO HAY GARANTÍA DE QUE SE EVITARÁN LESIONES
CON EL USO DE ESTE PRODUCTO.
PRECAUCIÓN: LA LEY FEDERAL (EE.UU.) RESTRIGE LA VENTA DE ESTE DISPOSITIVO POR PARTE DE O A
PEDIDO DE PROFESIONALES DE ATENCIÓN MÉDICA MATRICULADOS.
MDSS GmbH
DJO, LLC
Schiffgraben 41
5919 Sea Otter Place,
30175 Hannover Germany
Suite 200
Carlsbad, CA 92010
USA
©2021 DJO, LLC
13-2793-0-00000 Rev E 2021-11-11