CYP CH-1106RX Instrukcja obsługi - Strona 10
Przeglądaj online lub pobierz pdf Instrukcja obsługi dla Przedłużacz CYP CH-1106RX. CYP CH-1106RX 16 stron. Hdmi v1.3 to cat6 transmitter & receiver with ir return control
Również dla CYP CH-1106RX: Instrukcja obsługi (16 strony)

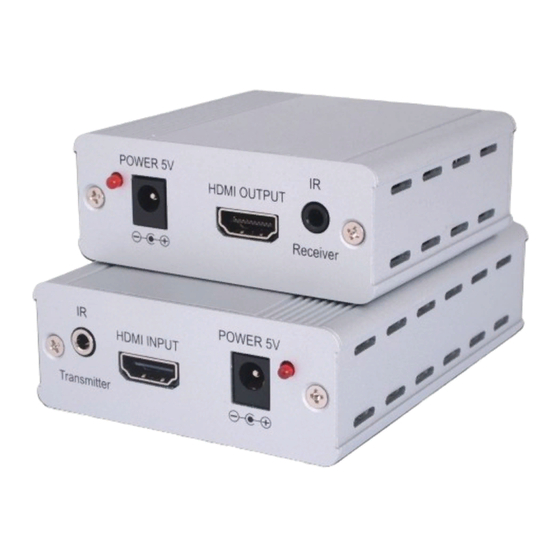
7.2 Receiver Front and Rear Panels
VIDEO
CAT6 INPUT
①
① Video INPUT: Connect to the Video Input of the transmitter with a CAT6
cable.
② DDC INPUT: Connect to the DDC Input of the transmitter with a CAT6
cable.
③ POWER 5V: This slot is where you plug the 5V DC power supply into the unit
and connect the adaptor to an AC outlet.
④ HDMI OUTPUT: This slot is where you connect the HDMI or DVI input port of
your display such as HDTV ' s or HD monitors or you can connect this device
to another unit from the same family or some other type of splitter to
further extend an HDMI signal.
⑤ IR Receiver: This slot is where you connect the IR receiver cable, place
the IR eye in front of the display then use the existing remote to control
the input source equipment. The IR receiver has a frequency range from
30KHz to 50KHz.
Example:
HDMI
Cable
DVD
Player
DDC
②
CAT6
CH-1106TX
VIDEO
DDC
CAT6
POWER 5V
CH-1106RX
HDMI
Cable
CAT6
CH-1106TX
VIDEO
DDC
CAT6
5
HDMI OUTPUT
④
CH-1106RX
HDMI
Cable
IR
Receiver
⑤
HDMI LCD TV
