Ashly CA-1.02 Instrukcja obsługi - Strona 7
Przeglądaj online lub pobierz pdf Instrukcja obsługi dla Wzmacniacz Ashly CA-1.02. Ashly CA-1.02 12 stron. 2- and 4-channel

CA Amplifier • Operating Manual
4
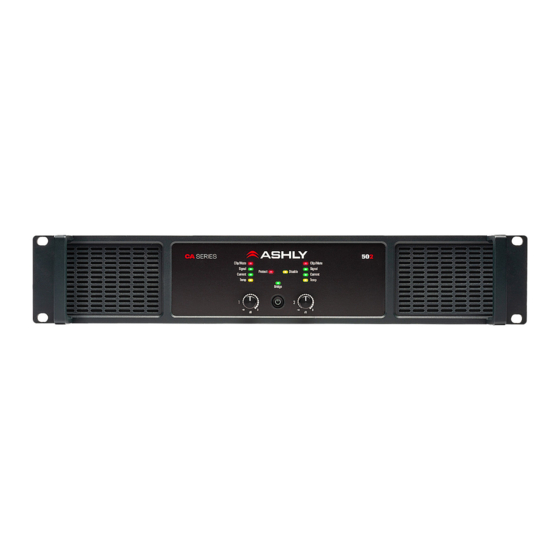
Front Panel Features
4.1
Air Vents
Cool air enters in through the amplifier sides
and is vented out the front.
4.2
Channel LED Indicators
•
CLIP/MUTE (red):
CLIPPING is indicated when the speaker
output reaches 95% (-0.5dB) of maximum
power.
MUTE is indicated when front panel level or DC
level controls are fully attenuated.
The Clip/Mute LED is also used with the Protect
LED to indicate output DC fault. See the
troubleshooting
section for LED fault codes.
•
SIGNAL (green) is indicated when amplifier
output voltage reaches 25% (-12dB) of
maximum.
•
CURRENT (green) indicates when output
current delivered to the speaker load is 2
Amp or greater.
•
TEMP (yellow) indicates that automatic
counter-measures are being applied due to
an excessive internal temperature .
4.3
Protect LED
The red protect LED initially turns on to indicate
that real-time countermeasures are being applied
to overpower, over-temperature, or rail voltage
fault conditions while the amp is still running.
If the countermeasures are unsuccessful and
the amplifier protects itself by shutting down,
the protect LED remains on and the amplifier's
power must be cycled before resuming normal
operation.
CA-1.54 shown
The exception to this is when the amp shuts
down due to the AC mains voltage being out
of range, in which case the amp automatically
restarts as soon as the AC mains line voltage
returns to the specified operating range.
4.4
Disable LED
This yellow LED lights when the power switch
and level controls have been disabled using the
back panel DIP switch
4.5
Channel Attenuators
These control the level of the amplifier, and work
in combination with the remote DC level controls.
When an input attenuator is turned fully off, the
red Clip/Mute LED for that channel turns on to
indicate mute status. Front panel attenuators and
the power switch can be disabled using the back
panel DIP switch
(sec.
4.6
Bridge LED
This green LED indicates when a channel pair
is set to BRIDGE mode from the back panel
switch
(sec.
5.6). In bridge mode, only the
odd numbered input and level control for that
channel pair is used.
4.7
Power Switch/LED
This switch is used for powering the amplifier
on or off. Its white LED lights solid when the
amplifier is on and flashes at 1Hz when in
standby mode. The power switch can be
disabled using the back panel DIP switch. The
three possible power switch LED conditions are:
•
Fully lit: The amplifier is powered up, even
if the power switch has been disabled, in
(sec.
5.2b).
which case the disable LED will be on.
•
Flashing: The amplifier is in standby mode.
•
Fully off: The amplifier is completely off.
4.8
Model Number
The first two numbers of model number express
the power rating per channel of the amplifier.
For example, "1.5" mean 1,500W per channel,
5.2b).
"1.0" means 1,000W per channel, and "50"
means 500 W per channel. The last number is
the channel count.
4.9
Mounting Holes
For mounting to a 19" equipment rack.
7
