FlyingThingZ M1A1 Flying Tank Manual de montagem - Página 9
Procurar online ou descarregar pdf Manual de montagem para Brinquedo FlyingThingZ M1A1 Flying Tank. FlyingThingZ M1A1 Flying Tank 20 páginas. A sport scale flying military tank
A20. Cut several pieces of the 1/16" balsa sheet. For added
strength make your cuts are against the grain. When installed on
the fuselage bottom, the grain on the 1/16" balsa sheet should be
running along the width of the fuselage, not it's full length.
A21. Glue the 1/16" balsa sheets onto the bottom of the fuse-
lage. Sand all the edges flush with the sides and back end of the
fuselage. Remember, the grain on the 1/16" sheeting should run
along the width of the fuselage.
A22. Along the front of the fuselage, glue the lower ply fuse
plate flush with the edges of the fuselage sides and the firewall.
A23. Sand all rough edges of the fuselage to obtain a nice
smooth
All parts should be flush with each other at all corners and edges.
A24. Fuel proof the firewall and internal components using
either epoxy or polyurethane.
The next steps outline covering the fuselage with our precut, self
adhesive vinyl covering. If you have elected to use another
material such as Monokote, the process will be very similar.
Please follow the manufacturer's instructions on using their
material for covering.
A24. Lay a piece of the precut vinyl shaped like the fuselage
on your workbench. Place the fuselage onto the vinyl and cut slits
into the vinyl at the corners of the fuselage. Fold the corners over
onto the fuselage and trim any excess. Leave approximately 1/8"
to 1/4" overlap. Cut out the opening on the bottom of the fuselage
where it saddles onto the wing.
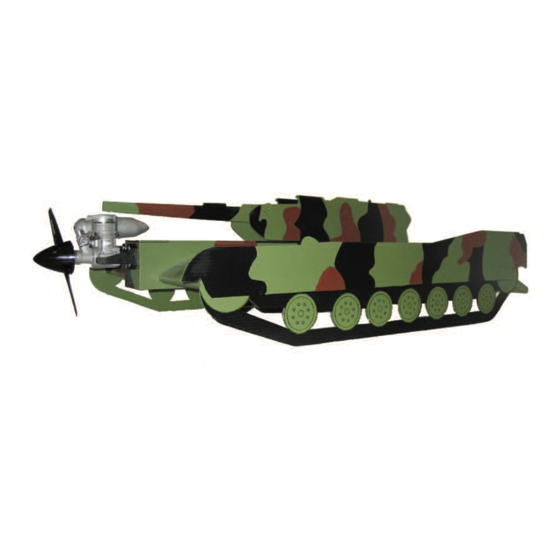
A25. Flip the fuselage over and do the same on the other side.
In the image above, you can see the cutout on the fuselage/wing
saddle mentioned in step A24.
A26. Cover the firewall and hatch bolt plate in the same man-
ner as the fuselage sides. Extend the covering onto the bottom
front of the fuselage right below the firewall. Do not cover the
1/16" balsa sheeting on the bottom of the fuselage. This needs to
finish.
be exposed due to the fact that it will be expoxied to the wing in a
later step. In the same manner as the firewall, apply vinyl cover-
ing to the rear fuselage plate.
A27. In the same manner as the fuselage sides, cover the fuse-
lage hatch. Cut slits in the corners to make folding over easier.
Leave a 1/8" to 1/4" overlap on the bottom of the hatch.
The fuselage is now complete.
9